Page 34 INSTRUCTION MANUAL CENTRAL COMMAND STATION MX10
9.
“Roco Z21“ app and other apps on the MX10
The Roco app “Roco Z21” for smartphones or tablets can be used in combination with the ZIMO central
command station MX10. Therefore, the app is downloaded from Roco’s website and installed (see
Roco instructions).
The MX10 is connected via the LAN socket to a standard WIFI router (preferably bought in Europe).
The smartphone or tablet is connected to the WIFI router as usual (selecting network, entering pass-
word, etc.).
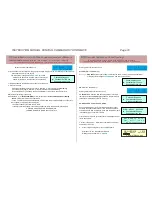
Opening the (previously installed) app starts it. In
“App settings”
the IP address has to be entered. For
the ZIMO central command station, the IP address by default is (as long as it is not changed in the
MX10 menu):
192.168.1.145
(in the MX10 menu / PC Monitor as „LAN IP: 192.168.001.145“)
After clicking “New connection”, the connection is confirmed and normal operation can be started after
defining the vehicles (see Roco instruction manual).
In case, NO connection (WIFI symbol in the status bar in the upper right corner) can be made (IP ad-
dress of the MX10 does not correspond to the router), the IP address on the MX10 has to be changed.
The IP address has to be in the range:
- 192.168.0.0 to 192.168.99.255
- 10.0.0.0 to 10.99.99.255
- 172.16.0.0 to 172.31.99.255, MUST NOT be in a DHCP-area and has to be static. (Configuration on
the MX10 see bottom of this page).
If this does not help, the router has to be connected to the computer to determine the router’s IP ad-
dress (see chapter 10 “Interlocking program “ESTWGJ” on the MX10”) and the MX10 and the router
have to be matched.
If the Roco app and the MX10 connect (green W
IFI symbol on the app’s screen) vehicles can be de-
fined under “rail vehicle settings”. Afterwards, driving operation (big arrow-symbol in the middle of the
screen) can be started.
Regarding usage of the “Roco Z21” app, consult Roco instruction manu-
als!
In case, changes in the MX10’s IP address have to be made
(see above):
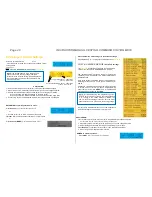
Open the MX10 menu and the settings for “PC Monitor” and:
Set the cursor (
) with the rotary knob on
“LAN IP” and afterwards
Press rotary knob
the area that can be configured is
framed and can now be adjusted by the rotary knob; to
change the following numeric block, press
Button
1
(
):
the next numeric block is framed and is also
adjusted with the rotary knob. By pressing button 1, the
system always jumps to the next triplet (to the right).
Pressing the rotary knob again
configuration mode is
terminated and adjusted values stored, the rotary knob
can now be used to scroll (cursor position).
Afterwards, the app is started again and connected to the MX10 with the new IP address.
ATTENTION:
in the corresponding app, the receiving port has to show the MX10’s address and vice-
versa. When using PCs, the application and the used ports have to be unlocked in the firewall.

