11 | UPStealth® 2 User Manual
Installing UPStealth 2 UPS 1000W
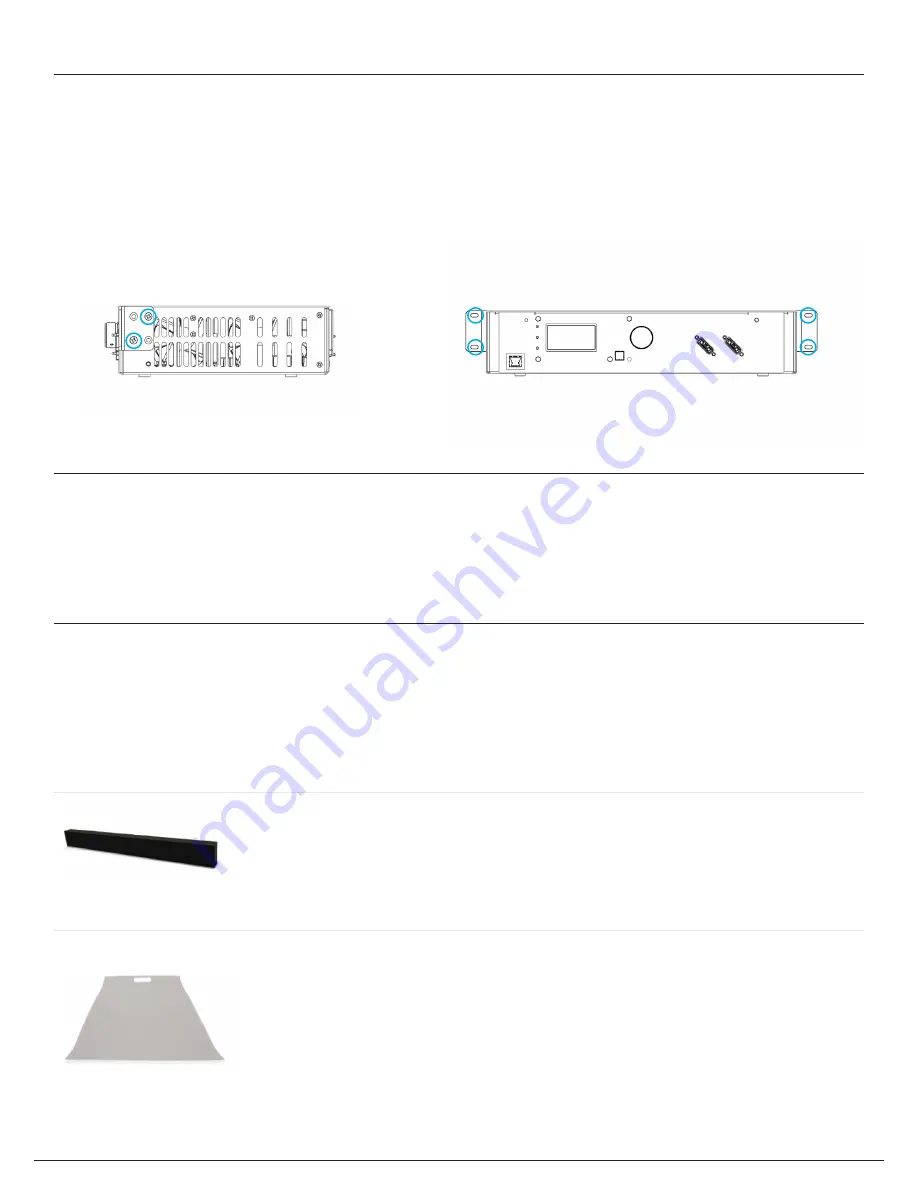
Installation of the UPStealth 2 UPS 1000W can be done either by shelf or rack mounting. For shelf installation, no other
hardware is needed. For rack mounting installations, use the provided brackets (2) and screws (8) as shown in the
figures below.
Installing the Batteries
The UPStealth 2 Battery Panel 500W and UPStealth 2 Battery Module 500W are designed to be installed inside primary
traffic cabinets. The UPStealth 2 Battery Panel 500W is compatible with 170/2070 33X series traffic cabinets.
UPStealth 2 Battery Module is compatible with 170/2070 33X series and NEMA traffic cabinets.
Installing UPStealth 2 Battery Panel 500W
The UPStealth 2 Battery Panel 500W is not designed to be rack or shelf mounted. The flex design allows it to bend into
the unused space between the rack and cabinet wall of 33X series cabinets as shown in the below figures. The space
bar and speedy sleeve will assist with installation, use the provided figures and steps to install the UPStealth 2 Battery
Panel.
Step 1: Spacer Bar
Insert the spacer bar between the rack and cabinet wall at the bottom of the cabinet.
This will support the bottom of the battery panel when installed.
Step 2: Speedy Sleeve
Insert the speedy sleeve between the rack and cabinet wall.
Insert the UPStealth 2 Battery Panel between the cabinet wall and speedy sleeve which
is up against the rack. When installing the UPStealth 2 Battery Panel, start inserting
with the end opposite of the handle going into the cabinet first.
UPS Rack Mount Bracket Installation
(4QTY) 10-32 x 5/16" Phillips Flat Undercut Head Screws
UPS Rack Mount Installation
(4QTY) 10-32 x 3/8" SEMS Screws w/ Square Cone Washer
Installing UPStealth 2 UPS 1000W
Spacer Bar
Speedy Sleeve
Summary of Contents for UPStealth 2
Page 2: ......
Page 71: ...UPStealth 2 User Manual 68 Notes ...
Page 72: ...69 UPStealth 2 User Manual Notes ...
Page 73: ......


