Page 9 of 12
Zip CH103, CH104 - Installation & operating instructions - 82127UK - June 2015 v1.04
Operation
Commissioning
Operation
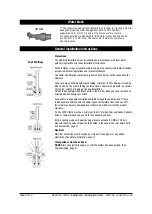
Chilled water is obtained by pulling the lever on the tap forward. The water is
chilled by a refrigeration unit fitted within the under counter chiller.
Using the Heavy Duty ChillTap
®
, you can obtain chilled water within the rated
capacity for as long as you pull forward the lever. The lever will self return,
and close the tap once finger pressure has been removed.
Commissioning
Ensure all pipes and cables are secure. After the system is correctly installed
and connected, turn the incoming mains cold water supply on. Check all
connections for leaks. Repair as necessary, again turn on the incoming mains
cold water supply and then the electricity supply.
The chiller unit takes up to 20 minutes to chill its contents to the rated
temperature, depending on the ambient temperature of the water.
Following installation, the chiller system will contain air, which needs to
be purged. To purge the system of air follow the instruction in the Filter
replacement section below.
CH104 remove the protective wrapping & clean the stainless steel surfaces.
Dispose of the packaging wisely.
Pull
Filter replacement
Changing the filter
For safe operation, the filter cartridge should be replaced at least every 6-12
months, or earlier if you notice a persistent reduction in water pressure from
the tap or an unpleasant taste or odour in the water.
For safe operation, thoroughly flush the water through after periods of
non-use longer than 12 hours.
Not changing the filter cartridges when required may cause the water to
become biologically unsafe.
Use only a Zip filter to match the one used in your chiller product (see Spare
parts and accessories page 3). The filter cartridge can be obtained through
plumbing suppliers or direct from Zip. The filter is located behind the front
access panel on the CH104. The installation date should be written on the
filter cartridge. No special tools or skills are required to install the filter
cartridge.
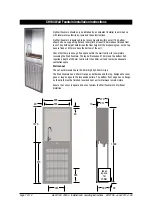
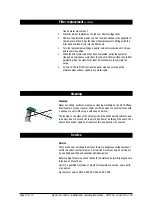
• For the CH104, unlock the front louvre panel to locate the filter. For the
CH103, locate the filter in the under-sink cupboard.
•
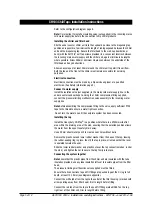
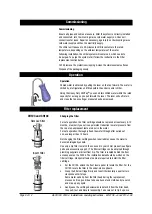
Grasp the filter cartridge firmly and twist it horizontally a quarter turn
clockwise until it stops.
Some water will drip from the filter head during the replacement
process so it is a good idea to have a bucket and cloth handy to catch
and mop up any spills.
•
Gently ease the cartridge downwards to detach it from the filter head,
then pull it out and discard responsibly. Take care not to tip it up once
Remove filter
Insert filter
Rotate
Pull
Rotate
Insert
CH103 and CH104


