background image

805846US v1.04 06.21 HydroTap G4 User Guide 


Page 5 of 32

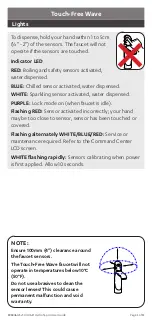
NOTE:

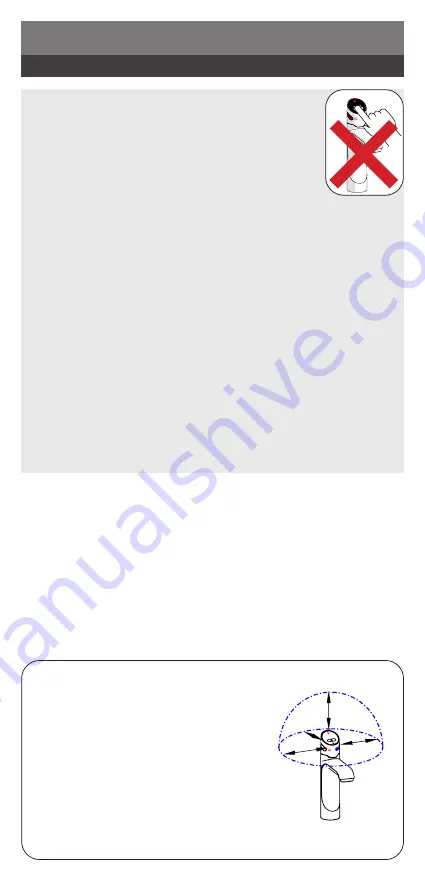
Ensure 100mm (4”) clearance around 
the faucet sensors.
The Touch-Free Wave faucet will not 
operate in temperatures below 10°C 
(50°F).
Do not use abrasives to clean the 
sensor lenses! This could cause 
permanent malfunction and void 

warranty.

Touch-Free Wave

Lights

To dispense, hold your hand within 1 to 5cm  
(½” - 2”) of the sensors. The faucet will not 
operate if the sensors are touched.

Indicator LED
RED: 

Boiling and safety sensors activated, 

water dispensed.

BLUE: 

Chilled sensor activated, water dispensed.

WHITE: 

Sparkling sensor activated, water dispensed.

PURPLE: 

Lock mode on (when faucet is idle).

Flashing RED: 

Sensor activated incorrectly; your hand 

may be too close to sensor, sensor has been touched or 
covered.

Flashing alternately WHITE/BLUE/RED: 

Service or 

maintenance required. Refer to the Command Center 
LCD screen.

WHITE flashing rapidly: 

Sensors calibrating when power 

is first applied. Allow 10 seconds.

Summary of Contents for HydroTap G4

Page 1: ...n 11 A Set language units of measure 13 B System information 13 C Install 14 D Service 18 E Security 18 F Communication WiFi selected models 18 G Settings 19 Maintenance 24 Cleaning 24 Water Filter 24 Air inlet filter 26 Gas bottle change sparkling models 27 Home menu icons 29 HydroTap G4 User guide Scan QR Code to download the latest version of this document English French PRODUCTLABEL ...

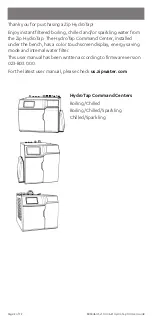
Page 2: ...the Zip HydroTap The HydroTap Command Center installed under the bench has a color touchscreen display energy saving mode and internal water filter This user manual has been written according to firmware version 023 B03 0 00 For the latest user manual please check us zipwater com HydroTap Command Centers Boiling Chilled Boiling Chilled Sparkling Chilled Sparkling ...

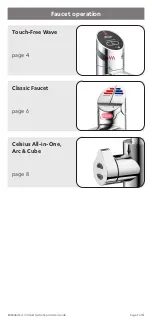
Page 3: ...805846US v1 04 06 21 HydroTap G4 User Guide Page 3 of 32 Touch Free Wave page 4 Celsius All in One Arc Cube page 8 Faucet operation Classic Faucet page 6 ...

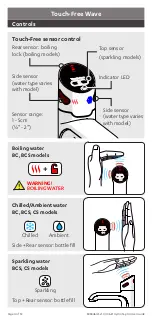
Page 4: ...r boiling lock boiling models Side sensor water type varies with model Side sensor water type varies with model Top sensor sparkling models Chilled Ambient water BC BCS CS models Sparkling water BCS CS models WARNING BOILING WATER Indicator LED Sensor range 1 5cm 2 Chilled Ambient Side Rear sensor bottle fill Sparkling Top Rear sensor bottle fill ...

Page 5: ...sors The faucet will not operate if the sensors are touched Indicator LED RED Boiling and safety sensors activated water dispensed BLUE Chilled sensor activated water dispensed WHITE Sparkling sensor activated water dispensed PURPLE Lock mode on when faucet is idle Flashing RED Sensor activated incorrectly your hand may be too close to sensor sensor has been touched or covered Flashing alternately...

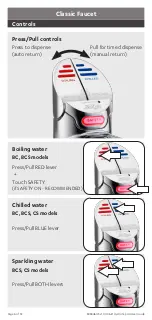
Page 6: ...dels Press Pull RED lever Touch SAFETY if SAFETY ON RECOMMENDED Chilled water BC BCS CS models Press Pull BLUE lever Sparkling water BCS CS models Press Pull BOTH levers Classic Faucet Controls Press Pull controls Press to dispense auto return Pull for timed dispense manual return ...

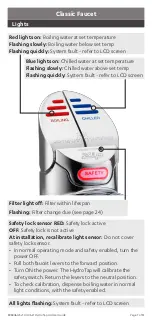
Page 7: ...flashing System fault refer to LCD screen Filter light off Filter within lifespan Flashing Filter change due see page 24 Safety lock sensor RED Safety lock active OFF Safety lock is not active At installation recalibrate light sensor Do not cover safety lock sensor In normal operating mode and safety enabled turn the power OFF Pull both faucet levers to the forward position Turn ON the power The H...

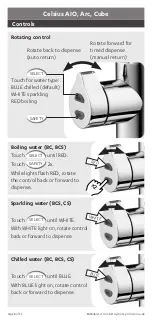
Page 8: ... Rotate back to dispense auto return Rotate forward for timed dispense manual return Touch for water type BLUE chilled default WHITE sparkling RED boiling SELECT SAFETY SAFETY SELECT x2 RED Sparkling water BCS CS Touch SELECT until WHITE With WHITE light on rotate control back or forward to dispense SELECT WHITE Chilled water BC BCS CS Touch SELECT until BLUE With BLUE light on rotate control back...

Page 9: ...CT light BLUE default Chilled water at set temperature ready to dispense Flashing slowly Chilled water above set temp Flashing quickly System fault refer to LCD screen RED Boiling water at set temperature Flashing slowly Boiling water below set temp Flashing quickly 2 secs Ready to dispense boiling water WHITE Ready to dispense sparkling water SELECT Indicator light ON RED or BLUE Water at set tem...

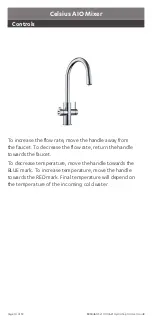
Page 10: ... from the faucet To decrease the flow rate return the handle towards the faucet To decrease temperature move the handle towards the BLUE mark To increase temperature move the handle towards the RED mark Final temperature will depend on the temperature of the incoming cold water Celsius AIO Mixer Controls ...

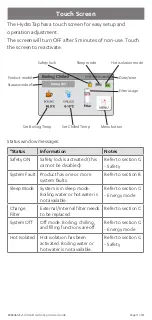
Page 11: ...ystem faults Refer to section B Sleep Mode System is in sleep mode Boiling water or hot water is not available Refer to section G Energy mode Change Filter External Internal filter needs to be replaced Refer to section C System Off Off mode Boiling chilling and filling functions are off Refer to section G Energy mode Hot Isolated Hot isolation has been activated Boiling water or hot water is not a...

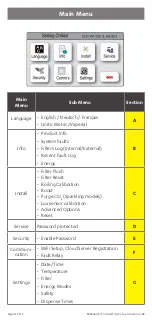
Page 12: ...g Internal External Recent Fault Log Energy B Install Filter Flush Filter Reset Boiling Calibration Boost Purge CO2 Sparkling models Lux sensor calibration Advanced Options Reset C Service Password protected D Security Enable Password E Communi cation WiFi Setup Cloud Server Registration Fault Relay F Settings Date Time Temperature Filter Energy Modes Safety Dispense Times G Main Menu ...

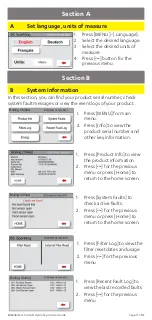
Page 13: ...ress Product Info to view the product information 2 Press for the previous menu or press Home to return to the home screen 1 Press System Faults to check active faults 2 Press for the previous menu or press Home to return to the home screen 1 Press Filter Log to view the filter reset dates and usage 2 Press for the previous menu 1 Press MENU for main menu 2 Press Info to view the product serial nu...

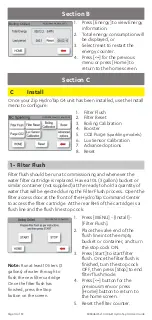
Page 14: ...the new filter cartridge Once the filter flush has finished press the Stop button on the screen 1 Filter Flush 2 Filter Reset 3 Boiling Calibration 4 Booster 5 CO2 Purge sparkling models 6 Lux Sensor Calibration 7 Advanced options 8 Reset 1 Press MENU Install Filter Flush 2 Place the valve end of the flush line into the empty bucket or container and turn the stop cock ON 3 Press Start to start fil...

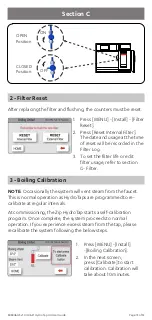
Page 15: ...ing the below steps 1 Press MENU Install Boiling Calibration 2 In the next screen press Calibrate to start calibration Calibration will take about 10 minutes 3 Boiling Calibration 2 Filter Reset NOTE Occasionally the system will vent steam from the faucet This is normal operation as HydroTaps are programmed to re calibrate at regular intervals 1 Press MENU Install Filter Reset 2 Press Reset Intern...

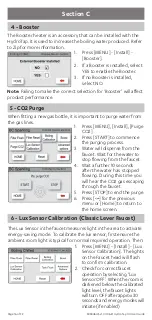
Page 16: ... 6 Lux Sensor Calibration Classic Lever Faucet 5 CO2 Purge When fitting a new gas bottle it is important to purge water from the gas lines 1 Press MENU Install Purge CO2 2 Press START to commence the purging process 3 Water will dispense from the faucet Wait for the water to stop flowing from the faucet 4 Wait a further 10 seconds after the water has stopped flowing During this time you will hear ...

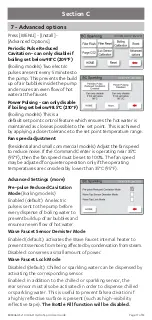
Page 17: ...to 100 The fan speed may be adjusted for quieter operation only if the operating temperatures are considerably lower than 35 C 95 F Section C 7 Advanced options Advanced Settings more Pre pulse Reduced Cavitation Mode Boiling models Enabled default An electric pulse is sent to the pump before every dispense of boiling water to prevent build up of air bubbles and ensure an even flow of hot water Wa...

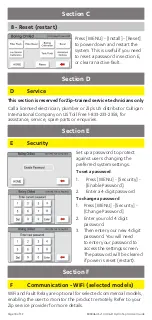
Page 18: ...r is reset restart F Communication WiFi selected models WiFi and Fault Relay are optional for selected commercial models enabling the user to monitor the product remotely Refer to your Zip service provider for more details Section E Section F Call a licensed electrician plumber or Zip s US distributor Culligan International Company on US Toll Free 1 833 233 2358 for assistance service spare parts ...

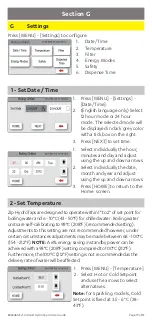
Page 19: ...HydroTapsaredesignedtooperatewithin1 to2 ofsetpointfor boilingwaterand6 10 C 43 50 F forchilledwater Boilingwater units are self calibrating to98 C 208 F recommendedsetting Adjustments tothissetting arenotrecommendedhowever under certain circumstancesadjustmentsmaybemadebetween68 100 C 154 212 F NOTE A6 energysavinginstandbypowercanbe achieved witha98 C 208 F settingcomparedto100 C 212 F Furthermo...

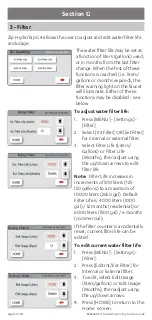
Page 20: ...ows the user to adjust and edit water filter life and usage The water filter life may be set as a function of liters gallons used or in months from the last filter change When the first of these functions is reached i e liters gallons or months expired the filter warning light on the faucet will illuminate Either of these functions may be disabled see below If the filter counter is accidentally re...

Page 21: ...k N A OFF OFF OFF Luxor2Hr 68 C 154 F Dark 2 Hr Sleep 68 C 154 F ON Lux or 2 Hr OFF Dark 2 Hr OFF OFF OFF Disable N A N A ON ON ON Section G Lux Light Sensor Calibration It is recommended to recalibrate the Lux Light Sensor after selecting any of the 4 Lux sensor options from the sleep mode menu Before commencing ensure there are Normal to Dim not dark operating light conditions Refer to section C...

Page 22: ...ess On Off Modes Menu 5 Select Set Individual Days if you wish to allocate specific times for each day 6 Select Group 1 if you wish to allocate the same time to all 7 days 7 Select Group 2 if you wish to allocate the same time to the 5 working days Mon Fri and additional times for Sat Sun This screen allows you to select the individual days for programming Only one ON OFF period is allowed for eac...

Page 23: ...rc Cube or Celsius AIO Do not enable this function for HydroTap Arc Cube or Celsius AIO The HydroTap Classic Faucet is equipped with a Hot Isolation Mode that delivers additional safety protection When Hot Isolation Mode is enabled Boiling water cannot be dispensed To enable disable Hot Isolation mode Press MENU Settings Safety Select Hot Isolation Enable Disable To operate the faucet when in Hot ...

Page 24: ...A Est No 002623 IL 002 Replacement cartridges may be purchased from your local Culligan dealer Zip dealer or other Zip approved distributors See Contact Details at the back of this manual For safe operation after periods of non use longer than 2 3 days flush the HydroTap by dispensing water through each water outlet for at least 60 seconds before consumption Do not use strong corrosive or abrasive...

Page 25: ...aging thoughtfully Remove filter cartridge Use a cloth to catch water drips Maintenance 4 10L Run a filter flush followed by filter reset refer to page 20 ON 3 1 1 2 Unpack new filter cartridge Moisten the top O ring with faucet water Do not touch Write today s date on label Insert cartridge into HydroTap ...

Page 26: ...n needs to be inspected at least every three months cleaned and replaced if damaged 1 2 Slide screen forward Rinse off with water Gently dry with cloth towel 3 Replace screen 4 50mm 2 minimum Maintain at least a 50mm 2 air gap in front of the screen at all times Take care to keep the air inlet clear of blockage by soft materials Air inlet filter Maintenance ...

Page 27: ...ng water for 30 seconds until the water flow is free of gas 3 Residential models the 1200g 1 5lb gas bottle supplied is disposable and cannot be refilled Please contact your local city council for collection center details or return the bottle to your service agent for recycling Detach regulator from old bottle Remove old bottle Caution do not lose the small plastic sealing washer inside the end o...

Page 28: ...nes and reset the CO2 counter 8 Wait for system to complete cooling cycle Dispense sparkling water and perform a taste test 7 Replace with new bottle Caution Cold CO2 gas may discharge from the bottle joint Check all joints for gas leaks using a sponge and soapy water If any bubbles appear reseal and re test the joint Maintenance ...

Page 29: ... to 0 end of life When it reaches 0 the filter warning light on the faucet head will flash slowly Filter life can be adjusted by liters gallons and by days used See page 20 50 Boiling temperature The set temperature of the water in the Boiling tank will be displayed This is optimises at 98 C 208 F but may be adjusted between 68 100 C 154 212 F See page 19 BOILING 208 F 98 C CHILLED 6 10 C 43 50 F ...

Page 30: ...Page 30 of 32 805846US v1 04 06 21 HydroTap G4 User Guide Notes ...

Page 31: ...805846US v1 04 06 21 HydroTap G4 User Guide Page 31 of 32 Notes ...

Page 32: ...33 2358 for assistance service spare parts or enquiries As Zip policy is one of continuous product improvement changes to specifications may be made without prior notice Images in this booklet have been modified and may not be true representations of the finished goods The terms Zip and HydroTap are registered trade marks of Zip Water Aust Pty Ltd Zip products described in this publication are man...

Reviews: