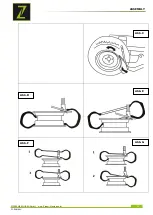
ASSEMBLY
ZIPPER MASCHINEN GmbH www.Zipper-Maschinen.at
26
ZI-RMM94H
26
Operation
15.1.1
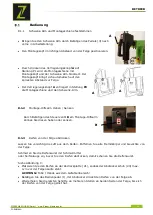
Clamp swivel arm and mounting rail
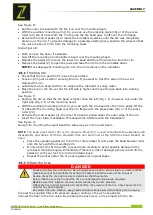
Attach the swivel arm by pressing the pedal (3) forward to working
position.
Position the mounting head at the correct distance from the rim.
By pressing the locking button A to position P1, the
mounting rail is blocked with mounting head and the swing-
arm. The mounting head brings automatically to the correct
distance to the rim.
The locking button A released in the P2 position, the
mounting rail and the swing-arm.
15.1.2
Mounting auxiliary arm lifting / lowering
By actuating the control valve B on the mounting sub arm it be raised
or lower.
15.1.3
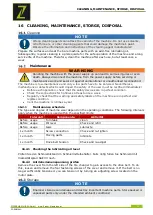
Pull the trigger tire from the rim
Let Carefully remove the air from the tire. Remove all foreign objects and weights from the rim.
Lubricate the tire bead lubricantor soapy water, before you squeeze the tire so that you protect the
tire bead.
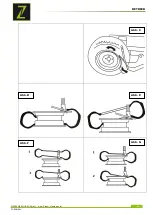
See Figure C:
Place the tire to the pressure plate (21) so that the bead breaker shoe (20) max. 1cm is just
around the rim edge.
ATTENTION: Feet / hands out of the danger zone!
Activate the control pedal (1), the bead breaker pushes the tire from the rim from.
Repeat the last steps in several places on the rim until the tire has come off the rim.
15.1.4
Remove tire from the rim
Place the tire on the turntable (6).
ATTENTION : In asymmetric drop center rims set the tire on so that the flatter side is up.
Do all the way to the outside jaws according to drive the control pedal (2).
Note: There are different types of jaws according to the different fields genotypes . For
aluminum rims , you should use the 4 jaw protectors .
In the event that you want to stretch the rim from the inside out , shut the jaws together first ,
put the tire on the turntable and stand on the pedal (2) to clamp the rim.
In the event that you want to stretch the rim outside , take the jaws apart ( 2 -3cm from the
edge of the rim away), the tire place centered on the turntable and contact to tension the
wheel and pedal (2).
Depress the control pedal (2), making sure that the 4 jaws (7) Tighten the wheel on the rim
flange.
Press the control pedal (3) and thus the pivot arm in working position, press the mounting rail
(11) down so that the mounting head (7) 1-2mm away from the edge of the rim to protect the
rim.
Secure the work position by pressing the locking button A - described in 7.1.1 -
A
A
A
B

