23
2.5
Assembly
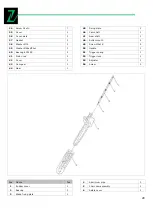
Mount the pole with the control panel 11 on
the engine (Fig. B).
Then you have to fit the handle 28 on the
extension pole 2 (Fig. C).
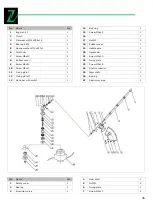
Now fix the safety cover 8 on the brush cut-
ter like shown in Fig. D.
Then the slot for the attachments 29 has to
be fitted on the pole (Fig. D).
Then mount the twig saw 4 like shown in Fig
E. on the related pole.
Then you have to fit the belt 10 into the re-
lated hole (Fig. A).
2.6
Operation Instructions
I M P O R T A N T
Do not operate the engine at maxi-
mum speed right from the start. The
engine itself reaches its maximum
capacity after the first 10 hours of
operation. Non-compliance with this
instruction reduces your engine life-
span substantially.
2.6.1
Cold starting
Turn the ignition
16
to the position
I
(Fig.
H).
Turn the choker
17
into the position like
shown in Fig. J.
Now push the button
28
3 to 5 times (Fig.
K).
Pull at the cable control
20
powerfully to
start the engine (Fig. M). When the engine
doesn’t start you’ll have to push the but-
ton some times more.
When the engine’s running, you have to
turn the choker
17
off again (Fig. I).
2.6.2
Warm starting
Turn on the ignition
16
(Fig. H).
Let the choker
17
turned off (Fig. F).
Do the next steps like cold starting.
2.6.3
Stopping
Turn the ignition
16
to the position O (Fig.
H)
Wait till the engine stands still and all
components are cold again.
2.6.4
Regulating the engine speed
For this you have to use the throttle han-
dle shown in Fig. L.
At first you have to push the lock handle
18
.
Now the throttle handle
19
can be
pushed.
2.7
Operation
For operation all safety devices and the belt must
be used!
2.7.1
Mounting the operation attach-
ments
For this work the engine has to stand still!
Loosen the hand screw
12
.
Then push the safety cover
13
to the out-
side.
Push the handle being under the safety
cover and remove the pole with the en-
gine.
Put the new pole with the attachment into
the hole.
Push the handle again and take care that
the hook at the inside of the pole fits into
the hole.
Push the cover
13
to the pole and fasten
the hand screw
12
again.
2.7.2
Operation brush cutter
Changing the mowing attachment
For the blade you have to use the nut.
The trimmer is fitted by the threaded hole.
Operation with the blade (Fig. U)
Start the machine. Now hang the belt
round your neck. Operate the throttle
handle and start mowing like shown on
the picture.
Operation with the trimmer
Do that like mowing with the blade.
2.7.3
Operation twig saw (Fig. V)
Take care that you aren’t standing under
the twig you want to cut.
Remove the safety cover.
Start the engine.
Hang the belt around your neck.
Position the saw where you want to cut.
Summary of Contents for 912003923778 7
Page 5: ...5 Fig B Fig C Fig D Fig E Fig F Fig G 12 13 14 15 1 11 28 2 29 8 4 30 31 32...
Page 6: ...6 Fig I Fig J Fig K Fig L Fig M Fig H Fig O Fig P 16 17 17 18 19 20 21 28...
Page 7: ...7 Fig Q Fig R Fig S Fig T Fig U 22 23 24 25 26 27...
Page 8: ...8 Fig V Fig W Fig X...
Page 9: ...9 Fig Y Fig Z Fig a Fig b Fig c Fig d 32 33 34 35 36 38 37 39...
Page 71: ...71...


