16
Z I PP I E XP R E SS
M.KNEE ANGLE ADJUSTMENT
WARNING
Always stabilize the mobility device before performing this action.
•
Rotate the front casters until they point forward.
•
Engage the parking brake.
The knee angle adjustment can be done with occupant in the device.
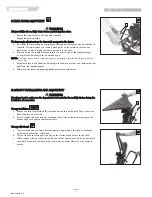
a. Be careful to avoid pulling or crimping any life support tubing that may be attached to
the child. This adjustment can create a pinch point, so be careful to remove any
obstruction, and/or clothing that could get stuck in this area.
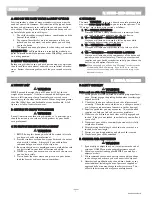
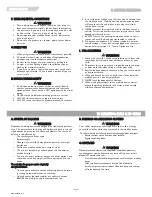
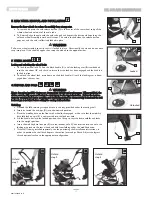
b. Press down on the thumb activated levers (A) at each side of the footbed/hanger.
and adjust the Knee angle to the desired angle.
NOTE -
The levers may not move easily until you have adequately supported the weight of the occu-
pant’s legs.
c. Release the levers and allow the Knee angle to lock into place as you remove the sup-
port from the footbed/hanger.
d. Make sure the levers are properly locked after every adjustment.
N.CANOPY INSTALLATION AND ADJUSTMENT
WARNING
It is always best to make sure the dependent is not seated in the mobility device during the
installation of accessories.
Canopy installation
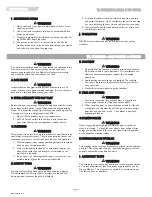
a. Loosen the two thumbscrews (B) located near the top of the back. They screw into
black couplers on each side.
b. Put the canopy rod ends into the mounting holes, raise or lower the canopy to the
proper height and tighten the thumbscrews.
Canopy adjustment
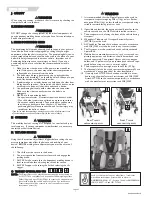
a. Once installed, you can adjust the canopy angle by pushing it forward or backward
until desired protection is obtained.
b. Lift the front of the canopy all the way up for clearance and access to the child.
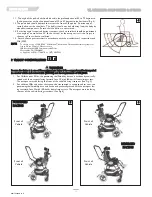
c. When canopy is being used with the tilt and recline adjustments, it may be necessary
to angle the canopy either forward or rearward for better clearance with the push
handle.
25
27
26
27
VIII. USE AND MAINTENANCE
25
26
27
B
A
9921700000 Rev. E

