22
Z I PP I E XP R E SS
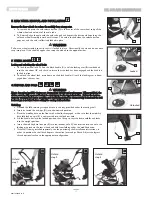
Lateral Height and Width Adjustments
NOTE -
The following adjustments can be done with the child present in the seating system.
a. Unzip the rear cover to access the adjustment screws.
b.
Loosen
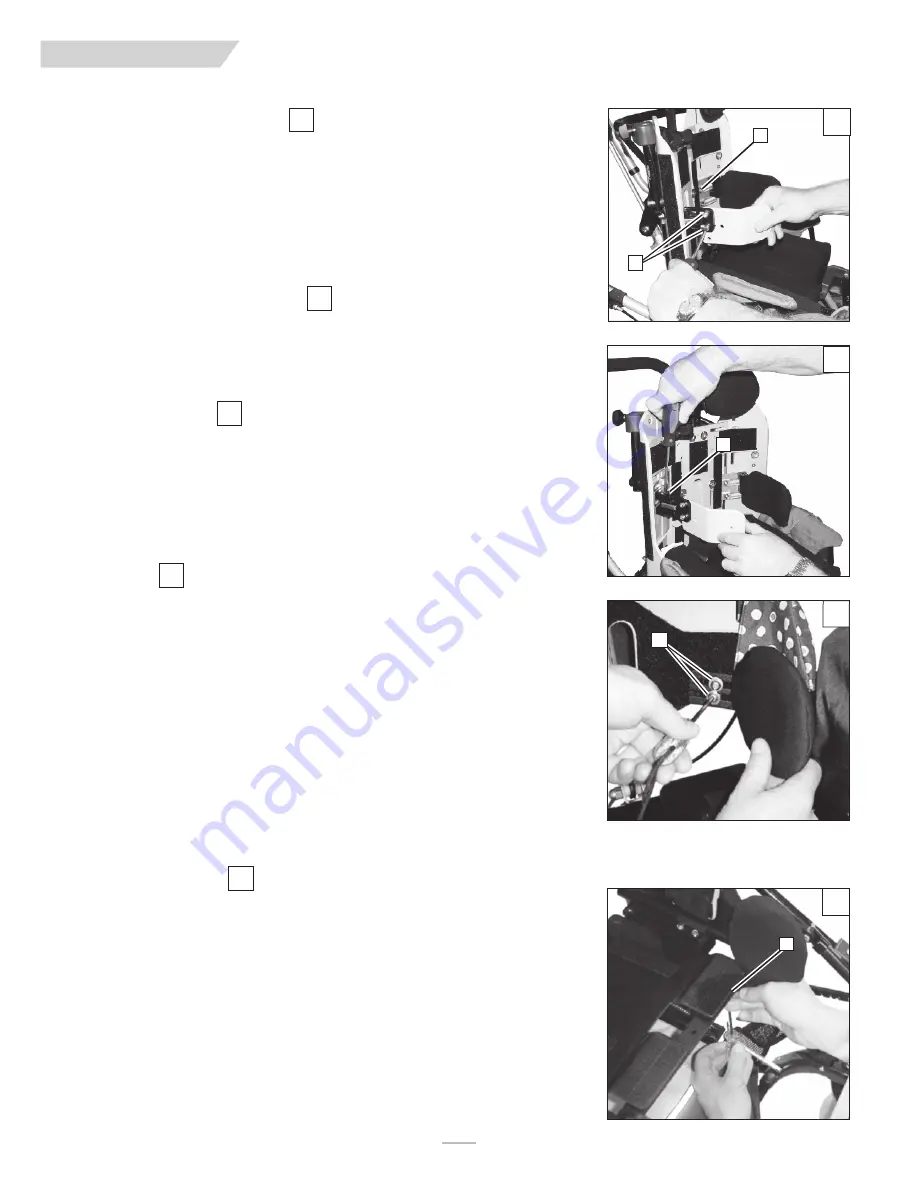
(do not remove) the mounting screws (A) from the front of the shell enough
to gain horizontal adjustment of the laterals. Adjust the lateral brackets for width
bringing the lateral assembly including the pads to the proper position. If more hori-
zontal adjustment is needed, you can also adjust the swing-away bracket.
c. Tighten the mounting screws to hold the adjustment.
d. To gain vertical adjustment of the laterals, loosen screws (A) from the rear of the back-
shell, and move the laterals up or down to the proper position, and tighten the screws.
Lateral Length and Rotation Adjustments
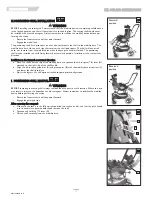
a. Slide the lateral cover and foam forward or remove to expose adjustment screws.
b. Loosen screws (B) and move lateral to proper length, you can also add a slight rota-
tion by twisting the lateral slightly. Be sure to make the same adjustment on the
other side.
c. Tighten screws and replace the foam and cover.
Lateral Angle Adjustment
a. Lock the lateral by rotating inwards.
b. Loosen the angle lock screw (C) as shown at the lateral hinge point.
c. Adjust the lateral angle to the proper position and tighten.
L. HIP PADS
Width Adjustment
a. Determine the proper location for each hip pad.
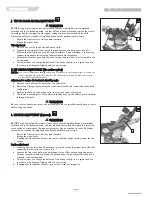
b. Remove the seat cushion to expose hip pad adjustment screws(D).
c. Loosen two adjustment screws for each hip pad.
d. Adjust hip pads to the desired position.
e. Tighten the adjustment screws and replace the seat cushion.
Forward /rear Adjustment
a. Determine the proper location for each hip pad.
b. Remove the foam cover from the hip guide to expose hip pad adjustment screws.
c. Loosen two adjustment screws.
d. Adjust hip pads to the desired position.
e. Tighten the adjustment screws and replace the seat cushion.
M. KNEE ADDUCTORS
Angle and Width Adjustment
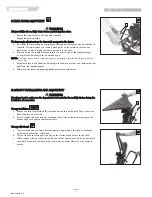
a. Locate adjustment screw. (E) Screw is located beneath the forward edge of the seat.
Seat cushion removal aids greatly in finding screw location.
b. Lock the wheels, seat the child, and buckle the pelvic positioning belt.
c. Loosen the adjustment screw from beneath the seat and adjust medial pad to proper
width and angle.
d. Tighten adjustment screw to lock the pad in position.
e. If using 2 pads, repeat the adjustment sequence on opposite side.
43
43
44
45
46
IX. DEALER SERVICE & ADJUSTMENT
43
44
45
46
A
B
C
D
E
9921700000 Rev. E

