background image


12


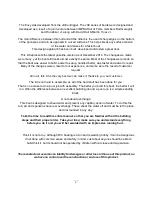
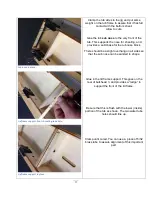
Transom doubler. 


Transom brace. One on each side. 


Lots of meat here… 


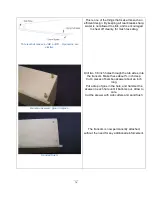
Glue in the transom doubler TD. 

This goes in front of the transom. 
The cooling holes should line up. 


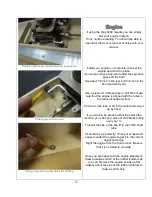
Glue in the two transom braces in place on each 

side of the transom doubler. 


Clamp all until cured. 


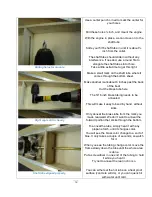
You should have a nice, strong rear end at this 

point. Alway

s a good thing… 


Summary of Contents for J.A.E. RACING Envy GAS Outrigger

Page 1: ...1 Z I P P K I T S Envy GAS Outrigger A Zippkits R C Boat Building Instructions 2015 JMP Hobby Group LLC www zippkits com Toll Free 866 922 ZIPP...

Page 2: ...The kit is not hard to assemble as all of the hard stuff has been done for you That is no excuse to do a poor job with assembly The better you build this boat the better it will run Often the differe...

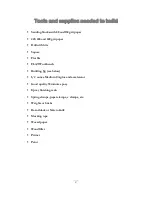
Page 3: ...per Drill with bits Square Flat file FLAT Workbench Building Jig see below 1 2 ounce Medium CA glue and accelerator Good quality 30 minute epoxy Epoxy finishing resin Spring clamps paper clamps c clam...

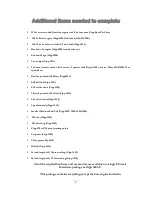
Page 4: ...rod 4 40 Size Zipp3463 4 40 ball link Zipp 3457 4 40 solder clevis Zipp 3455 Throttle pushrod 2 56 size Zipp 3462 2 56 nylon clevis Zipp 3459 3 pushrod seals Zipp 3422 Small or Medium Fuel Cell Zipp 3...

Page 5: ...5 Let s identify some of the parts so that we can easily find them when needed 1 16 Ply parts 1 8 Ply parts...

Page 6: ...6 Foam parts Miscellaneous parts...

Page 7: ...to Every critical component on this hull depends on a straight square tub Do whatever it takes to get it done correctly The assembly order and the direction that parts must face is important If not a...

Page 8: ...parts and you can see writing check again Notice the little ledge at the rear of the inner sides This is for the radio box lid frame Glue the inner sides to the outers making sure that you have a RIGH...

Page 9: ...all holes in the bulkheads line up as well Laminate the transoms T and T together Do not laminate TD at this time Once all bulkheads are laminated check the fit of the bulkheads in the right tub side...

Page 10: ...ure that the bottom extends to the front bulkhead It should cover the full 1 4 inch bulkhead and be flush with the front If necessary adjust or rack the tub frame so that it aligns perfectly with the...

Page 11: ...ose for sheeting and provides a solid base for the tub nose block There should be a slight overhang on all sides so that the sub nose can be sanded to shape Glue in the lid frame support This goes on...

Page 12: ...Glue in the transom doubler TD This goes in front of the transom The cooling holes should line up Glue in the two transom braces in place on each side of the transom doubler Clamp all until cured You...

Page 13: ...ide down tub back in the jig Sand the forward tub bottom so that the FWD bottom sheet will sit flat This will include sanding a bevel on the aft bottom to match the angle of the sides Glue the forward...

Page 14: ...s encouraged to shear off cleanly for much less drag Drill two 1 8 inch holes through the tub sides into the transom Make these about inch deep Cut 4 pieces of bamboo skewer about an inch long Put a d...

Page 15: ...tube or drill bit to make sure that the engine is aligned with the holes in the rear bulkhead and floor Put the inch tube or bit in the collet and snug it up by hand If you want to be precise about th...

Page 16: ...t the back of the boat Cut the brass tube here The 5 16 inch brass tubing needs to be annealed This will make it easy to bend by hand without kinks Only anneal the brass tube from the mark you made re...

Page 17: ...m and through bulkhead 3 Put the end that you didn t anneal towards the engine The tube should start inch behind the engine and continue about 6 inches behind the transom Glue the shaft tube in place...

Page 18: ...out the transom Put a drop of epoxy around each tube where it goes through each bulkhead Do both sides of the bulkheads for a leak free installation Ski Assemble the 4 parts of the ski using epoxy or...

Page 19: ...excess run forward Sand a sharp bevel on the rear of the ski bottom sheet so that it matches the ski sides Sand the outside of the ski all around Sand the front of the ski bottom so that it tapers to...

Page 20: ...s Strut Make a pencil line in the center of the transom and mount the strut bracket flush with the top of the transom Slide the strut onto the shaft tube and bolt in place Bolt the strut in the tub to...

Page 21: ...t skip this step We need to make sure that both sponsons are exactly correct with reference to the tub If they are off the boat will never handle properly The process is simple Take your time measure...

Page 22: ...lly remove the aluminum boom tubes before the epoxy fully cures Wipe off any epoxy on the tubes before it cures Rudder Servo You must use a digital servo with at least 250 oz in of torque Assemble the...

Page 23: ...and 4 servo screws Notice that the screws only need to be snug to hold the servo securely in place This mount puts the servo arm in the correct position for a straight pushrod run to the rudder We wil...

Page 24: ...der us straight Use epoxy to glue the mount in place again making sure that the rudder is straight Don t get any glue on the servo or wire Allow to cure Throttle servo The throttle servo is mounted to...

Page 25: ...tion The servo should not touch the tub floor Use either a Z bend or an EZ connector at the servo Glue the servo mounts to the tub floor Don t get any glue on the servo Allow to cure Fuel Bag Mount Th...

Page 26: ...mount to the tub correct Remove everything in preparation for sealing Sealing Using epoxy finishing resin or West Systems epoxy seal the inside of the tub Seal every part of the wood In the boom tube...

Page 27: ...lush with the outer sides If you find anything a single edge razor can be used to scrape it away Once you are happy with the fit of the lid frame glue it in place sealed side down Tape and weight this...

Page 28: ...check to make sure the deck is in the correct position and in contact all around Allow to cure Sand the top deck flush all around Sand the front of the tub flat for the nose block Glue the pine nose b...

Page 29: ...sponson inside and outside plates by lightly sanding the edges Put the RH sponson outside 3 big holes on the bench Mix up some 30 minute epoxy and coat the inside of the sponson plates and both sides...

Page 30: ...the sponson sides are cured let s do the sheeting This is where the strange order comes in The sheeting is done in this order because it has to overlap in a specific way Follow along and you won t ha...

Page 31: ...ace with overhangs Once these have cured sand the bottom and sides of S 2 and S 1 flush 2 glued in place Glue S 3 in place S 3 is 1 16 ply Glue S 4 and leave an overhang in the rear S 4 is 1 8 ply It...

Page 32: ...t of S 4 flush with the forward bottom This is exactly like the forward tub bottom Do not round any corners Glue S 5 in place Match the rear to just cover the bevel you sanded in S 4 Leave the rear of...

Page 33: ...an now epoxy the aluminum sponson plugs in place Glue the plugs in place so that the right sponson has the wood dowels The sponsons should be a mirror image of each other Check the length of the alumi...

Page 34: ...5 32 hole through the aluminum boom tube and the sponson plug Put the supplied 6 32 screw and locknut in place Do this for all 4 corners Remove the right sponson but leave the left one attached to the...

Page 35: ...and until it is gone Sharpen the outside RH of the turn fin Make a bevel at least 3 8 inch wide along the front and bottom of the fin Mark the center of the turn fin dowels Drill 3 16 holes on your ma...

Page 36: ...ng easier Also seal the radio box top When cured sand with 150 and recoat with epoxy This coat will use far less resin than the first When this cures wet sand the bottom of everything with 220 Ski Tes...

Page 37: ...be at the very bottom of the ski for the proper propeller depth Make the ski parallel with the tub bottom 0 degree angle Slide your drive dog onto your flex shaft then your prop Leave about half of th...

Page 38: ...t the sponsons on with the 6 32x7 8 screws and locknuts Measure the sponsons and adjust until the right sponson has toe in and the left is straight The sponsons should be centered equal distance from...

Page 39: ...shut off and will be embarrassing and dangerous Mount your switch with a waterproof switch cover Make sure that your tuned pipe is mounted to the tub Make sure your prop is sharpened and balanced Grea...

Page 40: ...intlwaters com Excellent forum for information on R C boats lots of general JAE discussion Klass Kote Epoxy Paint www klasskote com Phone 612 243 1234 Source for the best epoxy paints Servo City www...

Page 41: ...ose and adjusted back the boat rides wet If the boat rides up in the turn fin especially with left rudder the fin is angled too far forward Tips Do not change the ride attitude or height Leave the AOA...

Page 42: ...ilding setup and running We encourage you to experiment with different props and pipe settings Props make all the difference in the world as far as speed and handling go We can be reached by email at...

Reviews: