12
Assembly Instructions
Unfold the Baby Stroller
• Take the stroller out of the package as shown in Fig. 1a
• Unfold the folding hook, pull the handlebar and gradually push to
open the stroller until a „click“ sound is heard as shown in
Fig. Ib and 1c
Install the Front Wheels
As shown in Fig. 2, attach each wheel to
the front wheel axle till a “click”
sound is heard.
Install the Rear wheel
As shown in Fig. 3, insert the rear wheels
into the rear wheel axle till a „click“ sound
is heard and ensure the rear wheels are
locked and cannot be pulled out.
1а
1b
1c
3
2
Folding Hook
13
• Ein 5-Punkt-Sicherheitsgurt sorgt für einen sicheren Halt des Kindes und sollte immer
getragen werden.
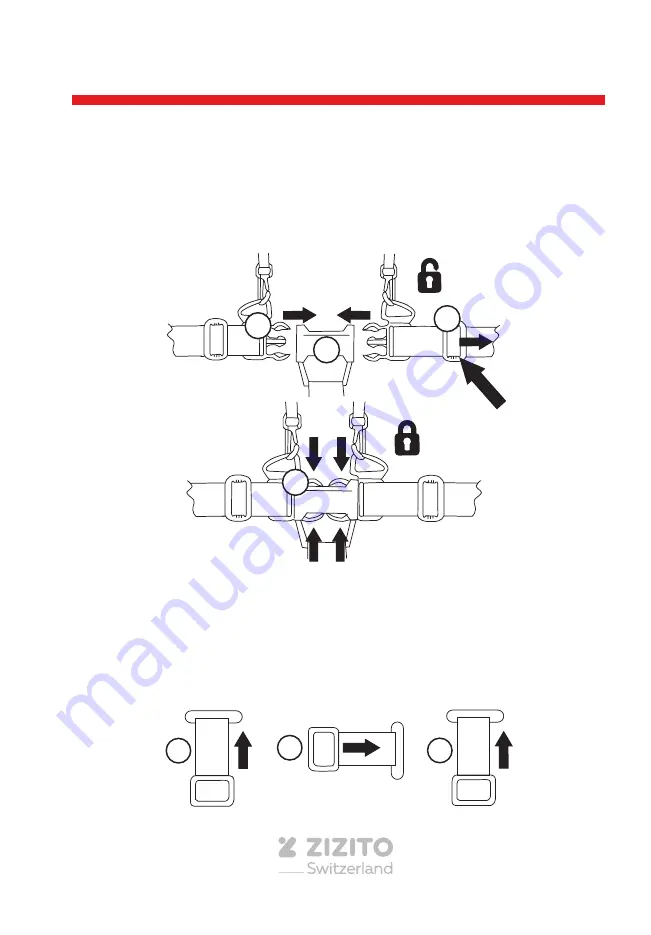
• Drücken Sie zum Befestigen die Seitenclips (g) in die mittlere Schnalle (h).
• Schiebeversteller (i) sind angebracht und sollten an Ihr Kind angepasst werden.
• Drücken Sie zum Lösen die Schiebeklammern an den Punkten U) und entfernen Sie
die Schnalle.
WARNUNG! Ihr Kind sollte immer gut angeschnallt und betreut sein.
• Entfernen des Gurts (zum Reinigen) und erneutes Anbringen: Entfernen - Führen Sie
die Schultergurthalterungen (1) durch die horizontalen Schlitze in der Rückenlehne.
Führen Sie die Hüftgurthalterungen (2) durch die vertikalen Schlitze an der
Rückenlehne. Führen Sie den Schrittgurthalter (3) durch den Schlitz an der Sitzfläche.
• Um den Gurt wieder anzubringen, kehren Sie den oben genannten Vorgang um und
überprüfen Sie, ob alle Gurte sicher sind, bevor Sie den Hochstuhl benutzen.
Gurt
6
7
A 5-point safety harness is provided to restrain your child and should always
be worn.
To fasten, push the side clips (g) into the centre buckle (h). Sliding adjusters (i)
are fitted and should be adjusted to suit your child.
To release, press the slide clips at points (j) and remove buckle.
WARNING!
Your child should be harnessed snugly and attended at all
times.
g
h
i
j
1
3
2
Harness removal (for cleaning) & re-fitting: to remove - pass the shoulder strap
retainers (1) through the horizontal slots in the backrest. Pass the waist strap
retainers (2) through the vertical slots on the backrest. Pass the crotch strap
retainer (3) through the slot on the seat base.
To re-fit harness, reverse the above process and check all straps are secure before
using the highchair.
The tray can be stored on the rear of the highchair. Remove tray (Step 6).
With the top of the tray facing outwards, attach the edge of the tray into the
allocated plastic clips located on the rear of the highchair seat unit. Ensure the
tray edge fits between both clips.
Summary of Contents for MARS
Page 93: ......


