background image


User Manual 

P a g e

 | 15 


2


Main Menu 

Click [

M/OK

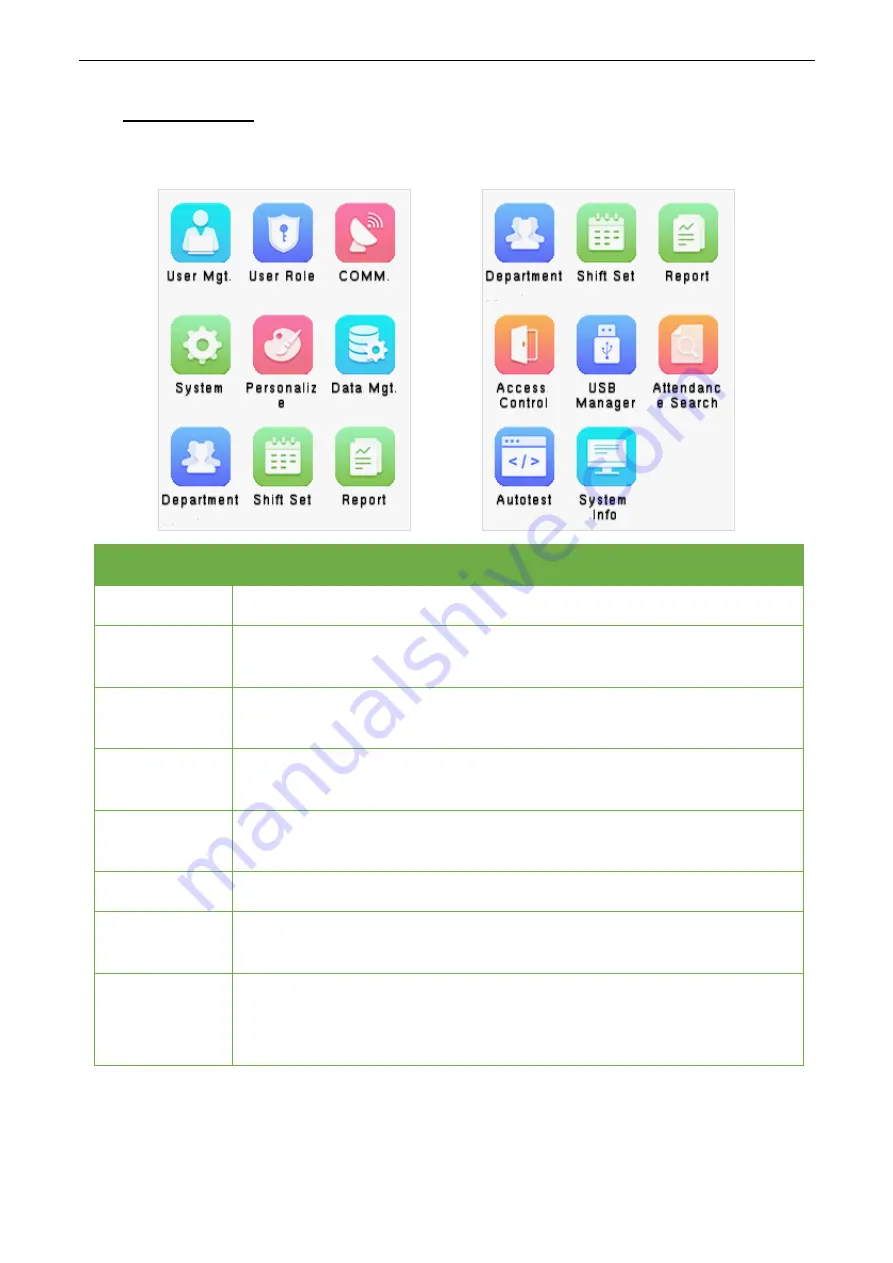
] on the initial interface to enter the main menu, as shown below:  


Items 

Descriptions


User Mgt.


To add, edit, view, and delete basic information of a user. 

User Role


To set the permission scope of the custom role and enroller, that is, the rights to 
operate the system. 

COMM.


To set the relevant parameters of Ethernet, PC connection, cloud server setting 
and network diagnosis. 

System


To set parameters related to the system, including date & time, attendance, face, 
fingerprint, reset and USB upgrade. 

Personalize


To customize settings of interface display, including  user  interface,  voice,  bell 
schedules, punch state options and shortcut key mappings. 

Data Mgt.


To delete all relevant data in the device. 

Department 

Establish the organizational structure of the department, including functions like 
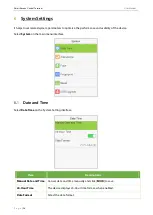
adding, editing, or deleting the department, and scheduling the department, etc. 

Shift set 

Set attendance rules and the number of shifts to be used, and schedule 
employees. 

The device supports up to 24 shifts. 

Smart Access Control Terminal

Summary of Contents for FA2000

Page 1: ...Product Name and Model Number User Manual P a g e 1 Copyright 2020 CO LTD All rights reserved User Manual FA2000 Date January 2021 Doc Version 1 0 English...

Page 2: ...2 MAIN MENU 15 3 USER MANAGEMENT 17 ADDING USERS 17 SEARCH FOR USERS 21 EDIT USERS 21 DELETING USERS 22 4 USER ROLE 23 5 COMMUNICATION SETTINGS 25 NETWORK SETTINGS 25 PC CONNECTION 26 CLOUD SERVER SET...

Page 3: ...48 11 REPORT 52 DOWNLOAD ATT REPORT 52 DOWNLOAD ATT SETTING REPORT 55 UPLOAD ATT SETTING REPORT 56 SETTING 57 12 ACCESS CONTROL 58 ACCESS CONTROL OPTIONS 58 13 USB MANAGER 60 USB DOWNLOAD 60 USB UPLO...

Page 4: ...power source and refer service personnel under the following conditions When cord or connection control is affected When the liquid spilled or an item dropped into the system If exposed to water or du...

Page 5: ...rs including electric generators radios televisions especially CRT monitors or speakers Operation Safety If smoke odour or noise rise from the device turn off the power at once and unplug the power ca...

Page 6: ...not advisable to connect the AC 24V power supply to the DC 12V input port Make sure to connect the wires following the positive polarity and negative polarity shown on the device s nameplate The warr...

Page 7: ...ification Our company will assume no liability for recognition issues that may result from incorrect usage of the product We reserve the right of final interpretation and modification concerning this...

Page 8: ...User Manual P a g e 7 Facial expression Standing posture Note During enrolment and verification please remain natural facial expression and standing posture Smart Access Control Terminal...

Page 9: ...confusion and the registration may fail A user wearing glasses should register their face both with and without glasses Cautions for authenticating a face Ensure that the face appears inside the guid...

Page 10: ...ommended way to place your finger onto the sensor For details please refer to 1 1 Finger Positioning The following screen displays on successful and failed verification respectively On successful veri...

Page 11: ...n to his her fingerprints and the verification method is set to password fingerprint badge face verification the following screen will appear Select the fingerprint icon to enter fingerprint verificat...

Page 12: ...al Verification It compares the face captured by the camera with the facial template related to the entered user ID For 1 1 facial verification enter the User ID on the main interface and enter the 1...

Page 13: ...compares the entered password with the registered User ID and password Enter the User ID on the main screen to enter the 1 1 password verification mode 1 Enter the user ID and press M OK If an employe...

Page 14: ...d failed verification respectively On successful verification On failed verification 1 4 4 Card Verification Only the product with the card module offers the card verification function Please place th...

Page 15: ...in the picture below Note 1 means or and means and 2 You must register the required verification information before using the combination verification mode otherwise the verification may fail For exa...

Page 16: ...arameters related to the system including date time attendance face fingerprint reset and USB upgrade Personalize To customize settings of interface display including user interface voice bell schedul...

Page 17: ...cess Control To set the parameters of the lock and the relevant access control device USB Manager To transfer data such as user data and attendance logs from the USB disk to the supporting software or...

Page 18: ...tive options Note 1 A username can contain a maximum of 17 characters 2 The user ID may contain 1 9 digits by default 3 You can modify your ID only during the initial registration and can t be modifie...

Page 19: ...d user role is the Super Admin the user must pass the identity authentication to access the main menu The authentication is based on the authentication method s that the super administrator has regist...

Page 20: ...ensor The registration interface is shown below Register Face Select Face on the Verification mode to enter the face registration page Users need to face the camera such that their whole face is visib...

Page 21: ...eight digits by default Register user photo When a user registered with a photo passes the authentication the registered photo will be displayed Select User Photo Select M OK to take a photo Then Sel...

Page 22: ...e an ID surname or full name The system will search for the users related to the entered information Edit Users Choose a user from the list and select Edit to enter the Edit user interface Note The op...

Page 23: ...to be deleted and click M OK Note If you select Delete User all information of the user will be deleted Only fingerprint data is removed if Delete Fingerprint Only is selected Only face data is remov...

Page 24: ...ole under the User Role menu You may set the permission scope of the custom role up to 3 roles and enroller Select User Role on the main menu interface 1 Select an item to set a defined role Select th...

Page 25: ...s complete Note You need to select the features in sub menus If the device has a role enabled you may assign the roles you set to users by selecting User Mgt New User User Role If no super administrat...

Page 26: ...of the network PC connection WIFI and cloud server Network Settings When the device needs to communicate with a PC over the Ethernet you need to configure network settings and ensure that the device...

Page 27: ...for clients via server Display in Status Bar To set whether to display the network icon on the status bar PC Connection To improve the security of data please set a Comm Key for communication between...

Page 28: ...e http is used such as http www XYZ com while XYZ denotes the domain name Disable Domain Name Server Address The IP address of the ADMS server Server Port Port used by the ADMS server Enable Proxy Ser...

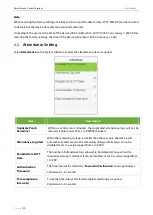
Page 29: ...evice Select System on the main menu interface Date and Time Select Date Time on the System Setting interface Item Descriptions Manual Date and Time Can set date and time manually and click M OK to sa...

Page 30: ...s the duplicated attendance logs will not be reserved value ranges from 1 to 999999 minutes Attendance Log Alert When the remaining storage is smaller than the set value the device will automatically...

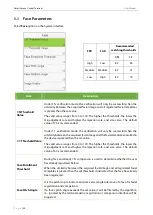
Page 31: ...valid value ranges from 0 to 100 The higher the thresholds the lower the misjudgement rate and higher the rejection rate and vice versa The default value of 63 is recommended Face Enrollment Threshold...

Page 32: ...at qualifies as potential motion detection that wakes up the terminal from standby to the comparison interface The larger the value the more sensitive the system would be i e if a higher value is set...

Page 33: ...environment is dry resulting in slow fingerprint detection you can set the level to High to raise the sensibility when the environment is humid making it hard to identify the fingerprint you can set...

Page 34: ...stem interface Select OK to reset USB Upgrade Insert the U disk with upgrade file into the device s USB port and in the initial interface press M OK System USB Upgrade to complete firmware upgrade ope...

Page 35: ...main menu interface Interface Settings You can customize the display style of the main interface Select User Interface option on the Personalize interface Item Description Wallpaper To select the mai...

Page 36: ...sabled or you may set the interval between 3 and 999 seconds Idle Time to Sleep m If sleep mode is activated when there is no operation the device enters standby mode Press any key or finger to resume...

Page 37: ...ingtone automatically until the ringing duration passes Select Bell Schedules option on the Personalize interface Add a Bell Select New Bell Schedules option on the Bell Schedules interface Press M OK...

Page 38: ...item to be edited Select Edit to edit the bell schedule time The editing method is the same as that of a new bell Delete a Bell On the All Bell Schedules interface select a bell item to be deleted Se...

Page 39: ...ng to the switching time in the Shortcut Key Mapping Manal and Auto Mode In this mode the main interface displays the auto switching punch state key meanwhile supports manual switching of the punch st...

Page 40: ...rface To set Auto Switching Time Choose any shortcut key and select Punch State Options in Function to set the auto switching time Auto Switch A different time interval is set for different Punch Stat...

Page 41: ...e 40 8 Data Management It helps to delete the relevant data in the device Select Data Mgt option on the main menu interface Delete Data Select Delete Data option on the Data Mgt interface Smart Access...

Page 42: ...te Wallpaper To delete all wallpapers in the device Delete Screen Savers To delete the screen savers in the device Note When deleting the access records attendance photos or blacklisted photos you may...

Page 43: ...company and arranging departments shift is necessary to view the department information of the device In this menu option you can add edit or remove a department Select Department on the main menu int...

Page 44: ...department Note 1 The equipment will automatically assign numbers to departments starting from 1 and so on 2 Dept Shift Select the shift attendance used by all users of the department Shifts can be s...

Page 45: ...annot delete them In addition to the 8 default departments additional departments can be edited and deleted 1 Select Dept Lists and press M OK to enter 2 Select a department to edit and press M OK to...

Page 46: ...department as required 1 Select Dept Lists and press M OK to enter 2 Select a department to delete and press M OK to enter 3 Select Delete and press M OK Note Only departments other than the 8 defaul...

Page 47: ...ndance rules Therefore the staff attendance rules need to be set first including late early leave calculation method and scheduling type Once the attendance rules are set it is not recommended to modi...

Page 48: ...heduling If a company uses one timetable then only one department needs to be set and department based scheduling is recommended If the departments have their respective timetables department based sc...

Page 49: ...fault shifts Shift 1 and Shift 2 All the shifts are editable and a single shift includes three time ranges at most Schedule The shifts should be set based on the actual condition of a company If no sh...

Page 50: ...d for all the members of the department Individual based Scheduling Select Shift Set Attendance Rule Schedule Type Personal Shift to schedule shift for an individual 1 Add Schedule 1 Press M OK to ent...

Page 51: ...eds to be adjusted 1 Select Personal Shift Lists on the Personal Shift interface 2 Select a scheduled user and press M OK 3 Select Edit press M OK to enter and modify the Shift Name of the user Note T...

Page 52: ...s to delete an employee s schedule that is no longer required 1 Select Personal Shift Lists on the Personal Shift interface 2 Select a scheduled user and press M OK 3 Select Delete press M OK and choo...

Page 53: ...eports with defined shifts and employees schedules The device gives priority to the schedules in an attendance setting report Select Report on the main menu interface Note First insert the USB flash d...

Page 54: ...ts stored in the USB disk or SD card The Schedule Information Statistical Report of Attendance Attendance Record Report Exception Statistic Report and Card Report can be viewed on a PC The following r...

Page 55: ...ertime hour in the Statistical Report of Attendance is HH MM For example 17 50 indicates that the on duty time is 17 hours and 50 minutes Attendance Record Report The report lists the daily attendance...

Page 56: ...ifts and schedules be set for employees in the attendance setting report Select Download Att Setting Report and press M OK Open the setting AttSettingE xls in the USB disk or SD card on a PC Set the S...

Page 57: ...the schedule setting report contains the schedules of 31 days after 2020 1 6 that is scheduled from 2020 1 6 to 2020 2 5 2 If no schedule setting report is set all employees use Report 1 by default fr...

Page 58: ...nt User Shift Number and Department available in the device Or the above information and scheduling information can be seen in the standard download report Note If the schedule time format is incorrec...

Page 59: ...elect Access Control on the main menu interface Access Control Options To set the parameters of the control lock of the terminal and related equipment Select Access Control Options on the Access Contr...

Page 60: ...types of Door Sensor None NormalOpen and NormalClosed None means door sensor is not in use Normal Open means the door is always opened when powered and NormalClosed means the door is always closed wh...

Page 61: ...disk insert the USB disk into the USB slot first Select USB Manager on the main menu interface USB Download Select Download on the USB Manager interface Item Description Attendance Data Import all the...

Page 62: ...pers from USB disk into the device You can choose Upload selected picture or Upload all pictures The images display as wallpaper after upload User Data Upload the message stored in a USB disk to the t...

Page 63: ...nterface and input the User ID The interface is shown below 1 Enter the user ID to be searched and select OK If you want to search for records of all users select OK without entering any user ID 2 Sel...

Page 64: ...every key on the keyboard works normally Press any key on the Keyboard Test interface to check whether the pressed key matches the key displayed on the screen The keys are displayed as dark grey befor...

Page 65: ...ice Capacity Displays the current device s user storage password fingerprint and face storage administrators and attendance records Device Info Displays the device s name serial number MAC address fac...

Page 66: ...ervice attendance terminal A SSR attendance calculation flow Obtain the EXCEL schedule record Attendance rules is the individual based scheduling adopted Does the EXCEL schedule record exist NO Obtain...

Page 67: ...to the USB flash drive or SD card Step 2 Open the Attendance Setting Report xls on a computer Step 3 Set shifts in the Attendance Setting Report xls as required Step 4 Arrange schedules for employees...

Page 68: ...09 00 in shift 1 Shift No First Time Range Second Time Range Overtime Range On duty Off duty On duty Off duty Check in Check out 1 09 00 18 00 2 09 00 12 00 13 30 18 00 3 9 5 18 00 d A time value cont...

Page 69: ...time of 1 employee 9 01 9 04 12 01 12 50 18 00 Statistical result based on attendance rules 9 01 12 01 12 50 18 00 Description Employer 1 checks in for work at 9 01 and 9 04 and he she is late based o...

Page 70: ...om 13 00 is from 12 30 to 13 00 The calculated time of attendance is shown in the preceding table Case 2 Attendance Time Range 09 00 12 00 13 00 18 00 Attendance time of 1 employee 8 50 11 55 12 20 18...

Page 71: ...determined by turning the equipment off and on the user is encouraged to try to correct the interference by one or more of the following measures Reorient or relocate the receiving antenna Increase t...

Reviews: