


OP200 Quick Start Guide
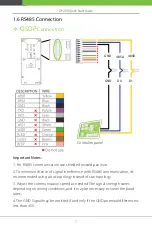
4
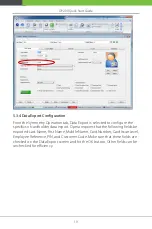
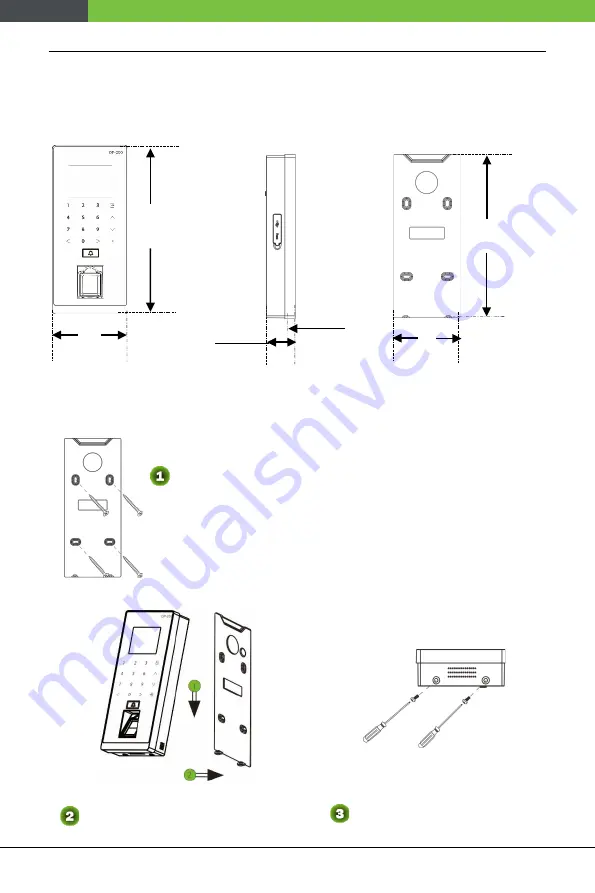
1.3 Dimensions & Installation
Mounting the device on Wall
7.70 in
(195.5 mm)
3.43 in
(87 mm)
1.38 in
(35mm)
7.34 in
(186.5 mm)
3.0 in
(76.1mm)
Fix the back plate on the wall using wall mounting screws.
Note:
We recommend drilling the mounting plate screws
into solid wood (i.e. stud/beam). If a stud/beam cannot be
found, use supplied drywall plastic anchors.
Attach the device to the back
plate.
Fasten the device to the back
plate with security screws.
0.51 in
(13 mm)
Front view
Back view
Left side view
Summary of Contents for OP-200
Page 1: ...OP200 Quick Start Guide 1 QUICK START GUIDE Applicable Model OP 200 Version 1 2 Date May 2019 ...
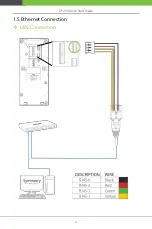
Page 9: ...OP200 Quick Start Guide 6 1 5 Ethernet Connection LAN Connection ...
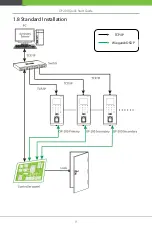
Page 12: ...OP200 Quick Start Guide 9 1 8 Standard Installation TCP IP Wiegand OSDP ...
Page 34: ...OP200 Quick Start Guide 31 4 Complete the installation ...
Page 36: ...OP200 Quick Start Guide 33 2 Display the certificate settings 3 Add the server exception ...
Page 41: ...OP200 Quick Start Guide 38 ...
Page 48: ...OP200 Quick Start Guide 45 ...
Page 49: ...OP200 Quick Start Guide 46 The following figure shows enroll fingerprint successfully ...


