2 SBTL8000 series installation guide
2
Installation
1.
Prepare the tools for product installation and sort out the auxiliaries according to the packing list.
2.
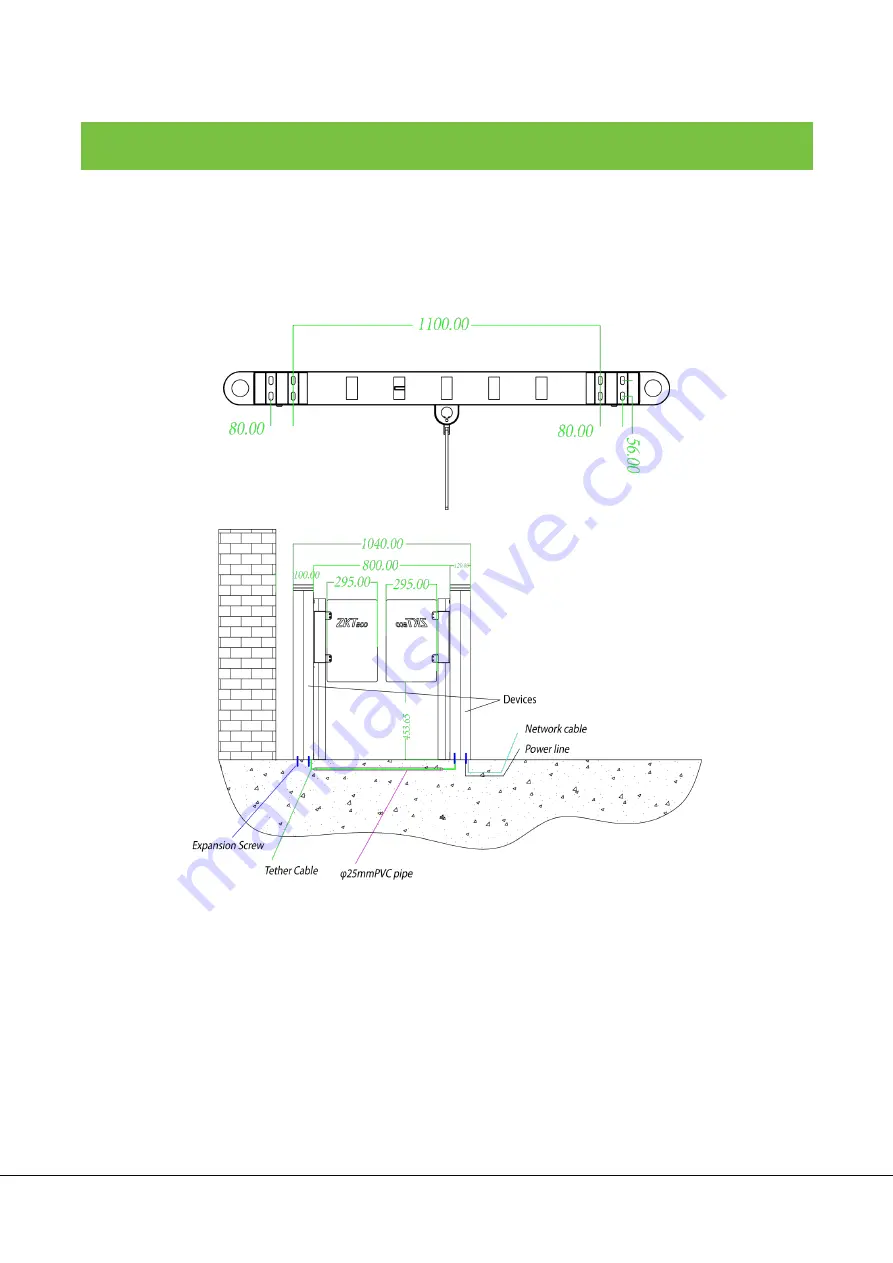
Drill holes after determining the hole positions based on the mounting template as shown in
Figure 2-1. Insert the expansion bolt into the holes accordingly.
Figure 2-1
3.
Tighten the nut preliminarily, then connect the master and slave devices with wires.
4.
Test the operations of the device after connecting it to the power supply with the temporary
cable. Make sure that the ground wire of AC power is connected to the cabinet of the device.
5.
Turn on the air switch to test whether the device is working properly. Wait for 10 seconds for the
turnstile to complete the self-test program. At the same time, check if the indicators work
properly. If everything works fine, you can fasten the ground screw nuts and fix the device. If an
exception occurs, please contact your vendor.


