2
1.2 Startup Screen
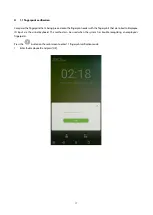
After plugging in the device, press the On/Off switch located on the side. The following screen will load:
Notes:
The wallpaper can be customized. For more details, please refer to
“1.4 Change Theme and Wallpaper”
.
Tap on
to enter the personnel ID Input screen in 1:1 verification mode. For further information
about the 1:1 verification process, see section
“1.5 Verification Method”
.
Tap on
to enter the main menu. If a super administrator has already been registered for this device,
you will need the permission of the super administrator to enter the main menu.
Summary of Contents for SpeedFace Series
Page 1: ...General User Manual Visible Light Face Recognition Version 1 0 Date December 2018...
Page 10: ...5 Change the theme 1 Tap on Choose theme and select a theme at the bottom of the interface...
Page 11: ...6 2 After the theme was set successfully it will be displayed on the standby interface...
Page 13: ...8 2 The wallpaper is set successfully and displayed on the standby interface...
Page 15: ...10 2 Verification is failed...
Page 17: ...12 2 Look at the camera make sure your face stay in the center of the camera...
Page 18: ...13 3 Successfully verified...
Page 19: ...14 4 Verification is failed...
Page 21: ...16 Verification is failed...
Page 24: ...19 2 Press the finger on the fingerprint reader to proceed with verification...
Page 25: ...20 3 Successfully verified...
Page 26: ...21 4 Verification is failed...
Page 29: ...24 2 Enter a password and press OK...
Page 30: ...25 3 Successfully verified...
Page 31: ...26 4 Verification is failed...
Page 34: ...29 2 Successfully verified...
Page 39: ...34 2 Tap on Start on the employee creation wizard...
Page 44: ...39 4 Tap on the rightwards arrow to complete adding the photo...
Page 51: ...46 Tap on to encrypt the password tap on to make the password visible as shown below...
Page 54: ...49 Press Delete Overwrite in the dialog window that pops up...
Page 55: ...50 Click Done after the registration a new employee is created successfully...
Page 59: ...54 2 Select Verification Mode and then select a verification mode...
Page 65: ...60 2 Automatically finds employees with information that is relevant to the search query...
Page 66: ...61 3 3 Edit an Employee 1 Select an employee on the employee list...
Page 72: ...67 2 In the attendance event creation wizard tap on Start...
Page 75: ...70 4 Successfully created...
Page 76: ...71 4 2 Edit Attendance Events 1 Select an employee attendance event...
Page 79: ...74 2 A window will appear Tap on OK...
Page 80: ...75 3 The event is now deleted and will not appear on the list...
Page 84: ...79 1 Enter the number of time rule maximum 50 rules in the search bar...
Page 90: ...85...
Page 93: ...88 3 Automatically finds the employees with information that is relevant to the search query...
Page 96: ...91 2 Enter the Employee photos interface...
Page 98: ...93 5 Show search results...
Page 105: ...100 2 Set Time select Hour and Minute...
Page 107: ...102 4 Tap on the Bell button and a window will pop up Select a ringtone and tap on OK...
Page 109: ...104 9 2 Edit Alarms 1 Select an alarm from the alarm list...
Page 113: ...108 3 A window will appear Tap on OK...
Page 114: ...109 4 The event is now deleted and will not appear on the list...
Page 122: ...117 2 Tap on Set Time and swipe up and down to set the hour and minute Tap on OK...
Page 123: ...118 10 2 2 Date and Time Format Settings 1 Tap on Date Format and select a date format...
Page 128: ...123 3 Set the time When the Repeat daily switch is turned on the following will display...
Page 129: ...124 4 Tap on the Time button and swipe up and down to set the corresponding time Tap on OK...
Page 130: ...125 5 When the Repeat Daily switch is disabled the following will display...
Page 134: ...129 2 In the Fixed mode selection menu select the attendance status that you would like to set...
Page 135: ...130 Set this mode to disabled 1 Select the Status Mode as Disable mode...
Page 139: ...134 10 3 4 Verification Settings Configure settings for attendance verification parameters...
Page 145: ...140 10 5 2 Wiegand Out Tap on Wiegand Out to enter the below interface...


