2
2.2 Arm installation method
Installation procedure
1.
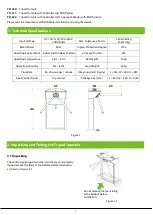
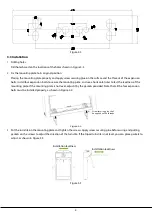
Using the glue and applying in the hole of the arms as well as the one countersunk screw, as shown in Figure 2-2. (This is
to prevent screws from getting loose due to vibration after being used for a long time.)
2.
Rotating the arms to the connection points until it was fastening, and use the Hex key to fasten the one screw on each
arm, as shown in Figure 2-3.
Figure 2-2 Figure 2-3
2.3 Power-on test before the installation of device
1.
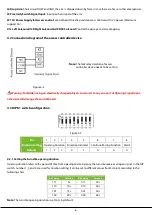
Please make sure that the power requirements are strictly met to avoid permanent damage to the unit. Input voltage: AC
100~120V /200~240V.
Note:
The tripod turnstile must be connected to the ground (earth).
2.
Power on and wait 30s for the tripod turnstile to finish the self-check program.
3.
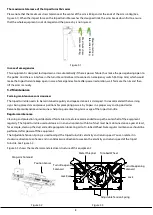
Lift the arms manually, as shown in Figure 2-5.
4.
Check whether the tripod turnstile and the LED indicators work properly.
If there is any problem, please contact the supplier.
Figure 2-4 Figure 2-5
Tighten the one screw on each
arm in clockwise direction.
There is a power switch in the side
direction of this power supply.
Earth wiring
terminal
Lift upwards
This hole shall be
applied with glue
evenly.


