3
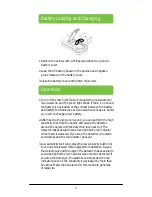
1. Remove the screws with a Philips screwdriver to open the
battery cover.
2. Load the 9 V battery based on the positive and negative
poles marked on the battery cover.
3. Close the battery cover and tighten the screws.
1. Turn on the switch (10). If a Dah is heard, the metal detector
is powered on, and the green light blinks. If there is no sound,
the battery is not loaded or the contact between the battery
and battery terminals is poor. If consecutive sounds are heard,
you need to change a new battery.
2. After hearing the power-on sound, you can perform the high
sensitivity test. Hold the handle and sweep the detector
around the object with the detection face near to it. The
detector makes an alarm sound and lights the red indicator
when metal is detected. If you stop the detection, the alarm
sound stops and the red indicator goes out.
3. Low sensitivity test: Long-press the low sensitivity button (4)
to exclude small-sized metal objects from detection. Sweep
the detector around the object. The detector makes an alarm
sound and lights the red indicator when metal is detected. If
you stop the detection, the alarm sound stops and the red
indicator goes out. The sensitivity is decreased by more than
five times. Metal that is detected in this mode are generally
of large size.
Battery Loading and Changing
Operation


