28
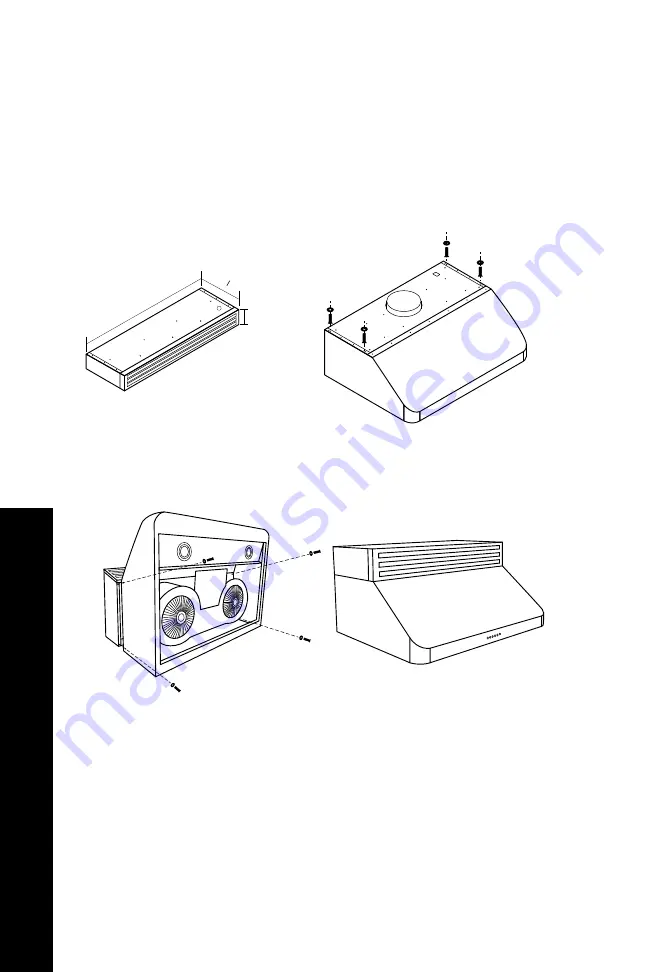
RECIRCULATING KIT
1. Open package, locate all necessary hardware. Included should be 4 screws
with 4 washers.
2. Line up the recirculating kit with the top of the range hood.
3. Secure the recirculating kit with the provided screws. Once secure, begin
tightening each screw until the recirculating kit is flush with the range hood.
4. Install undercab per range hood installation guide.
29 ¾“ - 35 ¾“
4 ¾”
11
7 8
“
No time to read?
Scan for a quick video.
Undercabinet Recirculating Kit
Step 1:
Open package, locate all neccessary hardware. Included should be
4 screws with 4 washers.
Step 2:
Line up the recirculating kit with the top of the range hood.
Step 3:
Secure the recirculating kit with the provided screws. Once secure,
begin tightening each screw until the recirculating kit is flush with the
range hood.
Step 4:
Install undercab per range hood installation guide.
UNDER CABINET INSTALLATION
Under Cabinet Installation
Summary of Contents for 697-R-30
Page 38: ...31 Insert Installation INSERT INSTALLATION Installation Tutorial Video 36 30 36...
Page 52: ...45 Single Motor Electrical Diagram SINGLE MOTOR ELECTRICAL DIAGRAM CHANGING PARTS...
Page 53: ...46 Double Motor Electrical Diagram CHANGING PARTS DUAL MOTOR ELECTRICAL DIAGRAM...
Page 103: ...Installation Guide and User Manual 1 614 777 5004 1 1 0 www zlinekitchen com...


