


21
Tr
oublesh
ooting
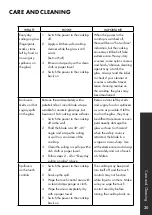
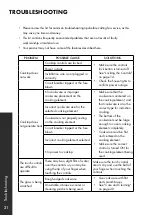
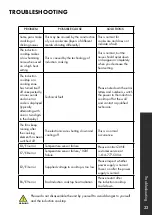
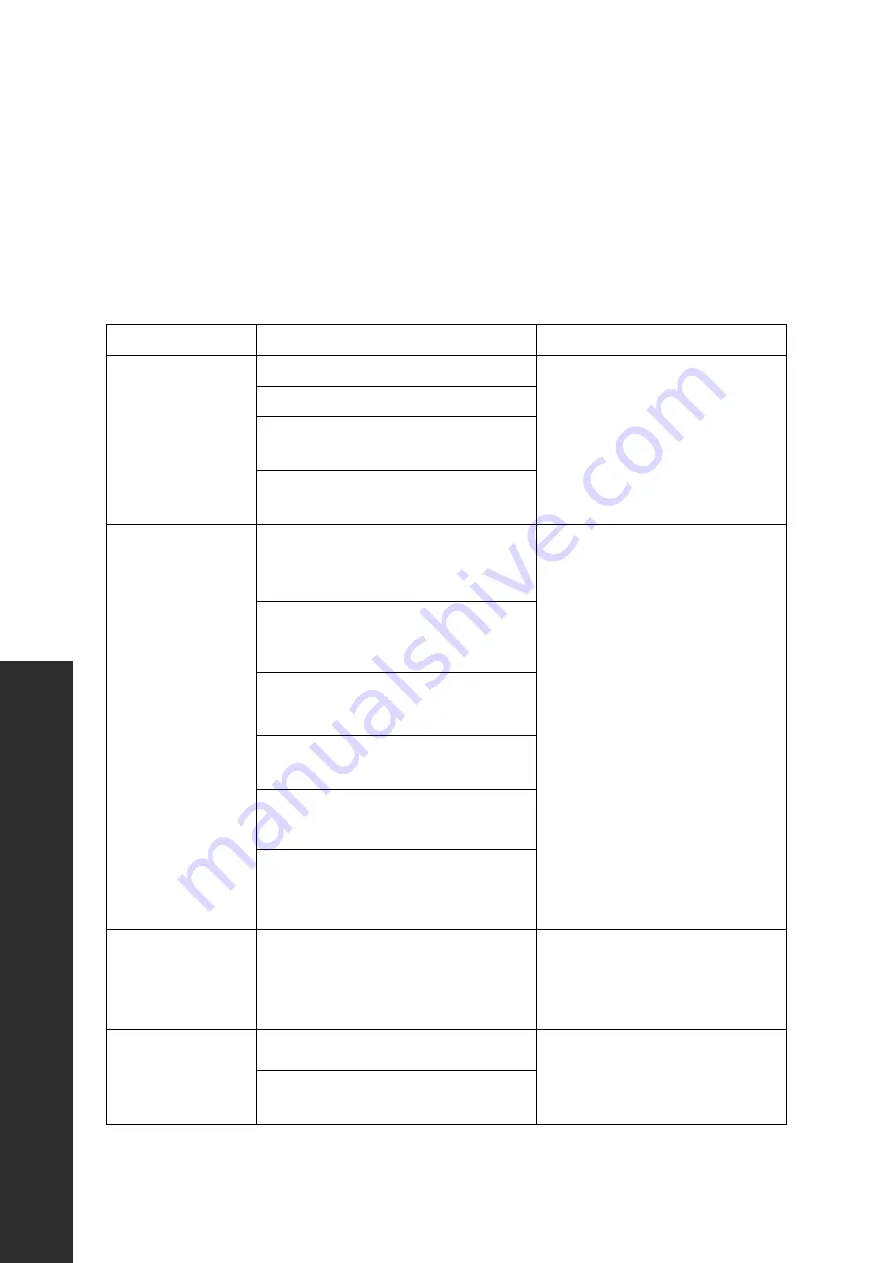
TROUBLESHOOTING
PROBLEM
POSSIBLE CAUSE
SOLUTIONS
Cooktop does
not work
Cooktop controls are locked
• Make sure the controls
lock button is turned off.
See "Locking the Controls"
on page 14.
• Check the house lights to
confirm power outage.
Power outage
Installation wire is not plugged in
correctly
Circuit breaker tripped or the fuse
blown
Cooktop does
not generate heat
No cookware or improper
cookware placement on the
cooking element
• Make sure that the
cookware is centered on
the cooking element, and
that cookware is also the
correct type for induction
cooking.
• The bottom of the
cookware must be large
enough to cover cooking
element completely.
• Cookware must be flat
and centered on the
cooking element.
• Make sure the correct
control is turned ON for
the cooking element being
used.
Incorrect cookware size for the
selected cooking element
Cookware is not properly resting
on the cooking element
Circuit breaker tripped or the fuse
blown
Incorrect cooking element selected
No power to cooktop
The touch controls
are difficult to
operate
There may be a slight film of water
over the controls or you may be
using the tip of your finger when
touching the controls
Make sure the touch control
area is dry and use the ball of
your finger when touching the
controls.
The glass is being
scratched
Rough-edged cookware
• Use cookware with flat
and smooth bases.
Unsuitable, abrasive scourer or
cleaning products being used
• Please review this list for common troubleshooting tips before calling for service, as this
may save you time and money.
• This list contains frequently encountered problems that are not results of faulty
workmanship or material use.
• Your product may not have some of the features described here.


