background image

P.3

Windows 98SE, Windows ME, Windows 2000 and Windows XP

One available USB Port

CD ROM drive required for driver installation (Windows 98SE only)

Windows Media Player 9 and Direct X 9.0c or above is required for 


video conversion software

1.  Do not operate the device under extreme temperature 

condition.  The best working temperature is 0C – 40C.

2.  Avoid placing the device to direct sun light.

3.  Insert the SD/MMC card ONLY when the device is turned off.  

Failure to so may result in data loss or damage to the circuit.

4.  Always back up your important files.  The manufacturer is not 

liable for any loss of data. 

5.  Do not connect the USB port while the device is playing media 

files.  

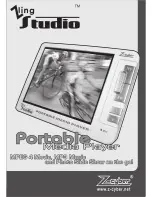
Zling Studio Portable 

Media Player

A. Hold Switch

B. Power 

C. B Button 

D. A Button

E. Menu

F. Forward 

G. Play / OK 

H. Backward 

I.  Volume Up

J. Volume Down

K. SD/MMC Card Slot

L. DC Power In

M. USB 

N. AV In

O. AV Out

P. Earphones

A                    B   C   D   E

K

F

G

H

I

J

P

O

N

M

L

Summary of Contents for Z-cyber

Page 1: ......

Page 2: ...bps 28Kbps Equalizer Flat Rock Pop Jazz Classic Dance Heavy Disco Soft Live Hall ID3 Tag ID3v1 Photo Display JPG format Video Out NTSC PAL Speaker Built in Memory Support Built in memory External SD MMC Cards Battery Li Polymer rechargeable Output Power Output Power Output Power 5mW 5mW at 32 ohm Frequency Response 20Hz 20kHz Signal to Noise Ratio 85dB USB Interface USB 2 0 Full Speed Supported OS...

Page 3: ...40C 2 Avoid placing the device to direct sun light 3 Insert the SD MMC card ONLY when the device is turned off Failure to so may result in data loss or damage to the circuit 4 Always back up your important files The manufacturer is not liable for any loss of data 5 Do not connect the USB port while the device is playing media files Product Illustration Zling Studio Portable Media Player A Hold Switc...

Page 4: ...by via the bundled USB cable The MSDC screen will appear on the device The computer will now detect the device and 2 removable drives will appear One is the internal memory of the device and the other is the external memory respectively 5 Now you can drag and drop the video files or audio files to the appropriate folders in the device For optimal result please use Media Conversion Program to convert...

Page 5: ...o asf CD Tracks to mp3 or an image file to jpg 2 Step 1 Select the conversion mode 2 Select audio sample rate only for Media Mode 3 Select video quality only for Media Mode 4 Browse and select the input file include the full file path 5 Preview the input file if you want ...

Page 6: ... if you want 9 Play the output file when conversion ended if you want 10 End program if you want to exit Now you have successfully converted the media files into the player To Play Video 1 In the main menu screen select VIDEO and click OK to confirm and enter 2 In the video selection screen select the video file that you wish to play and press OK to start playing To pause the video simply press OK but...

Page 7: ...ENU button To Display Pictures 1 In the main menu screen select PHOTO and click OK to confirm and enter 2 In the Picture selection screen select the picture file that you wish to display and press OK to start 3 The player supports Picture Bridge function In the full screen picture display press B to bring up the Printing menu Select either 3R 4R or print default and click OK to execute 4 During the ...

Page 8: ...rd audio signal only via AV in AV in video audio In the main menu screen select RECORD and press OK to confirm and enter 1 Select Av in and press OK 2 Plug in the bundled AV cable to the device and connect the RCA connectors to your video device For example TV 3 Press OK to start recording The yellow icon on the upper left corner will start blinking to red to indicate the recording is in progress 4...

Page 9: ... is able to perform scheduled recording function by setting the internal recording timer 1 Go to Setup menu and press OK 2 Select OnTimeRec and press OK 3 Switch to ON by pressing Up button 4 Set Hour and Min for which you wish the player to start recording automatically 5 In the Length section set how many minutes you wish the player to record And click OK to confirm 6 Press Menu button to exist T...

Page 10: ...n Be sure to turn off the Key Tone if you want hear from the earphones Storage Set to use either Nandflash or external memory card Format Set to format the memory Important All data will be lost after formatting Auto Off Set the time to automatically power off after certain period of Auto Off Set the time to automatically power off after certain period of Auto Off idle Language Available in English...

Page 11: ...l memory is in used it will display its remaining capacity in priority If you want to display the internal memory you will need to set it in the SETUP screen Supported Media Format Video Audio File extension Supported by device Supported by PC conversion 2 conversion 2 mpg No Yes avi Yes 1 Yes asf Yes 1 Yes vob No Yes wmv No Yes dat No Yes File extension Supported by device Supported by PC convers...

Page 12: ...ion Supported by device Supported by PC conversion 2 jpg Yes 1 Yes bmp No Yes tiff No Yes gif No Yes Note 1 Only applies to some specific encode format 2 Must comply with the decode encode requirement of the conversion program ...

Reviews: