First-time Setup
3.10
Connecting a PTZ Camera
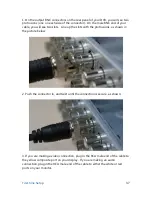
1. Locate the RS-485 connectors on the back panel of your DVR.
2. Locate the positive wire on your PTZ camera. Please refer to the
manual provided with your camera to determine the wires.
3. Push the orange tab labeled 'A' on the PTZ port (with your finger
nail or pen) in order to open the spring-loaded connection.
4. With the orange tab pushed in, insert the bare positive wire from
your camera about 1/8-1/4 inches into the port.
5. Let go of the orange tab and the port should clamp onto the cable. Give the
wire a light tug to ensure that it is securely clamped.
6. Repeat steps 2-5 for the negative wire, and the orange tab labeled 'B'.
Mounting the Camera
IMPORTANT:
Please complete the instructions for "Connecting the cameras to
the DVR" prior to mounting your cameras.
The following steps provide instructions to mount the camera on a drywall. Your
installation may vary depending on the specific camera purchased.
You will need:
1) Surveillance Camera (not provided)
2) Mounting Bracket (not provided)
3) Screws with matching anchor screws (not provided)
4) Power drill (not provided)
1. Choose a location.
Find a suitable location to mount your IP camera.
2. Mark screw locations.
Using a pencil and the holes in the mounting bracket
as a guide, mark three holes against the wall where you wish to mount the
camera.
3. Drill holes.
With a drill bit slightly smaller than the green plastic anchor screw,
drill a 1" deep hole in each of the three marked locations.
4. Insert anchor screws.
Place the anchor with the closed end evenly into the
hole. Gently tap the open end until the anchor is almost flush with the wall.
5. Attach the camera to the mounting bracket (if applicable).
Fasten your
camera to the mounting bracket using either the hole found on the top or
Summary of Contents for DX-SIN8
Page 1: ...1...
Page 2: ...2...
Page 13: ...Product Introduction 2 9 Front Panel...
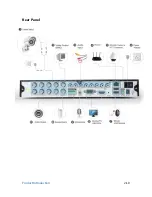
Page 14: ...Product Introduction 2 10 Rear Panel...

