background image

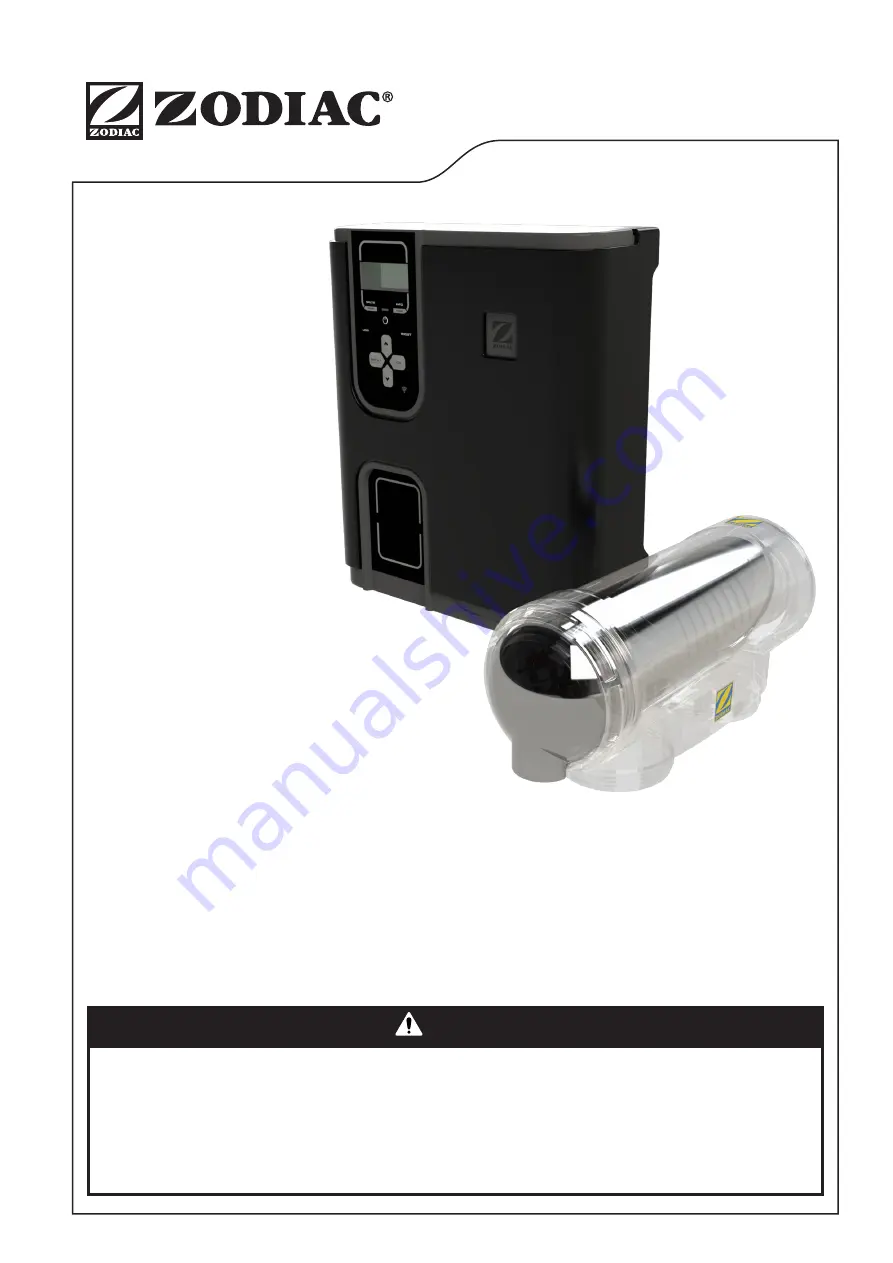
eXO

® 

|  Clearwater Duo™

(all models)

(all models)

H0633500_REVB

INSTALLATION MANUAL

FOR YOUR SAFETY - This product must be installed and serviced by a licensed electrician in 

accordance with the latest enforced version of AS/NZ 3000  and any other applicable local installation 

codes. Before installing this product, read and follow all warning notices and instructions that 

accompany this product. Failure to follow warning notices and instructions may result in property 

damage, personal injury, or death. Improper installation and/or operation will void the warranty.
Improper installation and/or operation can create unwanted electrical hazard which can cause serious 

injury, property damage, or death.

 WARNING

Summary of Contents for Clearwater Duo

Page 1: ...local installation codes Before installing this product read and follow all warning notices and instructions that accompany this product Failure to follow warning notices and instructions may result...

Page 2: ...rvice in your country Australia NZ Asia and Sth Pacific go to www zodiac com au South Africa go to www zodiac co za DATE OF INSTALLATION INSTALLER INFORMATION INITIAL PRESSURE GAUGE READING WITH CLEAN...

Page 3: ...re and Balance the Pool 15 6 1 pH Regulation Principle 15 6 2 Water Chemistry Table 15 6 3 Stabilizer Cyanuric Acid 15 Section 7 Operation 16 7 1 User Interface Overview 16 7 2 Initial start Up 16 Sec...

Page 4: ...ower water temperatures are recommended for young children and when spa use exceeds 10 minutes b Since excessive water temperatures have a high potential for causing fetal damage during the early mont...

Page 5: ...spa or hot tub The use of alcohol drugs or medication can greatly increase the risk of fatal hyperthermia in hot tubs and spas Water temperature in excess of 38 C may be hazardous to your health Atte...

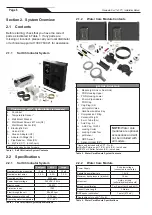
Page 6: ...acket d Wall Mount Screws 7 mm X2 e Wall Mount Anchor X2 f Electrolytic Cell g Unions X2 h Glue on Adapter X2 i Adapter O Rings X2 j Pipe Reducer White X2 k Zip Ties X7 not shown Items not included wi...

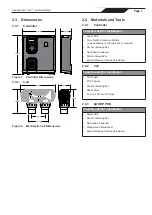
Page 7: ...llation Power Drill 7 mm Drill Bit Hammer Drill Bit only necessary to drill into brick or concrete Pencil or Marking Pen Flat Head Screwdriver Pozidiv Screwdriver Small Flathead or Slotted Screwdriver...

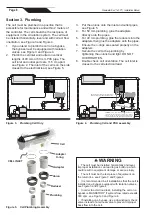
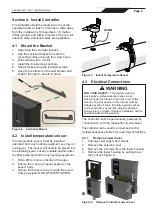
Page 8: ...ight DO NOT OVERTIGHTEN 8 Double check cell orientation The cell inlet is closest to the cell electrical lead Figure 3 Plumbing Cell Only pH Minus CAUTION Never store acid directly underneath any equi...

Page 9: ...ilter pump and before any heating equipment 1 Drill a 9 mm hole in the top of the pipe 2 Ensure the o ring is properly seated on the sensor body 3 Secure the sensor and o ring with the screw clamp pro...

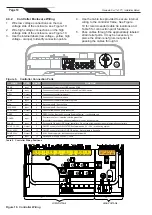
Page 10: ...pH or pH ORP sensing PCBA PUMP Input Connection of the pH pump for pH Link and Dual Link modules CELL Output 1 Connection of the electrolysis cell UI Output Connection of the user interface TEMP Input...

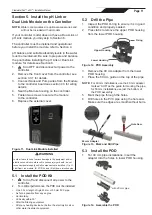
Page 11: ...do not reconnect power supply until all components are installed 1 pH Link Dual Link module 2 POD kit and 3 pH down injection pipe 5 1 Install the POD Kit 1 Turn off and disconnect all power to the c...

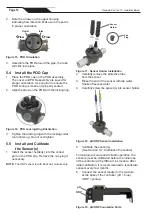
Page 12: ...rate the Sensor s 1 Install the sensor holder s into the correct port on the POD cap Remove the cap plug if necessary NOTE The ORP sensor is with Dual Link module only Sensor Holder Cap Plug Figure 17...

Page 13: ...m the pump outlet right 4 Thread tubing through the hole in the cap connect the tubing to the nipple on the module and reattach the threaded cap NOTE For a better fit soften both ends of the tubing by...

Page 14: ...dispose of the solution according to the applicable code s or standard s in effect in the country of use 7 Wash the sensor in the diluted hydrochloric acid solution for 2 minutes 8 Rinse sensor in cl...

Page 15: ...rbonate Add sodium bicarbonate Add calcium chloride Add cyanuric acid Add salt or minerals x To Decrease Add muriatic acid Add muriatic acid or dry acid Partially drain and refill pool Partially drain...

Page 16: ...ssing The set value is valid until the next modification 7 2 1 System Power 1 Press to enter Standby mode 2 Press again to start chlorination and filtration 3 Press and hold for 3 seconds to turn the...

Page 17: ...hen the cover is closed The Cover mode message and the output percentage are displayed on the screen 23 04 ON COVER MODE 10 Cover mode will stop as soon as the cover is completely open If the controll...

Page 18: ...The following pump models are compatible FloPro VS Flopro VS AUT NOTE Not compatible with Zodiac e3 1Hp pump or any any other manually operated variable speed pump that does not have an RS485 communi...

Page 19: ...n is stopped during the backwash mode To avoid emptying the pool the backwash mode automatically stops after 5 minutes The variable speed pump RPM is by default set at 3450 rpm max speed This can be c...

Page 20: ...ght then press 3 Use to select Assign Lights then press 4 Use to select Aux 2 then press 5 Use to select Yes then press 6 Use to select White Light or Color Light then press 7 Press to exit AUX LIGHTS...

Page 21: ...ed with a remote On Off contact serially connect to the flow switch present on all heating systems 1 Connect a 2 x 0 75 mm2 electric wire not supplied of the appropriate length to the green Aux 2 conn...

Page 22: ...10 Press while Go to Step 2 is selected 11 Rinse the pH sensor with tap water 12 Insert the pH sensor into the pH 4 buffer solution 13 Press while Start is selected 14 Press while Continue is selected...

Page 23: ...acid into water do NOT pour water into acid Dispose of the solution according to the appliable code s or standard s in effect in the country of use 1 Press 2 Use to select pH Setup then press 3 Use t...

Page 24: ...se to select the hour for the filtration on time then press 6 Use to select the minutes for the filtration on time then press 7 Use to select the hour for the filtration off time then press 8 Use to s...

Page 25: ...d filter pump and chlorinator program has been set 23 04 ON T 23 04 ON P 9 5 6 AUX Lights Programming 1 Press 2 Use to select Programming then press 3 Use to select AUX Lights then press 4 Use to sele...

Page 26: ...s are still valid Pressing will take priority over Slave mode If a Dual Link module is installed the ORP function is overridden by the slave mode The pH regulation is still valid LOW COVER BOOST modes...

Page 27: ...Service Pairing time is too long when connecting to the Home Wi Fi Network The product has a maximum time of 2 minutes 30 seconds to connect to the home Wi Fi network then the connection attempt ends...

Page 28: ...ion 13 Winterizing The chlorinator has a protective system which will limit sanitizer production during unfavorable operating conditions such as cold water or lack of salt Active winterizing leaves th...

Page 29: ...VER HEAT INFO indicator lit The temperature inside the control box is too high chlorination is slowed 85 C then stopped 90 C if the temperature does not fall back down in order to protect the electric...

Page 30: ...r Check the operation of the sensor using a sensor tester ask your pool specialist Clean and calibrate the sensor Drain the pool using the main drain in order to lower the cyanuric acid concentration...

Page 31: ...Page 31 Clearwater Duo eXO Installation Manual NOTES...

Page 32: ...registered trademark of Zodiac International S A S U used under license All other trademarks are the property of their respective owners H0633500_REVB Fluidra Group Australia Pty Ltd 219 Woodpark Roa...

Reviews: