


9
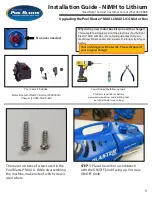
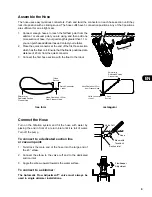
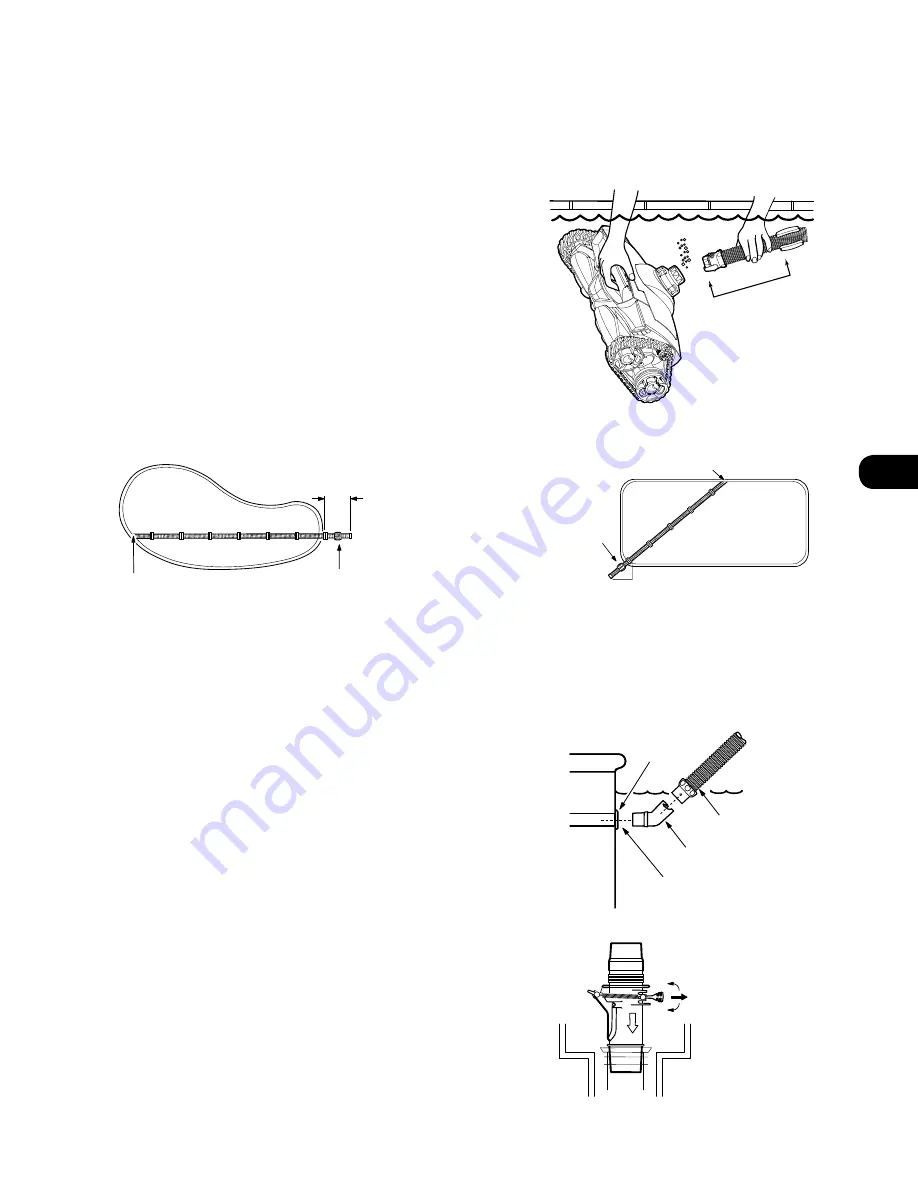
Assemble the Hose
The hose uses easy twist-lock connectors. Push and twist the connector on each hose section until they
lock into position with a clicking sound. The hose cuffs have 3 connection positions. Any of the 3 positions
are sufficient for an air-tight seal.
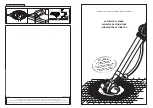
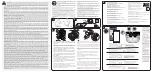
1. Connect enough hoses to reach the farthest point from the
skimmer or vacuum point you are using and then add one
more section of hose. If your pool length is greater than 11 m,
you can purchase additional hoses. Contact your retailer.
2. Place the quick connector at the end of the first hose section
which has the float on it. Ensure that the float is positioned at a
distance of 23 cm from the quick connector.
3. Connect the first hose section with the float to the robot.
1 Hose
Section
Skimmer or
Dedicated Suction
Cleaner Line
Skimmer or
Dedicated Suction
Cleaner Line
1 Hose
Section
Hose Float about 23 cm
from Cleaner Head
Hose Float about 23 cm
from Cleaner Head
Quick Connector
+ robot
Quick Connector
+ robot
1 Hose
Section
Skimmer or
Dedicated Suction
Cleaner Line
Hose Float 9”
from Cleaner Head
23 cm
Skimmer or
Dedicated Suction
Cleaner Line
1 Hose
Section
Hose Float 9” from
Cleaner Head
1 Hose
Section
Skimmer or
Dedicated Suction
Cleaner Line
Skimmer or
Dedicated Suction
Cleaner Line
1 Hose
Section
Hose Float about 23 cm
from Cleaner Head
Hose Float about 23 cm
from Cleaner Head
Quick Connector
+ robot
Quick Connector
+ robot
free form
rectangular
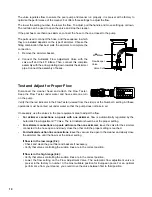
Connect the Hose
Turn on the filtration system and fill the hose with water by
placing the end in front of a return inlet until it is full of water.
Turn off the pump.
To connect to a dedicated suction line
or vacuum point:
1. Twist lock the male end of the hose into the large end of
the 45° elbow.
2. Connect the elbow to the valve cuff and to the dedicated
suction inlet.
3. Angle the elbow upward towards the water surface.
To connect to a skimmer:
The Automatic Flow Adjustment™ valve must always be
used in single skimmer installations.
Suction inlet
Elbow with
Twist-lock
Hose
Valve Cuff
FlowKeeper
Adjustment
EN