Installation
Nature2 Express easily installs on your pools return line. You will need to use a cordless or electric drill to install
the vessel.
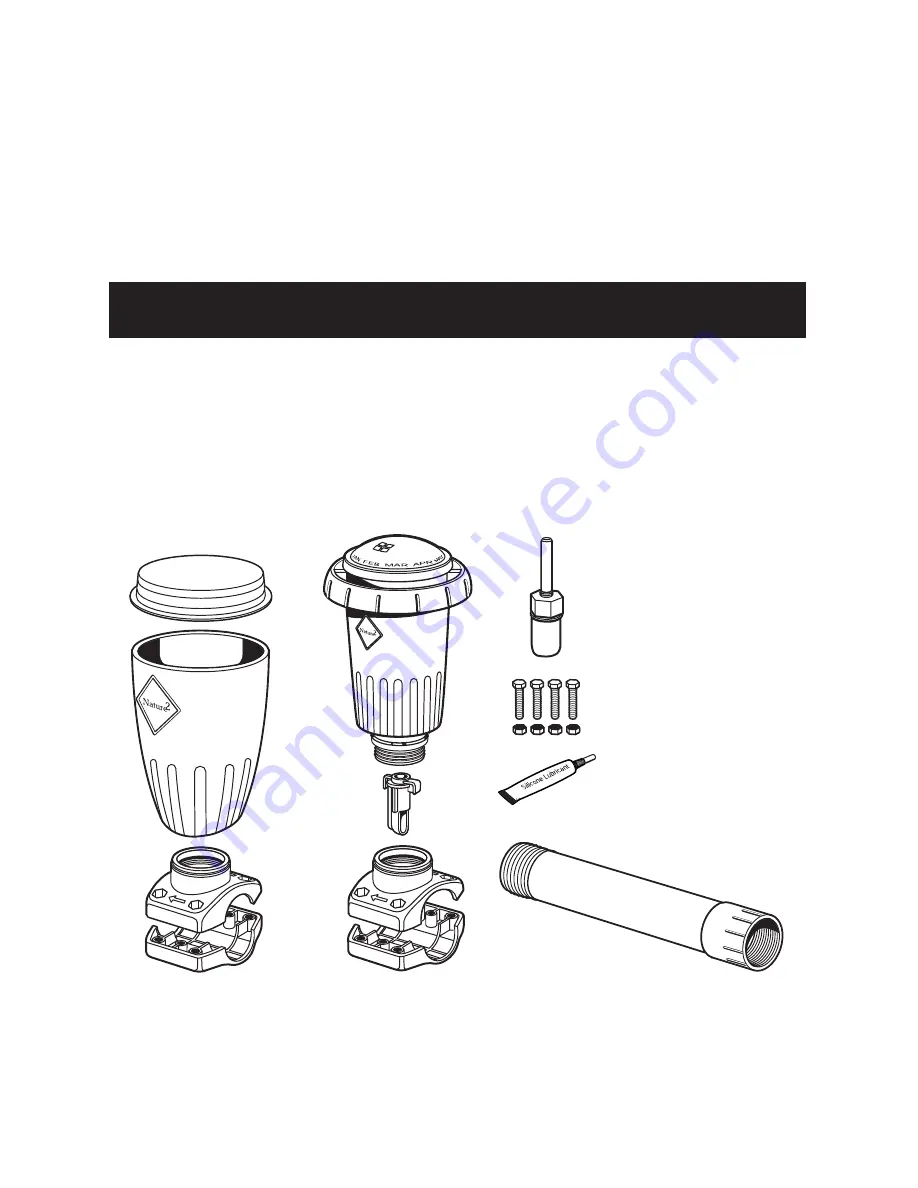
Nature2 Express consists of the following parts: (1) 2” clamp assembly w/gasket (I/G only), (1) 1 1/2” clamp
assembly w/gasket, (1) outer housing, (1) flow diverter, (1) Express cartridge, (4) nuts and bolts, (1) winterizing
cap, (1) hole saw and (1) silicone tube, (1) rigid PVC adapter (A/G only)
1 Decide where
to install the Nature2 vessel. It must be installed:
• after the filter on the main return to the pool,
• before or after the heater (downstream from a solar heating system),
• before any chemical dispenser or the discharge of an off-line chemical dispenser.
Contents
Page
Safety Instructions . . . . . . . . . . . . . . . . . . . . . . . . . . . . . . . . . . . . . . . . . . . . . . . . . . . . . . . . . . . . . . . . . . . . . .1
Installation . . . . . . . . . . . . . . . . . . . . . . . . . . . . . . . . . . . . . . . . . . . . . . . . . . . . . . . . . . . . . . . . . . . . . . . . . . . .2
Provide Filtration/Circulation . . . . . . . . . . . . . . . . . . . . . . . . . . . . . . . . . . . . . . . . . . . . . . . . . . . . . . . . . . . . . .6
Troubleshooting . . . . . . . . . . . . . . . . . . . . . . . . . . . . . . . . . . . . . . . . . . . . . . . . . . . . . . . . . . . . . . . . . . . . . . . .6
Replacing the Nature2 Express Cartridge . . . . . . . . . . . . . . . . . . . . . . . . . . . . . . . . . . . . . . . . . . . . . . . . . . . . .6
Winterizing . . . . . . . . . . . . . . . . . . . . . . . . . . . . . . . . . . . . . . . . . . . . . . . . . . . . . . . . . . . . . . . . . . . . . . . . . . .7
Limited Warranty . . . . . . . . . . . . . . . . . . . . . . . . . . . . . . . . . . . . . . . . . . . . . . . . . . . . . . . . . . . . . . . . . . . . . . .8
2


