


Figure 3
Figure 4
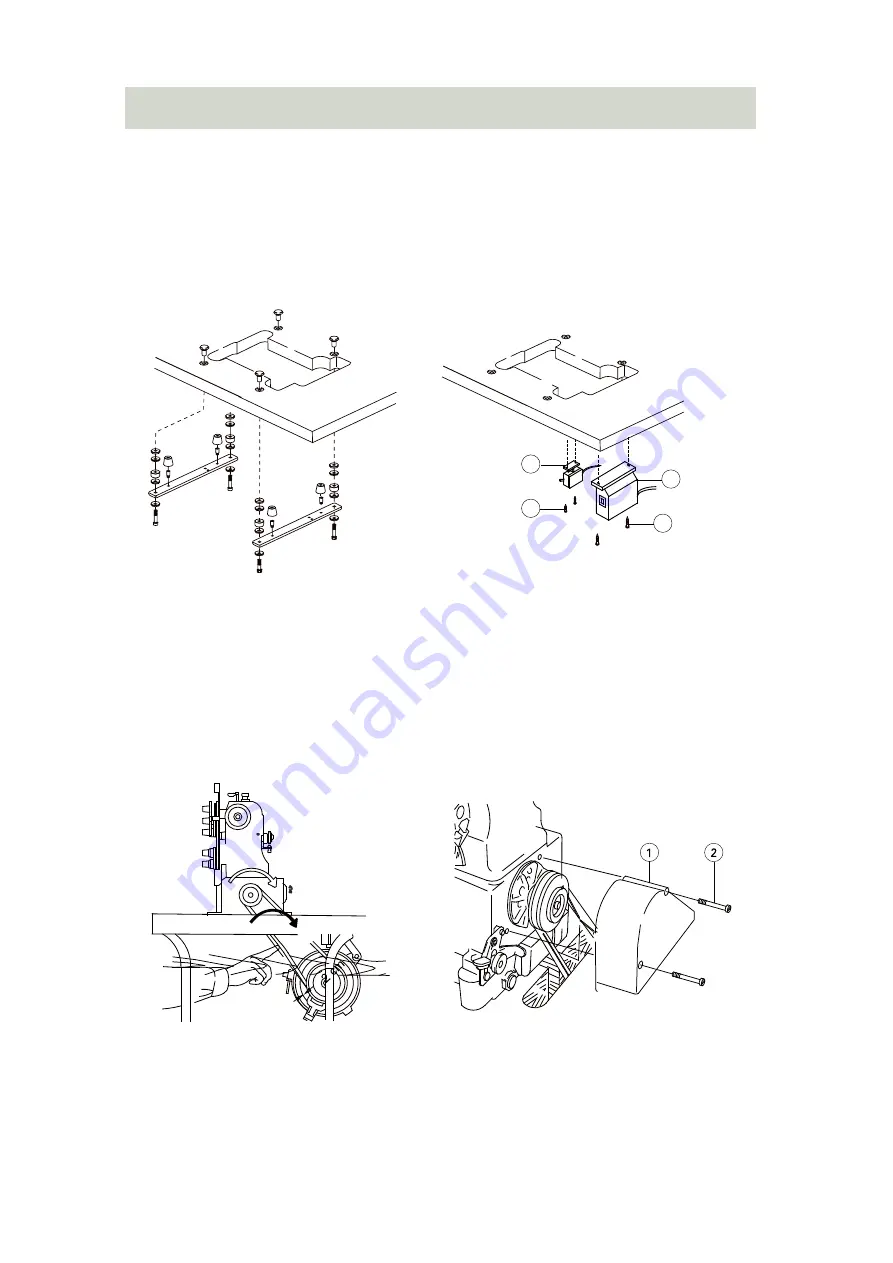
Connect the machine handwheel to the clutch motor with the v-belt. Adjust the
that it can be about 20 mm bent inward when you press
the middle of it and make sure the motor turning direction is clockwise,as shown
Install the belt cover according to
.
Figure 4
Assemble the machine support
components in Figure 2.
Install the control box ‘A’ by
screw 'B', and the pedal con-
troller ‘C’ by screw 'D'.
For ESDD motor
A
B
C
D
1.3.
(Installing the sewing machine)
_` X
W {
。
2
q
à
P Z
。
! " #
!,
$ % &
û
'
,
&
l
V
V
m
( )
G
*
+ ,
,
.
g F Z
(
(
,{
。
2 0 m m
3
0
Á
§ 。
4
tension of the v-belt so
on Figure 3.
Figure 2
X Y Z
Z
1 2
q
3 4
A
B
C
D
5
T q
3 4
。
-7-
6
Summary of Contents for ZJW663A
Page 5: ...5 1 3 Installing the sewing machine _ X Table Cut Out Drawing Figure 1A D Clutch Motor Z...
Page 20: ...2 1 A Machine bed frame A 4 5 4 7 21 8 18 9 9 10 11 12 1 13 19 6 3 20 2 16 14 15 22 17 20...
Page 54: ...5 6 3 4 2 1 7 8 13 11 12 9 10 14 15 2 13 HR device 54...
Page 60: ...10 9 5 12 11 14 6 13 7 2 3 4 8 1 15 2 16 ESDD Motor structure 60...
Page 64: ...2 18 Integrated Machine Specific Parts 64...


