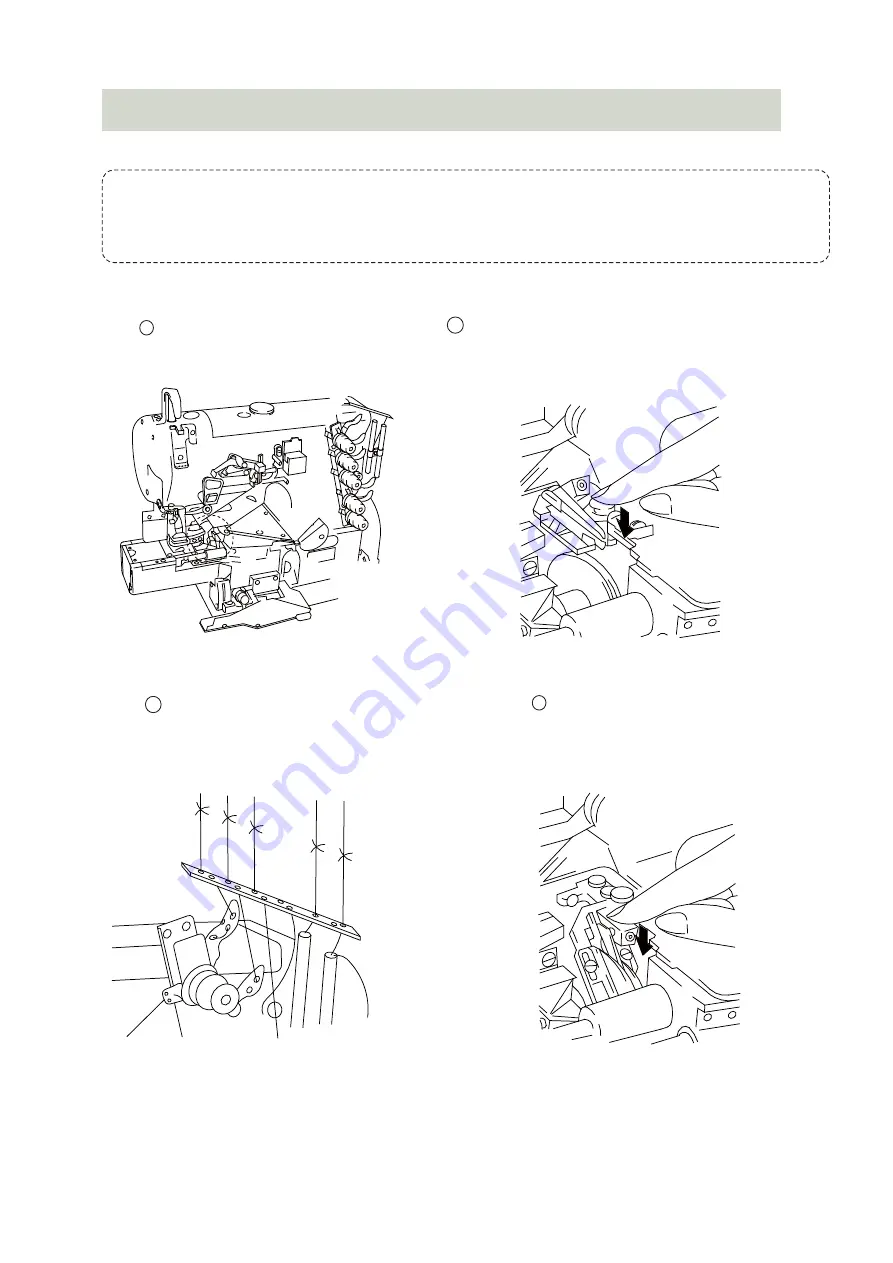
Open the eye guard and the covers.
Knot the preset and the new thread
together to thread the machine.
Replace the looper thread take-up
after the machine threading.
Press down the lever, as indicated in Figure 14.
The looper thread take-up comesout.
Figure 9
Figure 11
Figure 10
Figure 12
Refer to the sewing type you need for correct threading. Any incorrect threading
may cause thread brake, uneven stitches or skip stitches.
£
` a
¥ ¦
b
,N
5
c
。
ü
d :
g F n g 。 Ù Ú t n g
g
l
h i T
、
t
j l
¯
m
。
CAUTION:
%
@
% n
,{
,G M
o m
«
p
。
1 0
1
2
q
D
r
& q
s
> [
F a
。
3
4
9
t u
G
w
x y r {
。
1.5.
Before operating
Threading
kqx(
) }(
)
-9-
Summary of Contents for ZJW663A
Page 5: ...5 1 3 Installing the sewing machine _ X Table Cut Out Drawing Figure 1A D Clutch Motor Z...
Page 20: ...2 1 A Machine bed frame A 4 5 4 7 21 8 18 9 9 10 11 12 1 13 19 6 3 20 2 16 14 15 22 17 20...
Page 54: ...5 6 3 4 2 1 7 8 13 11 12 9 10 14 15 2 13 HR device 54...
Page 60: ...10 9 5 12 11 14 6 13 7 2 3 4 8 1 15 2 16 ESDD Motor structure 60...
Page 64: ...2 18 Integrated Machine Specific Parts 64...