C
HAPTER
10 P
ULSE
CO-O
XIMETRY
(S
P
O2, SPCO,
AND
S
P
M
ET
)
10-4
www.zoll.com
9650-0806-01 Rev. D
SpO
2
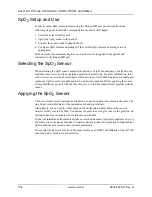
Setup and Use
To take accurate SpO
2
measurements using the Propaq MD unit, you must perform the
following steps, each of which corresponds to a section in this chapter.
1. Select the correct SpO
2
sensor.
2.
Apply the SpO
2
sensor to the patient.
3.
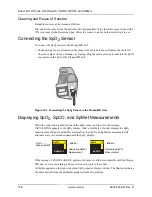
Connect the sensor to the Propaq MD unit.
4.
Configure SpO
2
alarms and settings (if the current SpO
2
alarms and settings are not
appropriate).
Pulse oximetry measurements begin as soon as the sensor is applied to the patient and
connected to the Propaq MD unit.
Selecting the SpO
2
Sensor
When selecting the SpO
2
sensor, consider the patient’s weight, the adequacy of perfusion, the
available sensor sites, and the anticipated duration of monitoring. For more information, refer
to the
Accessories
section of this chapter, which provides a list of ZOLL-approved reusable and
single-use SpO
2
sensors for adult, pediatric, and neonate patients. Before applying the sensor,
always familiarize yourself with the
Directions for Use
that the manufacturer provides with the
sensor.
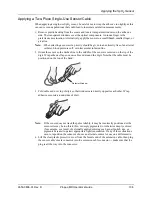
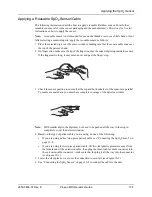
Applying the SpO
2
Sensor
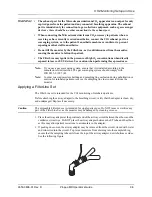
Choose a site that is well perfused and restricts a conscious patient's movements the least. The
ring finger or middle finger of the nondominant hand is preferred.
Alternatively, you can use the other digits on the nondominant hand. Be sure the sensor's
detector is fully covered by flesh. You can use the great toe or long toe (next to the great toe) on
restrained patients or patients whose hands are unavailable.
To prevent interference from ambient light, ensure that the sensor is properly applied, and cover
the sensor site with opaque material, if required. Failure to take this precaution in high ambient
light conditions may result in inaccurate measurements.
Do not select an SpO
2
sensor site on the same arm/leg as an NIBP cuff. Inflation of the cuff will
cause the SpO
2
values to read incorrectly.
Summary of Contents for Propaq MD
Page 1: ...Propaq MD Operator s Guide 9650 0806 01 Rev D...
Page 40: ...CHAPTER 1 GENERAL INFORMATION 1 28 www zoll com 9650 0806 01 Rev D...
Page 60: ...CHAPTER 2 PRODUCT OVERVIEW 2 20 www zoll com 9650 0806 01 Rev D...
Page 74: ...CHAPTER 4 TRENDS 4 4 www zoll com 9650 0806 01 Rev D...
Page 84: ...CHAPTER 5 ALARMS 5 10 www zoll com 9650 0806 01 Rev D...
Page 94: ...CHAPTER 6 MONITORING ECG 6 10 www zoll com 9650 0806 01 Rev D...
Page 104: ...Chapter 7 Monitoring Respiration Resp and Heart Rate HR 7 10 www zoll com 9650 0806 01 Rev D...
Page 120: ...CHAPTER 8 MONITORING NON INVASIVE BLOOD PRESSURE NIBP 8 16 www zoll com 9650 0806 01 Rev D...
Page 154: ...CHAPTER 11 MONITORING INVASIVE PRESSURES IBP 11 10 www zoll com 9650 0806 01 Rev D...
Page 160: ...CHAPTER 12 MONITORING TEMPERATURE 12 6 www zoll com 9650 0806 01 Rev D...
Page 186: ...CHAPTER 14 12 LEAD ECG INTERPRETIVE ANALYSIS 14 16 www zoll com 9650 0806 01 Rev D...
Page 212: ...CHAPTER 17 ADVISORY CPR PROTOCOL DEFIBRILLATION 17 6 www zoll com 9650 0806 01 Rev D...
Page 222: ...CHAPTER 18 EXTERNAL PACING 18 10 www zoll com 9650 0806 01 Rev D...
Page 240: ...CHAPTER 21 PATIENT DATA 21 6 www zoll com 9650 0806 01 Rev D...
Page 268: ...CHAPTER 22 COMMUNICATIONS 22 28 www zoll com 9650 0806 01 Rev D...
Page 284: ...CHAPTER 24 MAINTENANCE 24 12 www zoll com 9650 0806 01 Rev D...
Page 326: ...ACCESSORIES B 6 www zoll com 9650 0806 01 Rev D...

