G U I T A R S
G U I T A R S
37
36
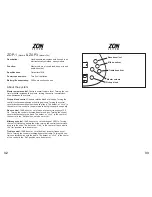
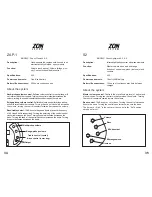
Midrange control.
12dB boost or cut of midrange at a frequency
selected by the mid sweep control. Turning the control clockwise boosts
the mids. Turning the control counterclockwise cuts the mids. The
detent, or “click,” in the center of the control is the “flat” position, zero
boost or cut.
Midrange sweep control.
Provides a variable Q that is narrow in the low
frequencies and increasingly broad in the higher frequencies. Turning the
control from the fully counterclockwise position to the fully clockwise posi-
tion references (sweeps) frequencies from 200 Hz to 1,000 Hz. The
detent, or “click,” in the center of the knob’s rotation sets the sweep at
approximately 450 Hz. Rotate this control in either direction to sweep the
frequency band until you find the desired frequency to boost or cut.
Piezo (Icetone) control.
Allows the blending of the signal from the piezo
elements (built into the individual monoliths) with the optical signal. Adding
Icetone enhances presence and brightness. Turning the control clockwise
increases the amount of piezo signal, while turning the control counter-
clockwise reduces the amount of piezo signal. Icetone cannot be selected
separately.
Power status LED.
This red LED illumi-
nates when a 1/4" plug is inserted into the
output jack. This indicates the system is
powered on. The battery typically provides
15 hours of playing time on a single charge.
Note:
Two hours of playing time remain
after this LED goes dark.
Power management LED.
Located on the rear cover plate. Operates only
when charger is plugged in. Red indicates that the battery is charging.
Green indicates a full charge. A full charge is achieved in one hour.
Note:
It is a normal function of this LED to show red each time the charger
is plugged in, even if the battery has just
been charged.
Charger jack.
Insert the wall charger’s
output plug here to recharge the internal
NiMH battery or to use the AC power
adapter while playing.
Calibration instructions for S2 Lightwave
This system utilizes a beam of infrared light to sense string vibration, so
proper string/light-receptor alignment is necessary for optimum perform-
ance. Calibration of the system is typically required when new strings
are installed or when the playing action is modified.
Note:
Adjust the string height (action) and set the intonation
before
cali-
brating the system.
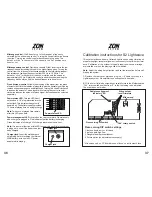
1.
Remove the rear cover plate and plug in a 1/4" cable to turn on the
Lightwave system. No amplifier connection should be made.
2.
With a 2mm flat-blade screwdriver, carefully rotate the Motherboard’s
“CAL” rotary switch position from “0” to the first string to be adjusted.
The order does not matter.
Red/green alignment
indicator LED
String output
level trimmers
Piezo voicing DIP switch
“CAL” rotary switch
Mid sweep*
* Mid sweep only on PC board when not found on instrument’s face.
Charger jack
Output jack
Piezo voicing DIP switch settings
1. Icetone treble-only or full-band
2. Icetone gain high/low
3. Daughterboard present/absent
4. Future option (no adjustment necessary)
Power status LED


