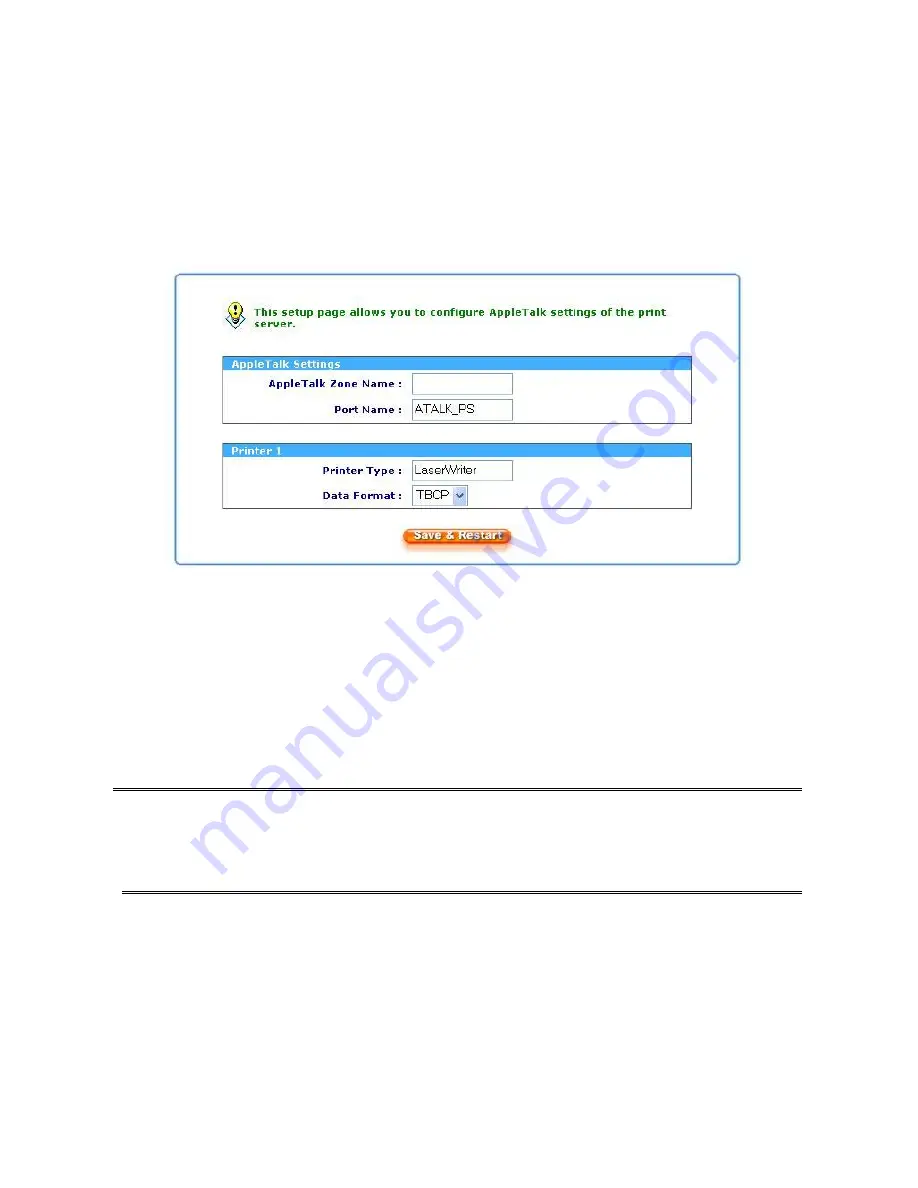
The print server can print jobs submitted from Macintosh workstations connected to an
Ethernet using AppleTalk protocol. The basic configuration is for the print server in an
AppleTalk environment is performed simply by opening the
Chooser
window and selecting a
printer that is connected to the print server.
1.Click
Setup
, it appears the sub-menu.
2.Click
AppleTalk
, it as shown in the following picture.
3.
Zone Name:
In this option, type an AppleTalk Zone name that you want the print server to
belong to or leave it in default
(This enables the print server automatically search and link
itself to the default zone that is set on the AppleTalk router, if found)
. We also assume that
at least an AppleTalk Zone exists on the network. If no any zone exists, the print server
itself displays the zone name as an asterisk (
*
) in the current
AppleTalk Status
of the print
server in the web browser.
4.
Port Name:
In this option, type a name for identification purpose or just leave it in default
(
recommended
).
Note:
The default print server’s Chooser name is as shown as follows:
<
ATALK_PS
>
-xxxxxx-1
, where xxxxxx represents the last six digits of the device’s
Node ID. For example: ATALK_PS-40EEED-1. You may also change the <
ATALK_PS
> to
a name you like for identification purpose in this option. The print server will append the last
six digits to the name you specify.
5.
Printer Type
: In this option, the
LaserWriter
of printer type by default
(
recommended
).
6.
Data Format:
In this option, data format includes
ASCII
,
TBCP
and
BCP
.
39


