13
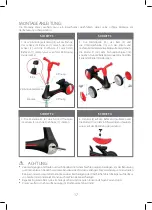
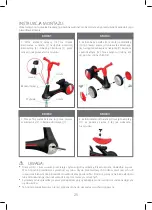
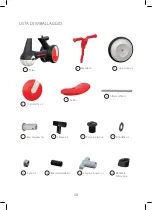
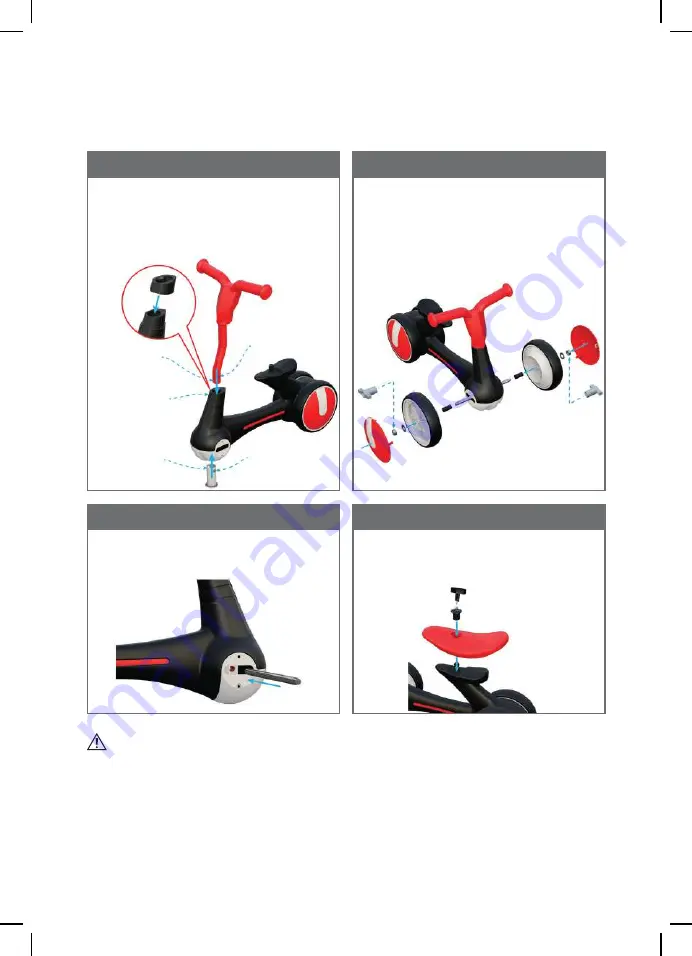
1. Put the fastener (14) on the top of frame’s
(1) steering tube, then insert the handlebar (2)
and turning sleeve (7) through the frame (1)
as described in the illustration.
3. Insert the shaft sleeve (12), wheel (3) and
washer (10) respectively to the left and right
side of the iron shaft (6), then lock the nut (11)
with the hex wrench (13). Now fasten the rim
(4) to both side of the wheels (3).
2. Insert the iron shaft (6) through the holes
of handlebar (2) and turning sleeve (7).
4. Put the saddle (5) to the frame (1) and lock
the nut (11) with the S wrench (8) as described
in the illustration.
ASSEMBLY INSTRUCTIONS:
This mini walking bike must be assembled by adult to make sure it is assembled in the correct manner
before using.
STEP 1
STEP 3
STEP 2
STEP 4
groove
fastener
convex
hole
hole
ATTENTION:
•
Wipe with a damp cloth using soap water only to remove dirt and dust. Dry thoroughly before use.
This will prolong the useful life of the product. Using industrial cleaners or solvents may damage
surface areas. Using alcohol or ammonia-based cleaners may also damage plastic components.
•
Routinely check that all parts are securely fastened and are in good working condition before each use.
•
This mini walking bike is not to be used in traffic.
Summary of Contents for EASY WAY
Page 2: ...CZ 3 SK 7 EN 11 DE 15 HU 19 PL 23 IT 27 SLO 31 ...
Page 35: ...35 ...


