2
Control Camera by Network
Connect to network
Connect the LAN port of camera to the router or switch.
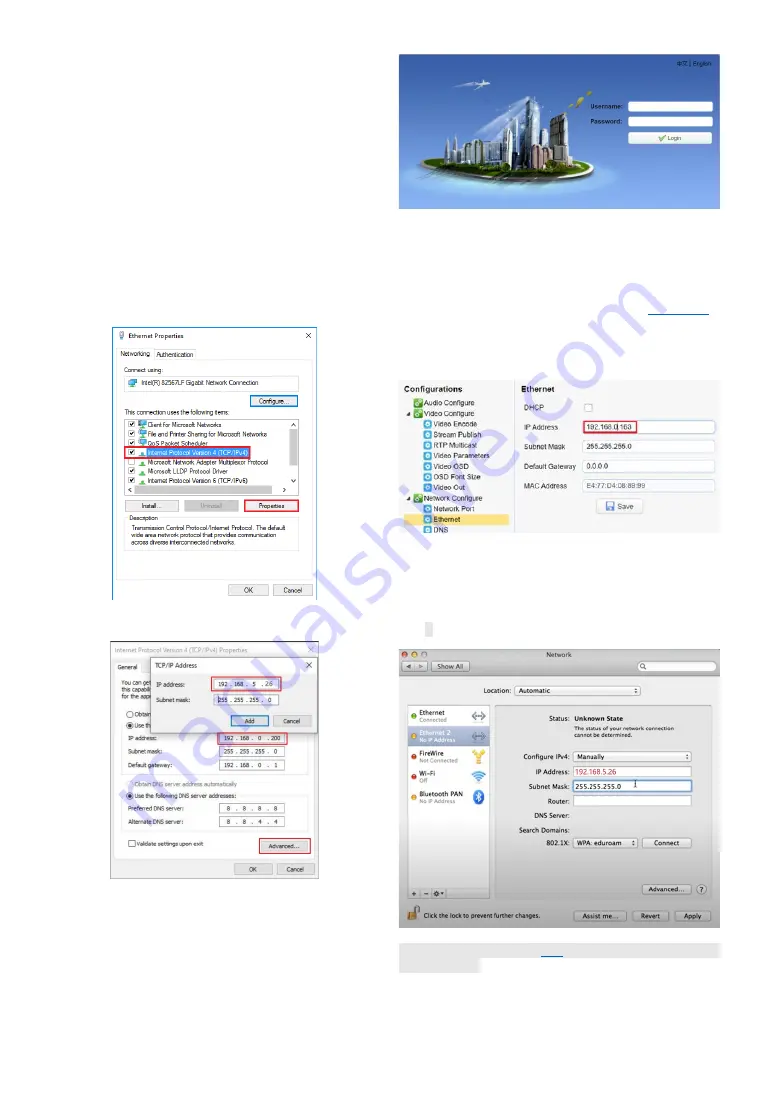
In order to access to camera, the IP address of PC has to be in the
same IP segment of camera, like 192.168.5.x. The camera factory
default IP address is 192.168.5.136 with DHCP off.
NOTE:
The current IP address of camera shows at the top-left corner of the
video screen for a couple of seconds when power on each time.
Change PC IP setting
Suppose your LAN IP segment is 192.168.0.x.
1) Press
Win
+
R
2) Type
ncpa.cpl
and
Enter
3) Right-click
Local Network connection
and select
Properties
.
4) Change the IP address of PC to static IP address
NOTE: the static IP address cannot be the same with any other computers or
devices in the same network.
5) Click Advance, add IP 192.168.5.26, for example.
Web login and control
Now, you can access the camera, open web browser, type IP
address 192.168.5.163, then
Enter
to go to the camera login page.
Select language:
English
User name:
admin
Password:
admin
At this time, you can see the preview of camera video. Do the pan,
tilt and zoom control via LAN. For detail advanced network and NDI
setting and control, please refer to chapter 4 of the
Change the IP of camera
For future convenient, Change the IP of camera to the same IP
segment of your LAN, for example 192.168.0.163.
NOTE: Above IP address cannot be the same with any other computers or
devices in the LAN. If forget the IP one day, note that it will show on the left-
top corner of video in seconds when power on each time.
MAC PC IP setting
Click + button on the left-bottom corne
r to add
2nd Ethernet IP
at
192.168.5.x segment, then you can access the camera.
for any reasons.
ENGLISH


