background image


User Manual 


U.S. Cellular

®

 Customer Service 1-888-944-9400 

Summary of Contents for zpad

Page 1: ...1 User Manual U S Cellular Customer Service 1 888 944 9400 ...

Page 2: ...h the utmost care to ensure the accuracy of its content However all statements information and recommendations contained therein do not constitute a warranty of any kind either expressed or implied Please refer to For Your Safety to be sure to use your device properly and safely We offer self service for our smart device users Please visit the ZTE official website http www zteusa com for more info...

Page 3: ...ch trademarks by ZTE Corporation is under license microSDXC logo is a trademark of SD 3C LLC Qualcomm Snapdragon processors are products of Qualcomm Technologies Inc Qualcomm and Snapdragon are trademarks of Qualcomm Incorporated registered in the United States and other countries Used with permission Manufactured under license from Dolby Laboratories Dolby Dolby Audio and the double D symbol are ...

Page 4: ...Powering On Off 17 Setting Up for the First Time 18 Locking Unlocking the Screen and Keys 18 Using the Touch Screen 19 Getting to Know the Home Screen 22 Personalizing 24 Changing the System Language 24 Setting the Date and Time 24 Changing Ringtones 25 Turning On Off System Sounds 25 Adjusting Volume 25 Using Do Not Disturb Mode 26 Applying New Wallpapers 27 Changing Screen Brightness 27 ...

Page 5: ...ts 35 Organizing With Folders 37 Rearranging the Primary App Icons 37 Entering Text 37 Editing Text 47 Opening and Switching Apps 48 Connecting to Networks and Devices 49 Connecting to Mobile Networks 49 Connecting to Wi Fi 50 Using Wi Fi Direct 54 Connecting to Bluetooth Devices 54 Connecting to Your Computer via USB 57 Using the microSDXC Card as Portable or Internal Storage 58 Sharing Your Mobi...

Page 6: ...ite Contacts 70 Working With Groups 70 Searching for a Contact 72 Editing Contacts 73 Web Accounts 75 Adding or Removing Accounts 75 Configuring Account Sync 76 Email 77 Setting Up the First Email Account 77 Checking Your Emails 77 Responding to an Email 78 Writing and Sending an Email 79 Adding and Editing Email Accounts 80 Changing General Email Settings 80 ...

Page 7: ...he Browser 84 Using Multiple Browser Tabs 85 Downloading Files 86 Changing Chrome Settings 86 Camera 87 Capturing a Photo 87 Recording a Video 89 Using Manual Camera Mode 89 Using Other Camera Modes 90 Customizing Camera Camcorder Settings 91 Gallery 93 Opening Gallery 93 Working With Albums 93 Working With Pictures 94 Retouching Your Pictures 95 ...

Page 8: ...naging Playlists 100 Video Player 102 Opening the Video Library 102 Playing and Controlling Videos 102 Managing Video Files 103 Managing Video Player Settings 105 FM Radio 106 Scanning and Saving Channels 106 Listening to FM Radio 106 Editing a Saved Channel 107 Turning Off FM Radio 107 Sound Recorder 108 Recording a Voice Memo 108 Playing a Voice Memo 108 ...

Page 9: ...ds 111 File Manager 112 Google Apps 113 Settings 115 Wireless and Networks 115 Personal 117 Device 121 Accounts 125 System 126 Troubleshooting 127 Health and Safety Information 130 General Safety 130 Radio Frequency RF Energy 131 FCC Compliance 132 Distraction 133 Product Handling 134 ...

Page 10: ...10 Electrical Safety 137 Interference 138 Explosive environments 140 Third Party Equipment 140 Efficient Use 140 ...

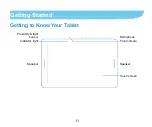
Page 11: ...11 Getting Started Getting to Know Your Tablet Proximity light sensor Indicator light Speaker Speaker Touch screen Front camera Microphone ...

Page 12: ...12 Volume key Power key Headset jack 4G LTE nano SIM microSDXC card slot cover Back camera Charging USB Type C jack ...

Page 13: ...ard and the microSDXC Card Notice on the 4G LTE nano SIM card This tablet requires a standard 4G LTE nano SIM card from U S Cellular to connect to the 4G LTE network Please insert the 4G LTE nano SIM card as instructed below If your 4G LTE nano SIM card is ever damaged your device will not fully function If you experience any issues with your tablet contact customer service at 1 888 944 9400 or vi...

Page 14: ...microSDXC card slot cover on the back of the tablet 2 Hold the 4G LTE nano SIM card with its cut corner oriented as shown and slip it into the card slot until you hear a click 3 To install an optional microSDXC card hold the card with its metal contacts facing down and slide it into the microSDXC card slot until you hear a click 4 Close the cover tightly ...

Page 15: ...lock screen will show you the exact battery level on the status bar WARNING Use only ZTE approved chargers and cables The use of unapproved accessories could damage your device or cause the battery to explode CAUTION Do not open the back cover of your tablet and change the built in rechargeable battery by yourself It may cause unexpected damage If your battery needs to be replaced please contact c...

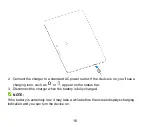
Page 16: ...ice is on you ll see a charging icon such as or appear on the status bar 3 Disconnect the charger when the battery is fully charged NOTE If the battery is extremely low it may take a while before the screen displays charging indication and you can turn the device on ...

Page 17: ...ch Settings Location to disable the GPS function when not in use Most applications using this function will periodically query the GPS satellites for your current location and each query drains your battery Touch Settings Battery to optimize each app for better battery life or use Battery saver to improve battery life Powering On Off Press and hold the Power key to turn on your device To power off...

Page 18: ...p mode when not in use and to turn the screen back on and unlock it when you need it To lock the screen and keys To quickly turn the screen off and lock the keys press the Power key NOTE To save battery power the device automatically turns off the screen after some time of inactivity You will still be able to receive notifications while the screen is off To unlock the screen and keys Press the Pow...

Page 19: ...gestures Touch When you want to type using the onscreen keyboard select items on the screen such as the application and settings icons or press the onscreen buttons simply touch them with your finger Touch and Hold To open the available options for an item for example a link in a web page touch and hold the item ...

Page 20: ...ickly drag your finger vertically or horizontally across the screen Drag To drag press and hold your finger with some pressure before you start to move your finger While dragging do not release your finger until you have reached the target position ...

Page 21: ...n For most screens you can automatically change the screen orientation from portrait to landscape by turning the device sideways NOTE The auto rotate feature needs to be enabled for the screen orientation to automatically change Touch Settings Display and turn on Auto rotate screen You can also access the screen rotation control by sliding down the status bar with two fingers and touch Auto rotate...

Page 22: ...dding folders widgets and more Extended Home Screen Panels Your home screen is extendable providing more space for app icons widgets and more Simply swipe left or right on the home screen to see the extended panels You can add or remove home screen panels or adjust their order Status bar Widgets Shortcut Recent apps key Back key Home key Primary shortcuts Folder ...

Page 23: ...uch on the top right corner of the thumbnail NOTE Your device keeps at least three home screen panels To adjust the order of a home screen panel 1 Touch and hold an empty area of the home screen The home screen zooms out and appears as a series of panel thumbnails 2 Touch and hold a thumbnail and drag it left or right to the place you need NOTE Touch at the bottom of a home screen thumbnail to set...

Page 24: ...djust the date and time automatically turn on Automatic date time To adjust the date and time manually turn off Automatic date time and touch Set date Set time to change the date and time To adjust the time zone automatically turn on Automatic time zone To adjust the time zone manually turn off Automatic time zone and touch Select time zone to set the correct time zone To adjust the time format to...

Page 25: ...rage or the microSDXC card touch the MUSIC or RECORDINGS tab at the top of the ringtone list to choose one as the ringtone 4 Touch OK Turning On Off System Sounds 1 Touch Settings Sound notification Other sounds 2 Touch Screen locking sounds Charging sounds or Touch sounds to turn them on or off Adjusting Volume 1 Touch Settings Sound notification 2 Drag the sliders below Media volume Alarm volume...

Page 26: ... and select Always or Scheduled Select Never to turn off Do not disturb mode 3 Touch Disturb rules and select Priority only Alarms only or Total silence depending on whether you want to allow exceptions You can customize the exceptions when Priority only is selected 4 If you selected Scheduled set the days and time period when Do not disturb automatically applies NOTE To turn off Do not disturb mo...

Page 27: ...o touch GALLERY or LIVE WALLPAPER to choose a picture For Gallery images you can scale and move them to select the needed area for wallpaper NOTE In addition you can touch Settings Display Wallpaper to pick an image from Wallpapers Gallery or Photos or an animation from Live Wallpapers Changing Screen Brightness 1 Touch Settings Display Brightness level 2 Drag the slider to manually adjust the scr...

Page 28: ...s until you find the favorite one Protecting Your Tablet With Screen Locks You can protect your tablet by creating a screen lock When it is enabled you need to touch and hold on the screen draw a pattern or enter a numeric PIN or password to unlock the tablet s screen and keys 1 Touch Settings Security Screen lock 2 Touch None Long press Pattern PIN or Password Touch None to disable the screen loc...

Page 29: ...Remember the pattern PIN or password you set Otherwise you will have to upgrade the tablet software to use the device Protecting Your Tablet With Screen Pinning You can use the screen pinning feature to keep an app in view so others cannot switch to other apps or access your personal information Turn On Screen Pinning 1 Touch Settings Security Screen pinning 2 Touch the On Off switch 3 If you want...

Page 30: ...any app tabs swipe up to find on the front most tab 5 Touch Unpin the Screen To unpin the screen and return to normal use touch and hold and at the same time If you have asked for the unlock pattern PIN or password before unpinning the screen touch and hold on the lock screen and draw the pattern or enter the PIN password ...

Page 31: ...w are some of the icons you may see 4G LTE connected Airplane mode Do not disturb mode on Alarms only or Priority only Signal strength Do not disturb mode on Total silence Wi Fi hotspot on Ring and notification sound muted Bluetooth on Battery partially drained Connected to a Wi Fi network Battery full GPS on Battery charging Alarm set Wired headset connected ...

Page 32: ...app Sending data Song playing USB tethering on USB connected Bluetooth tethering on Open Close the Notification Panel Notifications report the arrival of new emails upcoming calendar events as well as ongoing events such as when you are playing music You can open the notification panel to view the details of notifications To open the notification panel swipe your finger down on the home screen or ...

Page 33: ...lications allow you to turn off their notifications You can swipe such notification left and touch to hide future notifications from this app To remove all notifications touch below all the notifications To manage notifications you have received touch and hold a notification to identify the application that created it You can then touch and turn on or off some or all of the following settings Bloc...

Page 34: ...to open the Wi Fi hotspot menu See Share Your Mobile Data Connection as a Mobile Wi Fi Hotspot Sound Silent Turn off or restore ring volume and notification volume Airplane Touch to turn on or off airplane mode Sync Turn on or off Auto sync data See Configure Auto Sync Setting Do not disturb Total silence Alarms only Priority only Touch to open the Do not disturb menu See Using Do Not Disturb Mode...

Page 35: ...k Setting buttons may appear after you use at least once the functions they control In the Quick Settings screen touch at the top to get to the Settings menu touch to switch users touch to adjust the Quick Settings buttons Managing Icons and Widgets Add Widgets 1 From the home screen touch and hold an empty area 2 Touch the Widgets tab and slide left or right to browse all available widgets 3 Touc...

Page 36: ...t panel Remove Icons or Widgets 1 Touch and hold an icon or a widget on the home screen 2 Drag it to Remove at the top right to remove it NOTE If the icon is an application drag it to Uninstall and touch OK to uninstall it Some preinstalled apps cannot be uninstalled Adjust Widget Size 1 Touch and hold a widget on the home screen and then release it 2 An outline appears around the widget Drag the ...

Page 37: ...r the folder before releasing it NOTE Touch the folder and then touch the name field to rename the folder Rearranging the Primary App Icons The home screen includes a customizable primary icons area at the bottom visible from all home screen panels You can keep at most six items in the area Drag icons or folders in or out of the area to rearrange it Entering Text You can enter text using the onscr...

Page 38: ... icon appears at the bottom right of the screen Touch and select the input method you need NOTE The icon appears only when more than one input method is installed and enabled Google Keyboard The Google Keyboard provides a layout similar to a desktop computer keyboard When screen auto rotation is enabled turn the tablet sideways and the keyboard will change from portrait to landscape The landscape ...

Page 39: ... you enter a word candidates appear above the keyboard Touch to select the correct one touch and hold to see more possible options Touch to use uppercase Double tap to lock uppercase This key also changes to indicate the current case you are using for lowercase for uppercase and when locked in uppercase Touch to delete the text before the cursor Touch to select numbers and symbols You can then tou...

Page 40: ... by sliding through the letters To enable and use gesture typing 1 Touch and hold on the Google Keyboard and then touch Google Keyboard settings 2 Touch Gesture typing and then touch Enable gesture typing if this feature is turned off 3 Move your finger from letter to letter on the keyboard to trace a word without lifting the finger until you reach the end of the word Start of the word End of the ...

Page 41: ...utomatically when you begin to input the next word TouchPal Keyboard The TouchPal keyboard offers three layouts including Full Phonepad and T You can touch to select a language and layout You can also use Curve and Wave to speed up text input by moving your finger from letter to letter or word from word without lifting the finger The Full Layout ...

Page 42: ...hen locked in uppercase Word prediction Touch and hold or and touch the prediction switch to turn off or on prediction Pre defined texts Touch to enter digits symbols and other texts You can touch the arrow keys to turn pages or touch to go back to the alphabetic keys Slide up on the space key or touch to enter Emoji and emoticons The delete key Touch to delete text before the cursor You can also ...

Page 43: ...nepad Touch an alphabetic key repeatedly until the desired letter appears You can also touch and hold the key and slide left or right to choose the letter or number you need If word prediction is enabled just touch the keys once and choose the right word ...

Page 44: ...lide left or right to choose more letters and symbols If word prediction is enabled just touch the keys once and choose the right word Curve Word Gesture Curve allows you to enter text by moving your finger on the screen from letter to letter to enter each word To enable and use Curve 1 On the TouchPal keyboard touch Settings Smart input and check Curve Word gesture ...

Page 45: ...our finger from letter to letter on the keyboard to trace a word without lifting the finger until you reach the end of the word Tips for using TouchPal Curve Touch when you want to If you want to enter a single letter go ahead and touch the key Lift your finger at the end of the word A space is added automatically when you begin to trace the next word ...

Page 46: ...esture 2 Touch to return to the text field Open the TouchPal keyboard and switch to the full layout NOTE Wave is only available in the full layout 3 Touch or use Curve to enter the first word As the first word appears on the text field candidate words appear on the keyboard for you to choose from as the following word 4 Drag the correct candidate word to the space key to add the word to the text f...

Page 47: ...ge speak what you want to type 3 You can continue entering text to keep it or to delete it NOTE Say comma period question mark exclamation mark or exclamation point to enter punctuation Input Method Settings Choose the input method settings by touching Settings Language input from the home screen In the Keyboard input methods section you can set the current input method and choose the settings for...

Page 48: ...want to replace Then touch PASTE Insert clipboard text to the text field Touch and hold the tab below the cursor and then select PASTE Opening and Switching Apps Open an App 1 Touch to access the home screen 2 Touch and flick up or down on the screen and touch an app to open it Switch Between Recently Opened Apps 1 Touch The apps you ve used recently are displayed in a series of tabs Slide up and ...

Page 49: ... To get data services when roaming 1 Touch Settings Mobile networks 2 Touch the Data roaming switch NOTE Data roaming may incur significant roaming charges Set Access Point Names To connect to the Internet you can use the default Access Point Names APN And if you want to add a new APN please contact the service provider to get the necessary information 1 Touch Settings Mobile networks 2 Touch Acce...

Page 50: ...et 100 meters depending on the Wi Fi router and your surroundings Turn Wi Fi On and Connect to a Wi Fi Network 1 Touch Settings Wi Fi 2 Slide the Wi Fi switch to the On position to turn on Wi Fi 3 Touch a network name to connect to it 4 If the network is secured enter the password and touch CONNECT NOTE Your tablet automatically connects to previously used Wi Fi networks when they are in range Get...

Page 51: ...out of range To connect to a secured network you first need to get the security details from the network s administrator 1 Touch Settings Wi Fi 2 Slide the Wi Fi switch to the On position 3 Touch Add network 4 Enter the network SSID name If necessary enter security or other network configuration details 5 Touch SAVE Connect to a WPS Network Wi Fi Protected Setup WPS is a feature that makes it easy...

Page 52: ...ced WPS Pin Entry 4 The WPS PIN number displays on the screen Enter the PIN number into the access point s setup page After entering the PIN number your device automatically finds the access point and configures the connection NOTE For detailed information about the WPS feature of the access point please refer to its user documents Forget a Wi Fi Network You can make your device forget about the d...

Page 53: ...work is available Scanning always available Allow some services to scan for networks even when Wi Fi is off Keep Wi Fi on during sleep Set whether to keep Wi Fi on in sleep mode Install certificates Install certificates needed for connecting to certain Wi Fi networks Wi Fi Direct Use the Wi Fi Direct feature See Using Wi Fi Direct WPS Push Button Connect to a WPS network via the push button method...

Page 54: ... tablet will search for other devices enabled with Wi Fi Direct connections 4 Touch a device name below Peer devices to connect with it The other device will receive a connection prompt and need to accept the request for connection Both devices may need to enter a common PIN 5 Once connected the device is displayed as Connected in the Peer devices list Connecting to Bluetooth Devices Bluetooth is ...

Page 55: ...r Bluetooth Device 1 Touch Settings Bluetooth 2 Slide the Bluetooth switch to the On position if Bluetooth is off Your tablet automatically scans for and displays the IDs of all available Bluetooth devices in range You could touch Refresh if you want to scan again 3 Touch the device you want to pair with 4 Confirm that the Bluetooth passkeys are the same between the two devices and touch PAIR Alte...

Page 56: ...ooth and ensure that Bluetooth is turned on 2 In the list of paired devices touch the icon beside the Bluetooth device you want to forget 3 Touch FORGET Send Data via Bluetooth 1 Open the appropriate application and select the file or item you want to share 2 Select the option for sharing via Bluetooth The method may vary by application and data type 3 Touch a Bluetooth device the tablet has paire...

Page 57: ... you are using USB tethering you must turn that off before you can use USB to transfer files between your tablet and computer Connect Your Tablet to a Computer via USB 1 Connect your tablet to the PC with a USB cable 2 Open the notification panel and touch USB for 3 Choose one of the following options Charge only Charge your tablet via USB Install driver If the PC cannot recognize your tablet you ...

Page 58: ...nnect Your Tablet From the Computer To disconnect the tablet from the computer simply unplug the USB cable when you re finished Using the microSDXC Card as Portable or Internal Storage You can use your microSDXC card as portable storage when there s already content such as your media and other files so that you don t lose them If your microSDXC card is new or doesn t have content you want to keep ...

Page 59: ...otification panel and touch the microSDXC card name select Use as portable storage and then touch NEXT DONE To remove the microSDXC card from your tablet If you need to remove the microSDXC card used as portable storage while the tablet is on you must unmount it first 1 Touch Settings Storage 2 Touch next to the card name in the Portable storage section 3 When the screen prompts the card is safely...

Page 60: ...card name in the Portable storage section 3 Touch Format as internal 4 Touch ERASE FORMAT CAUTION The formatting procedure erases all the data on the microSDXC card after which the files CANNOT be retrieved 5 The tablet will prompt you to move your photos files and other data from the internal storage to the microSDXC card Select Move now or Move later and touch NEXT Follow the onscreen instructio...

Page 61: ...estination is accessible from a computer To remove the microSDXC card from your tablet If you need to remove the microSDXC card used as internal storage while the tablet is on you must unmount it first 1 Touch Settings Storage 2 Touch your card name below Device storage 3 Touch Eject NOTE Before ejecting the card ensure that you have moved data and apps to the internal storage 4 Touch EJECT 5 When...

Page 62: ...ch Format as portable 4 Touch FORMAT CAUTION The formatting procedure erases all the data on the microSDXC card after which the files CANNOT be retrieved Sharing Your Mobile Data Connection You can share your tablet s data capabilities through tethering or by activating the mobile hotspot feature Share Your Mobile Data Connection via USB You can access the Internet on your computer via the USB tet...

Page 63: ...our Mobile Data Connection via Bluetooth If your computer can obtain an Internet connection via Bluetooth you can configure your tablet to share its mobile data or Wi Fi connection with your computer 1 Pair your tablet with your computer via Bluetooth 2 Touch Settings More 3 Switch on Bluetooth tethering 4 Configure your computer to obtain its network connection via Bluetooth For more information ...

Page 64: ...n connected to the Internet via your mobile data network 1 Touch Settings Wi Fi hotspot 2 Switch on the Wi Fi hotspot feature After a moment the tablet starts broadcasting its Wi Fi network name SSID 3 On another device locate your tablet via Wi Fi and connect with it to start using the tablet s mobile data NOTE To stop sharing your data connection switch off Wi Fi hotspot Set Your Wi Fi Hotspot B...

Page 65: ...es from other devices 3 Touch SAVE to save your settings 4 Touch Sleep policy to set hotspot timeout options 5 Touch Manage users to set the maximum number of connections and block unwanted devices NOTES Touch WPS in the Wi Fi hotspot menu to activate WPS While editing the password check or uncheck Show password to show or hide it Connecting to Virtual Private Networks Virtual private networks VPN...

Page 66: ...rner and fill in the information provided by your network administrator 3 Touch SAVE The VPN is added to the list on the VPN screen NOTE You must set a lock screen pattern PIN or password before using VPN Connect to a VPN 1 Touch Settings More VPN 2 Touch the VPN that you want to connect to 3 When prompted enter any requested credentials and then touch CONNECT Modify a VPN 1 Touch Settings More VP...

Page 67: ...ts or contact groups Checking Contact Details 1 Touch Contacts and touch the CONTACTS tab to access your contact list 2 Scroll through the list to view all your contacts 3 Touch a contact to view its details NOTE If you have a lot of contacts stored drag the slider on the right to the initial letter you need Adding a New Contact 1 Touch Contacts 2 Touch to add a new contact 3 Enter the contact nam...

Page 68: ...let 1 Touch Contacts and touch the CONTACTS tab 2 Touch Set up my profile If a profile has already been set up touch the listing beside ME and touch 3 Edit your profile information 4 Touch Importing Exporting and Sharing Contacts You can import export contacts from to the internal storage or the microSDXC card This is especially useful when you need to transfer contacts between different devices Y...

Page 69: ...ntacts Export Contacts to the Internal Storage or the microSDXC Card 1 Touch Contacts 2 Touch Import Export Export to storage 3 Touch OK to export the contact list as a vCard file to the internal storage or the microSDXC card The save location depends on the storage settings See Storage Share Contacts 1 Touch Contacts and touch the CONTACTS tab 2 Touch and hold the contact you want to share 3 Chec...

Page 70: ... them quickly 1 Touch Contacts and touch the CONTACTS tab 2 Touch a contact and then touch at the top Remove a Contact From Favorites 1 Touch Contacts and touch the FAVORITES tab 2 Touch a favorite contact and then touch at the top Working With Groups View Your Contact Groups 1 Touch Contacts and touch the GROUPS tab 2 Scroll through the list to view the preset groups and any groups you have creat...

Page 71: ...e tablet select an account for the new group 4 Touch the Group s name field and enter the group name 5 Touch Add member and select the contacts you wish to be the group members 6 Touch 7 If necessary touch Default below RINGTONE or NOTIFICATION RINGTONE to set a special ringtone 8 Touch Delete a Group 1 Touch Contacts and touch the GROUPS tab 2 Touch a group and then touch Delete Group 3 Touch OK ...

Page 72: ... group Touch Default below RINGTONE or NOTIFICATION RINGTONE to change the ringtone 4 Touch NOTE To remove some contacts from the group touch the group touch Multi Select check the contacts you want to remove from the group and touch OK Searching for a Contact 1 Touch Contacts 2 Touch at the top of the screen 3 Input the contact name or any information the contact has to search for it The contacts...

Page 73: ... more contacts if needed and then touch 4 Touch OK to confirm Join Contacts As your tablet synchronizes with multiple online accounts you may see duplicate entries for the same contact You can merge all the separate information of a contact into one entry in the contacts list 1 Touch Contacts 2 Touch a contact entry to display the contact s details and then touch 3 Touch Join 4 Touch the contact w...

Page 74: ...t these steps to join another contact to the main contact Separate Contact Information If contact information from different sources was joined in error you can separate the information back into individual contacts on your tablet 1 Touch Contacts 2 Touch a contact entry you have merged and want to separate and then touch 3 Touch Separate 4 Touch OK to confirm ...

Page 75: ... to enter the information about the account Most accounts require a username and password but the details may vary You may also need to obtain some information from IT support or your system administrator When the account is successfully added it is displayed in the Accounts menu Remove an Account Removing an account will delete it and all information associated with it from your tablet such as em...

Page 76: ...ch Settings Accounts 2 Touch the account category and then the account you want to sync 3 Touch Sync now Or touch the types of information you want to sync Change an Account s Sync Settings 1 Touch Settings Accounts 2 Touch the account category and then the account The Sync screen appears showing a list of information the account can sync 3 When auto sync is enabled switch on or off items as you n...

Page 77: ...he tablet retrieve the network parameters automatically NOTE Touch MANUAL SETUP if you want to enter these details manually 3 Follow the on screen instructions to finish the setup You may also need to obtain some information from IT support or your system administrator Your tablet will show the inbox of the email account and start to download email messages Checking Your Emails Your tablet can aut...

Page 78: ...ply or To reply to the sender and all recipients of the original email touch Reply all or To forward the email to someone else touch Forward or 3 Edit your message and touch Mark an Email as Unread You can return a read email to the unread state for example to remind yourself to read it again later You can also mark a batch of emails as unread While reading a message touch Mark unread While in a m...

Page 79: ...have more than one email account added on the tablet touch the From line to select the account you want to use for sending the message 2 Enter a contact name or email address in the To field Separate each recipient with a comma NOTE To send a carbon copy or blind carbon copy to other recipients touch to open the Cc Bcc field and enter the contact names or email addresses 3 Enter the email subject ...

Page 80: ...n change a number of settings for an account including how often you check for email how you re notified of new mails your email signature and details about the servers the account uses to send and receive mails 1 Open Email to get the Inbox screen 2 Touch Settings and touch the account whose settings you want to change 3 Make the changes and touch when you finish Changing General Email Settings G...

Page 81: ...iew types Month Week Day and Agenda To change calendar views touch the current view at the top left and select the view you prefer In Month view swipe up and down to view future and past months In Week or Day view swipe left and right to view future and past weeks or days You can also swipe up and down on the small monthly calendar to view different months In Agenda view swipe vertically to see al...

Page 82: ...m unchecked calendars are not shown in the Calendar app Creating an Event 1 In any Calendar view touch at the bottom You can also touch a spot in Day or Week view twice to add an event to that time slot 2 Enter the event name location start time end time repetition and reminders NOTE If you have added a Google account or Exchange ActiveSync account on your tablet touch the calendar at the top to s...

Page 83: ...ONE to save your changes To delete the event touch OK To share the event touch and choose how to share To export the event as a ics iCalendar file to the storage touch To copy the event details and create a new event touch If the event is from an Exchange ActiveSync account touch to send the event information via email Changing Calendar Settings To change the calendar settings open a calendar view...

Page 84: ... the address box at the top of the web page 3 Enter the address URL of a web page or enter terms you want to search for You can also touch to search by voice 4 Touch a URL or search suggestion or touch enter key on the keyboard to open the web page or search results NOTE Touch left of the address box if you want to stop opening the page Set the Homepage Your homepage shows when you touch the Home ...

Page 85: ... one page in each tab and switch between them freely To open a new browser tab Touch New tab or touch at the top A new browser tab opens NOTE Touch New incognito tab if you want to view pages that won t show up in your browser history after you ve closed all incognito tabs To switch between tabs Along the top touch a tab to switch to it If there are too many tabs swipe them left and right to find ...

Page 86: ...ns touch Save image or Save link The file is downloaded You can view or open it in the Downloads app Changing Chrome Settings You can configure a number of settings to customize the way you browse the web including several that you can use to control your privacy To open the Chrome settings screen touch Settings ...

Page 87: ...s are stored on the microSDXC card you have installed or in the internal storage You can copy them to your computer or access them in the Gallery app Capturing a Photo 1 Touch Camera 2 Aim the camera at the subject and make any necessary adjustment Auto camera mode is used by default ...

Page 88: ...en 5 Capture a picture 6 Select MANUAL or AUTO camera mode or touch FUN to use panorama HDR special effect multi exposure smile detection or interval capture modes Only available for the back camera 7 Capture a video clip NOTE You can spread or pinch on the screen to zoom in or out before taking pictures 3 Touch the area where you want the camera to focus or leave the camera to autofocus on the ce...

Page 89: ...t recording You can also touch to pause or resume recording NOTE While the recording is in progress you can touch to save the frame as a separate photo 4 Touch to stop recording Using Manual Camera Mode You can use manual camera mode to adjust more camera options for you photo such as ISO white balance exposure etc 1 Touch Camera 2 Touch MANUAL 3 Aim the camera at the subject and you can make the ...

Page 90: ... icon to take the photo Using Other Camera Modes Besides capturing photos and videos in the traditional way your camera app offers other powerful and interesting camera modes Switch to the back camera and touch FUN in the viewfinder screen to find them all Panorama Capture panorama pictures HDR Turn on the HDR feature Special effect Apply warm cool sepia fisheye or other special effects to the pho...

Page 91: ...elect whether to store the location information in your captured photos and videos Review Select whether to review the picture after you shot it You can also set the review time Storage location Touch Save location to change the storage location for captured photos and videos Restore defaults Restore default camera and video settings Picture size Set the image size for your photo Mirror Take mirro...

Page 92: ...hen you shot time lapse videos with the back camera Geo tagging Select whether to store the location information in your captured photos and videos Storage location Touch Save location to change the storage location for captured photos and videos Restore defaults Restore default camera and camcorder settings ...

Page 93: ...pictures and videos it contains To share albums pictures or videos 1 Touch and hold an album to select it or touch and hold an item after you open an album to select a picture or a video 2 Touch more items that you want to share 3 Touch and select how you want to share the items To delete albums pictures or videos 1 Touch and hold an album to select it or touch and hold an item after you open an a...

Page 94: ...Pictures Touch a picture in an album to view the picture in full screen When viewing a picture in full screen the following features are available Swipe horizontally to see more pictures or videos Pinch a picture or video to make it smaller You ll then see a filmstrip style view of all your pictures and videos in a row Swipe left or right to scan through them all ...

Page 95: ...ete the picture Touch to access more options You can rotate or rename the picture set it as the wallpaper or contact photo check its details browse the album contents in a slideshow or print the picture Touch to return to the album NOTE Some options may not be available for certain albums or pictures Retouching Your Pictures You can edit any photos you took and some other pictures in Gallery 1 Tou...

Page 96: ...picture with a frame or comical stickers such as hat glasses or beard 3 Touch to keep the edition or to cancel it 4 Touch to save the new picture as a new file in the same album as the original picture The original picture remains unedited NOTE Tap in the Photo Editor screen to see the edits you have made and undo or redo them Playing Videos 1 Touch an album in the gallery and then touch the thumb...

Page 97: ...les to your tablet Copy From a Computer 1 Connect your tablet and the computer with a USB cable 2 Touch Media device MTP as the connection mode See Connecting to Your Computer via USB 3 Copy the music files from the PC and paste them to the tablet storage or the installed microSDXC card Download From the Internet You can download music files when browsing web pages See Downloading Files Receive vi...

Page 98: ...g played its name and player controls are displayed at the bottom of the screen Touch the area to open the playback screen Setting a Song as the Default Ringtone The song will be used as the default phone ringtone or notification ringtone 1 Touch Music All Songs to see the music library NOTE If you are in the playback screen touch at the top left of the screen to return to the music library 2 Touc...

Page 99: ...Playing Music Touch a song in the music library to listen to it Touch the bottom of the screen to open the following playback screen Number Function 1 Access additional options 2 View the current playlist ...

Page 100: ...rrent track repeat the current playlist or turn off repeat 9 Add the track to the Favorites playlist Managing Playlists Create playlists to organize your music files into sets of songs so that you can play the songs you like in the order you prefer To create a playlist or add a song to a playlist Touch next to a song and select Add to playlist To remove a song from a playlist 1 Touch Playlists in ...

Page 101: ...n the music library 2 Touch next to the playlist you want to delete or rename 3 Touch Delete or Rename 4 Follow the prompts to confirm deletion or edit the playlist name NOTE Certain automatically created playlists such as Recently Added cannot be deleted ...

Page 102: ...lay mode or sort the list Playing and Controlling Videos Touch a video in the video library to play it Touch the screen to show the playback controls You can control the video and audio or carry out other operations Touch the play pause button at the bottom to pause or resume the playback Slide horizontally on the screen to rewind or fast forward Slide vertically on the right or left part of the s...

Page 103: ...th other tasks on the tablet Touch for more video options Managing Video Files Delete Video Clips 1 Touch Multi Select in the video library 2 Touch the videos you want to delete 3 Touch OK Share Video Clips 1 Touch Multi Select in the video library 2 Touch the videos you want to share 3 Touch and select how you want to share them ...

Page 104: ... clip 2 From the menu that opens touch Details 3 From the window that opens check the file name time duration file size and path 4 Touch CLOSE or any place outside the window to close it Trim a Video Clip 1 Touch a video to start playing it 2 Touch Trim 3 Drag the two tabs on the progress bar to select the portion you want to keep If necessary touch to preview the selected portion 4 When the previ...

Page 105: ...figure the following options Resume play Set whether to play a video file from where you stopped last time or from the beginning Automatically play the next Set whether to play the next video file when the current one finishes Display screenshot button Set whether to display in the video playback screen Help See how to adjust volume brightness and progress in the playback screen ...

Page 106: ...ls 1 Plug in a wired headset and touch FM Radio 2 Touch Scan Your tablet scans for all available channels and saves them to the All channels list NOTE When you open the FM Radio app for the first time it will automatically scan for channels and show the All channels list You can also touch All channels to view the list Listening to FM Radio 1 Touch FM Radio while the headset is connected 2 Touch A...

Page 107: ...io app and touch All channels to display the list of saved channels 2 Touch and hold a channel and select Rename or Delete or touch the star to the right of a channel to add it to favorites Turning Off FM Radio To turn off automatically Touch Timing turn off and select the time you want to turn off the radio A count down clock appears above the frequency and the radio is turned off when the clock ...

Page 108: ...ring recording you can touch to pause or continue the recording 4 Touch to stop recording The memo is automatically saved Playing a Voice Memo To play a memo you just recorded Touch To play any saved memo 1 Touch at the top right of the screen to see all recordings 2 Touch the title of a memo to play it NOTE Touch next to a memo to delete rename share trim it check file information add a tag or se...

Page 109: ...ed guide NOTE You can back up your user data and apps to the internal storage when the microSDXC card is not inserted Please keep these data in your PC or other devices to avoid data loss Calculator Touch Calculator to use the tablet s convenient built in calculator for some basic as well as advanced mathematical equations Clock Touch Clock The Clock app allows you to check local time in places ar...

Page 110: ...directly just touch the switches on the right side Touch to set more alarm options including volume duration crescendo and alarm in silent mode Check World Time Touch the tab in the Clock app to check local time around the world Touch at the bottom to add other cities Use the Stopwatch and Countdown Touch the or tab in the Clock app to use the stopwatch or the countdown timer Stopwatch allows you ...

Page 111: ...as Graphic Equalizer Surround Virtualizer Dialogue Enhancer and Volume Leveler Touch Custom 1 or Custom 2 to configure and use your own Dolby Audio setting NOTE Some options only work when a headphone or stereo speakers are connected with the tablet Downloads The Downloads app keeps a record of the files you have downloaded using apps such as Chrome Touch Downloads to check the record Touch a file...

Page 112: ...n item to access option icons such as Copy Move Share or Delete To copy or move an item navigate to a new location and touch PASTE Touch to create a new folder in the current directory Touch to search for files Touch View by or Sort by to change the view of the list or the order of the items in the list Touch Multi Select to select multiple items for deletion sharing copying moving or compression ...

Page 113: ...eceive emails via your Gmail account or other personal email accounts Google Use Google search or get information when you need it with Google Now Hangouts Chat with Google friends or send text or multimedia messages Keep Create share and collaborate notes quickly and easily Maps Find your place and find your way in the world Photos Manage photos on the tablet and your Google account Play Books Bu...

Page 114: ...ewsstand Purchase and read newspapers and magazines Play Store Buy and download apps games and other content from the Google Play Store Voice Search Search for information with your voice YouTube Watch video clips from YouTube com or upload your own and share with the world ...

Page 115: ...Connecting to Wi Fi When Wi Fi is on touch Advanced Wi Fi Direct in the Wi Fi menu to share data between two devices via Wi Fi directly See Using Wi Fi Direct Bluetooth Touch Settings Bluetooth You can turn Bluetooth on or off and configure your Bluetooth connections See Connecting to Bluetooth Devices Mobile Networks Touch Settings Mobile networks to control mobile data use or set access point na...

Page 116: ...eck how much data has been used during the time cycle you set set mobile data limit and warning see what apps have been using mobile data or restrict background data for individual apps NOTE The data usage is measured by your tablet and your carrier s data usage accounting may differ Touch Network restrictions to select Wi Fi networks that are mobile hotspots Data usage on recognized mobile hotspo...

Page 117: ...Settings More Bluetooth tethering to share your tablet s mobile data or Wi Fi connection with PCs or other devices via Bluetooth See Share Your Mobile Data Connection via Bluetooth Personal Display Touch Settings Display to configure the following options Brightness level Set the brightness of the display Adaptive brightness Automatically adjust screen brightness Wallpaper Select a background imag...

Page 118: ...und see Changing Ringtones select system sounds see Turning On Off System Sounds control notification display and check the apps that have requested notification access or Do not disturb access Your tablet supports Dolby Audio to provide you with superior audio experience Touch Dolby digital plus in the Sound notification menu to set it up Security Touch Settings Security to configure options that...

Page 119: ...hen your tablet is being carried on the body NOTE You need to sign in to your Google account on the tablet to use the Smart Lock feature Make passwords visible Display passwords as you enter them Device administrators View or deactivate apps you have authorized to be device administrators Unknown sources Switch on this option to permit installation of apps from sources other than the Play Store St...

Page 120: ...ttings Language input to configure options related to system language input methods speech input and output as well as mouse trackpad input Language Select a language for your system Spell checker Use Google Spell Checker to check for spelling errors when entering text Personal dictionary Add new words to the tablet s dictionary or remove words from the dictionary The words you add are used for sp...

Page 121: ...ou can set the options for Google account and services Device Location Touch Settings Location to manage location services which help your tablet and apps determine your location To use location related applications such as finding your location on Google Maps you must have location services enabled on your tablet 1 Slide the switch at the top right to turn location services on or off 2 When locat...

Page 122: ...ttery to view the battery level check what has been using the battery and optimize battery use Touch an app or service to adjust its settings in order to save battery life For example touch Screen Reduce the screen brightness and or screen timeout to change screen brightness and sleep Touch Battery optimization Battery optimization helps prolong battery standby time when you re not using the table...

Page 123: ...y the app during the time cycle you set and restrict background data for the app Permissions Check or change the app permissions Notifications Manage the app notifications in the notification panel and the lock screen You can set the priority sensitivity and more Open by default Check the app s supported links and set whether to open the links in the app and clear the app s defaults Battery Check ...

Page 124: ...e apps for all other users Each restricted profile may have different restrictions on apps and content access By default a Guest account is available for anyone who needs to use your tablet temporarily You can touch Add user or profile to create three more user or profiles NOTES Touch DELETE next to a user to delete the account touch next to a profile to configure its restrictions or remove the pr...

Page 125: ...matic restore Restore previously backed up settings and data when you reinstall an app Network settings reset Reset all network settings including Wi Fi mobile data and Bluetooth Factory data reset Reset your tablet to factory default settings All your data in the internal storage will be erased during the process Accounts Touch Settings Accounts to manage your web accounts and synchronization Tou...

Page 126: ...ext for users with sight problems Printing Touch Settings Printing to manage Google Cloud Print service or other printer plug ins installed from the Google Play Store or your printer manufacturer About Tablet Touch Settings About tablet to view the device status and other information You can also touch System updates to check for download and install updates ...

Page 127: ...perly received The network is busy at the current time for example during peak times there may be too much network traffic to handle Avoid using the device at such times or try again after waiting a short time You are too far away from a base station for your service provider You can request a service area map from your service provider Unable to select certain features Your service provider does ...

Page 128: ... will be shortened Use a new battery If you are not able to connect to the network the device will continue to send out signals as it attempts to locate a base station Doing so consumes battery power and will consequently shorten standby time Change your location to one where the network is accessible or temporarily turn off your device Cannot turn your device on Battery power has been depleted Re...

Page 129: ...ice area Check the service area with your service provider Poor signal Move to an open space or if you are inside a building move closer to a window Device crashes reboots freeze or cannot be powered on Some third party software is not compatible with your device Reset the device to factory status Uninstall the software that may cause the problem Upgrade the device software ...

Page 130: ...ice may produce a bright or flashing light Do not dispose of your device in fire Small parts may cause choking Avoid contact with anything magnetic This device may produce a loud sound To prevent possible hearing damage do not listen at high volume levels for long periods Avoid extreme temperatures Keep away from pacemakers and other electronic medical devices ...

Page 131: ...o frequency RF energy set by the Federal Communications Commission of the United States During SAR testing this device is set to transmit at its highest certified power level in all tested frequency bands and placed in positions that simulate RF exposure in usage against the body with no separation Although the SAR is determined at the highest certified power level the actual SAR level of the devi...

Page 132: ...K90U The FCC ID also can be found on the device when you touch Settings About tablet Regulatory information For this device the highest reported SAR value for usage against the body is 1 20 W kg While there may be differences between the SAR levels of various devices and at various positions they all meet the government requirement FCC Compliance This device complies with part 15 of the FCC Rules ...

Page 133: ...eiving antenna Increase the separation between the equipment and receiver Connect the equipment into an outlet on a circuit different from that to which the receiver is connected Consult the dealer or an experienced radio TV technician for help CAUTION Changes or modifications not expressly approved by the party responsible for compliance could void the user s authority to operate the equipment Di...

Page 134: ...nd its accessories with care and keep it in a clean and dust free place Do not expose your device or its accessories to open flames or lit tobacco products Do not expose your device or its accessories to liquid moisture or high humidity Do not drop throw or try to bend your device or its accessories Do not use harsh chemicals cleaning solvents or aerosols to clean the device or its accessories Do ...

Page 135: ...r device contains small parts with sharp edges that may cause an injury or may become detached and create a choking hazard Demagnetization To avoid the risk of demagnetization do not allow electronic devices or magnetic media to be close to your device for a long time Electrostatic Discharge ESD Do not touch the nano SIM card s metal connectors Antenna Do not touch the antenna unnecessarily Air Ba...

Page 136: ... To minimize the risk of Repetitive Strain Injury RSI when texting or playing games with your device Do not grip the mobile device too tightly Press the icons and touch screen lightly Use the special features which are designed to minimize the times of pressing the icons and touch screen buttons such as text templates and predictive text Take lots of breaks to stretch and relax Loud Noise This dev...

Page 137: ...eptable to you you still risk damaging your hearing Reduce the sound volume to a reasonable level and avoid using headphones for an excessive period of time to avoid hearing damage Different headphones earphones or ear buds may deliver a higher or lower volume at the same volume setting on your mobile device Always start at a low volume setting Do not listen to music or video with headphones while...

Page 138: ...o not use it until you have taken it to be checked at an authorized service center Interference General Statement on Interference Care must be taken when using the device in close proximity to personal medical devices such as pacemakers and hearing aids Pacemakers Pacemaker manufacturers recommend that a minimum separation of 15 cm be maintained between a mobile device and a pacemaker to avoid pot...

Page 139: ...device when requested to do so in hospitals clinics or health care facilities These requests are designed to prevent possible interference with sensitive medical equipment Aircraft Turn off your wireless device whenever you are instructed to do so by airport or airline staff Consult the airline staff about the use of wireless devices onboard the aircraft Enable airplane mode prior to boarding an a...

Page 140: ...s Turn off your mobile device when in a blasting area or in areas posted turn off two way radios or electronic devices to avoid interfering with blasting operations Third Party Equipment The use of third party equipment cables or accessories not made or authorized by ZTE may invalidate the warranty of the mobile device and also adversely affect the mobile device s operation For example use only th...

Reviews: