background image

11

12

3.6.2 Precautions after use

3.6.2.1  It is recommended to perform 1 manual cleaning process before the 

               working head is removed;

3.6.2 .1 First turn off the machine and then take off the working head and bag pants; 

3.6.2.3 After the work head is removed, it is necessary to clean the sewage bucket in time.

3.6.2.4The working head and pipe can’t forward down when taken off from host,the 

pipe should lift up higher than caregivers’ height, making the remaining water and 

sewage flow back to the host’s sewage bucket, then remove the pipe

3.7


Cleaning

3.7.1 Sewage bucket cleaning

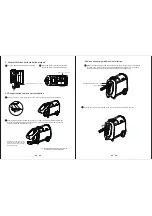
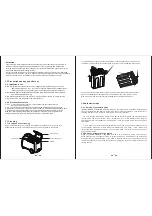
Open the Host swivel panel, hold the movable latch by hand and carry it to the sink. 

Withdraw the connector and lift the sewage bucket out by hand by the handle.

Turn the sewage bucket knob counterclockwise, hold the handle with one hand, hook 

the bottom of the bucket with the other hand, and slowly pour the sewage into the sink.

You can open the buckle with water or water to add toilet cleaner will sewage bucket 

clean will sewage bucket outside surface of the water with a clean cloth or cotton, 

wipe clean, and then reassemble (see Sewage bucket installation method)

Swivel Panel

Connecting head

Active Latch

Handle

3.8Automatic mode

When  the  INCONTINENCE  CLEANING  SYSTEM  is  in  automatic  mode,  the  robot  will 

automatically  start  the  preset  program  to  collect  excrement,  clean  and  dry  the  defecation 

area after the user has defecated. If you need to stop the process during operation, to stop 

the current operation, click the "Stop" button on the display or tap the "Stop" button on the 

remote control.

INCONTINENCE  CLEANING  SYSTEM  starts  up  in  manual  mode  by  default. Automatically 

switch to automatic mode after 3 minutes. After the care robot is turned on, click the button in 

the main interface of the display to enter the device control interface.

3.8.1  Setting of automatic mode

    3.8.1.1 Press the "Auto Mode" button on the device control interface, the system switches 

to auto mode. The icons of "Poop", "Pee", "Wash" and "Dry" on the display screen are gray 

and the button are not clickable. At the same time, the "Auto" button on the remote control is 

illuminated.

    3.8.1.2 Press the "Auto" button on the remote control, the device control interface on the 

current  display  will  switch  to  "Auto  Mode"  simultaneously.  The  "Poop",  "Pee",  "Wash"  and 

"Dry" icons are gray and the buttons are not clickable. state. The "Auto" button of the remote 

control is illuminated.

3.8.2How the automatic mode works

3.6 Precautions during and after use

3. 6.1Attention in use

3

.

6

.

1

.

1

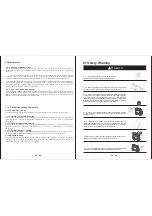
After the use of the object position change (including left and right turn, sit up

                again after lying down, etc.), you need to confirm whether the work head is loose, 

                misalignment (focus on confirming the inner thighs and soft rubber between) ;

3

.

6

.

1

.

2

Users should lie flat and keep the side lying less than 30°when urination 

              and defecation while using.

3.6.1.3

Red light at the end of the machine, report equipment failure, immediately stop 

using the machine, and feedback to the manufacturer.

Attention:

1. Before using the 

intelligent incontinence cleaning robot, check whether the Velcro on 

the base of the working head is aligned with the Velcro on the pants, and whether the 

working head falls exactly in the U-shaped slot of the pants (for details, please refer to the "

Instruction Manual of the Working Head").

2. After each use of the robot, you should check whether the user's skin is red or damaged,

 if there is such a condition, you should seek professional caregivers for treatment in time and 

wait until the user's skin is completely recovered before using the product 

 again.

Summary of Contents for ZH101

Page 1: ... Shenzhen ZuoWei Technology Co Ltd Web XXX VPXFJ DPN Email JOGP VPXFJ DPN Add Yifenghua Innovation Industrial Park Xinshi Community Dalang Street Longhua District Shenzhen The persuit of love is endless NBOVBM PG JOUFMMJHFOU JODPOUJOFODF DMFBOJOH SPCPU ...

Page 2: ... deodorization components 2 4Hose assembly and Host Installation III Usage 3 1Target group 3 2Start up preparation 3 3Machine cleaning 3 4Machine handling 3 5Usage schedule 3 6Precautions before and after use 3 7 Clean and disinfection 3 8Automatic mode 3 9Manual mode 3 10Parameter setting and query IV Safety Warning V Troubleshooting VI Specifications VII Maintenance and repair VIII Product recyc...

Page 3: ...ressure with a total of three adjustable high medium and low levels Water temperature adjustment button Touch the up or down arrow of the button to adjust the high or low water temperature with a total of three adjustable high medium and low levels Poop button In manual mode press this button to enter the poop handling procedure Pee button In manual mode press this button to enter the pee procedur...

Page 4: ...ee cleaning process Press the button to enter the drying process Stops the current processing action 1 2 4Display screen Press the button will apply a warm water wash to a person s private parts Press this button to rinse the inner surface of the working head Mode Selection Manual mode Automatic mode Clean air After selecting manual mode poop pee clean wash and dry will enter the selectable state ...

Page 5: ... end of the bucket cover will be successfully stuck into the slot of the suction port of the machine which means the bucket is loaded into the correct position Push active latch 2 Place the sewage bucket in the sewage bin placement in Hos 3 1 Sewage bucket placement Heating water tank Press and hold the unlock button downward to pull the active pin outward To remove the bucket press the unlock but...

Page 6: ...orant assembly to the bottom with a little pressure 2 2 3Deodorization component installation Reach your fingers into the groove of the front cover and lift the cover outward 1 Slowly close the front cover by hand Note that the lid suction force is large careful to pinch the hand Grasp the hose sewage tube connector first Host wire from the hose wire hole through then the Host connection part alig...

Page 7: ...cket 3 5Usage schedule The first week of use is based on the principle of gradual increase so that the user can gradually adapt to the use of the care robot Day 1 4H Daytime Day 2 8H Daytime Day 3 10H Daytime Day 4 12H Daytime Day 5 12H Evening After that it is recommended that each continuous use time should not exceed 12 hours 3 2 Start up preparation 3 2 1Make sure the connection between the wo...

Page 8: ...r 3 minutes After the care robot is turned on click the button in the main interface of the display to enter the device control interface 3 8 1 Setting of automatic mode 3 8 1 1 Press the Auto Mode button on the device control interface the system switches to auto mode The icons of Poop Pee Wash and Dry on the display screen are gray and the button are not clickable At the same time the Auto butto...

Page 9: ...ble state The buttons return to the clickable state At the same time the Manual button on the remote control is illuminated 3 9 2 How the manual mode works When the INCONTINENCE CLEANING SYSTEM is in manual mode the Host will start the preset program to collect excrement clean and dry the defecation area according to the manual operation information provided by Remote Control and the display Durin...

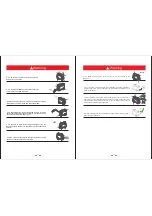
Page 10: ...event backflow of water 4 2 6 Do not use heavy objects to press the hose assembly and do not over bend the hose assembly 4 2 7 the correct voltage to prevent damage to the Make sure to use machine AC220V Warning 试 4 2 10This equipment must be installed and used in power supply systems with grounding conditions 4 2 8 If the power cord is damaged to avoid danger it must be replaced by a professional...

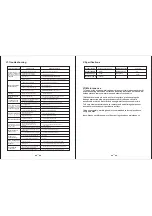
Page 11: ...and screws Machineconnector not tightened or screws not tightened Replace filter deodorization 3 Clogged filter deodorization Correctly docked hose and work head latch locked Replace the seal The connection between the working head and the hose is not tight Sealing ring at the hose joint is aging Check if there is a seam on the inner thigh Check whether the package pants are loose Work head center...

Page 12: ...is product reaches the end of its life please send it to a suitable place to protect the environment DUQLQJ 7KLV GHYLFH FRPSOLHV ZLWK SDUW RI WKH UXOHV 2SHUDWLRQ LV VXEMHFW WR WKH IROORZLQJ WZR FRQGLWLRQV WKLV GHYLFH PD QRW FDXVH KDUPIXO LQWHUIHUHQFH DQG WKLV GHYLFH PXVW DFFHSW DQ LQWH UIHUHQFH UHFHLYHG LQFOXGLQJ LQWHUIHUHQFH WKDW PD FDXVH XQGHVLUHG RSHUDWLRQ KDQJHV RU PRGLILFDWLRQV QRW H SUHVVO D...

Reviews: