STEP 3
-Top Rail Assembly
1.
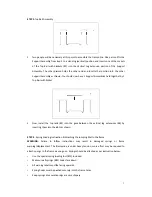
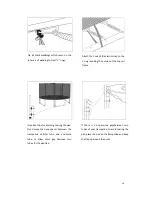
Two people will be necessary at this point to assemble the trampoline. One person lifts the
Support Assembly from step 2 to a standing (vertical) position and inserts one of the sockets
of the Top Rail with Sockets (#3) into the Vertical Leg Extension portion of the Support
Assembly. The other person holds the other end and inserts that portion into the other
Support Assembly as shown. You should now have 2 Support Assemblies held together
Top Rail with Socket.
2.
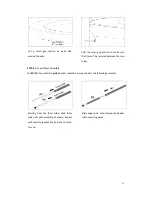
Now, install the top rails (#4) into the gaps between the vertical leg extensions (#6) by
inserting them into the slots as shown.
STEP 4
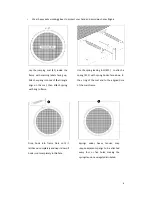
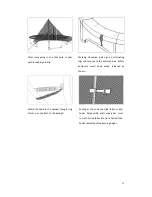
- Spring Loading Instruction & Attaching the Jumping Mat to the frame
WARNING:
Failure to follow instructions may result in damaged springs or frame
warping/displacement. The trampoline is under heavy tension, more effort may be required to
attach springs to the frame as you go on. Springs should be attached as per instruction below:
•
Use the special spring loading tool (#12) included.
•
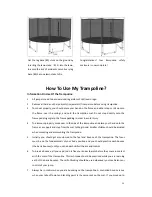
Make sure all springs (#11) hooks face down.
•
All warning labels must be facing upwards.
•
Spring hooks must be pushed securely into the frame holes.
•
Keep springs dry as wet springs are very slippery.
Two people will be necessary at this point to assemble the trampoline. One person lifts the
Support Assembly from step 2 to a standing (vertical) position and inserts one of the sockets
the Top Rail with Sockets (#3) into the Vertical Leg Extension portion of the Support
Assembly. The other person holds the other end and inserts that portion into the other
Support Assembly as shown. You should now have 2 Support Assemblies held together
Now, install the top rails (#4) into the gaps between the vertical leg extensions (#6) by
inserting them into the slots as shown.
Spring Loading Instruction & Attaching the Jumping Mat to the frame
to follow instructions may result in damaged springs or frame
warping/displacement. The trampoline is under heavy tension, more effort may be required to
attach springs to the frame as you go on. Springs should be attached as per instruction below:
special spring loading tool (#12) included.
Make sure all springs (#11) hooks face down.
All warning labels must be facing upwards.
Spring hooks must be pushed securely into the frame holes.
Keep springs dry as wet springs are very slippery.
7
Two people will be necessary at this point to assemble the trampoline. One person lifts the
Support Assembly from step 2 to a standing (vertical) position and inserts one of the sockets
the Top Rail with Sockets (#3) into the Vertical Leg Extension portion of the Support
Assembly. The other person holds the other end and inserts that portion into the other
Support Assembly as shown. You should now have 2 Support Assemblies held together by 1
Now, install the top rails (#4) into the gaps between the vertical leg extensions (#6) by
to follow instructions may result in damaged springs or frame
warping/displacement. The trampoline is under heavy tension, more effort may be required to
attach springs to the frame as you go on. Springs should be attached as per instruction below:

