10
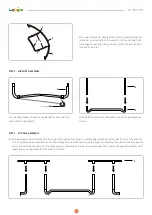
To connect the parts, simply slide a section (male) tubing that
is smaller on one end into the adjacent section (female) that
has a bigger opening, then you’ll see joints as shown (called
“connector points”).
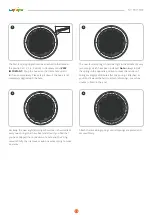
Put the Slip-Resistant Parts for Leg Base(#16) onto the two
sides of the Leg Base(#5).
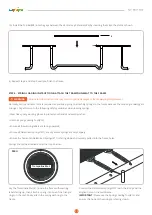
(a) Two people are required. One lifts the Support Assembly from Step 2 to a standing (vertical) position, inserts one of the sockets
of the Top Rail with Sockets(#3) into the Vertical Leg Extension(#6) portion of the Support Assembly; the other holds the opposite
end and inserts that portion into the other Support Assembly as shown. You should have TWO pieces of Support Assembly held
together by one Top Rail with the Socket in this step.
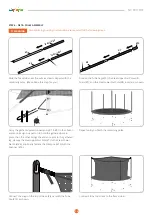
Slide all Vertical Leg Extensions(#6) onto the Leg Base(#5) as
shown.
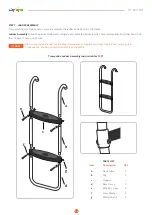
STEP 2 - SUPPORT ASSEMBLY
STEP 3 - TOP RAIL ASSEMBLY
5
16
5
6
3
3
3
4
5
6
Summary of Contents for Safump Trampoline
Page 29: ......
Page 30: ...PLAY ENJOY BOND ...


