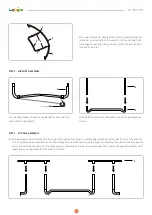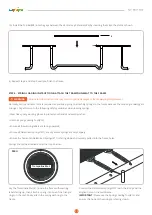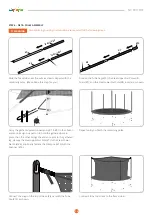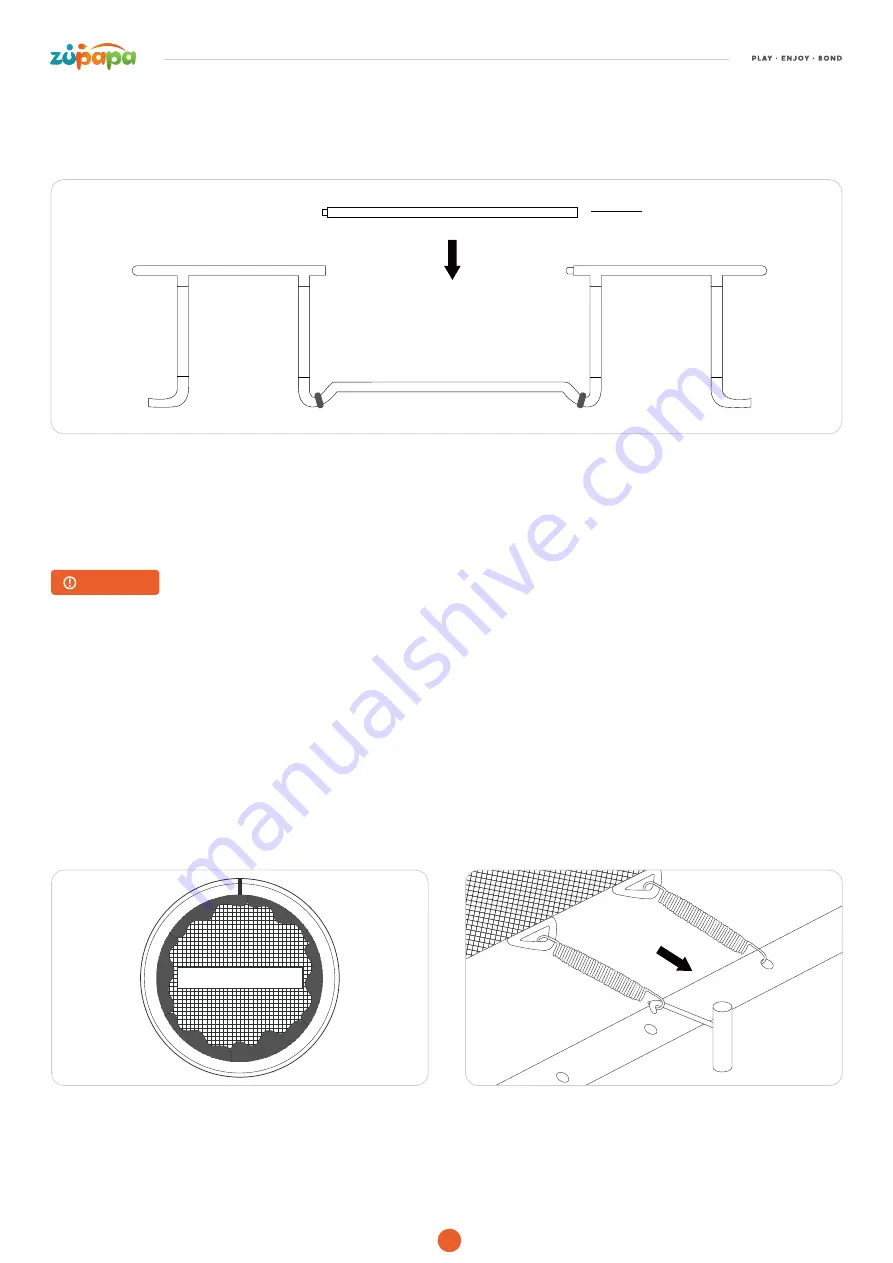
(b) Install the Top Rail(#4) into the gaps between the Vertical Leg Extension(#6) by inserting them into the slots as shown.
(c) Repeat Step 2 and Step 3 until you finish the frame.
STEP 4 - SPRING LOADING INSTRUCTION & ATTACH THE TRAMPOLINE MAT TO THE FRAME
Normally, more and more force is required as you keep going on attaching springs to the frame because the tension gradually gets
stronger. Pay attention to the following safety guidelines when loading springs:
• Wear heavy-duty working gloves to protect your hands and avoid pinches;
• Use the Spring Loading Tool(#12);
• Ensure all the warning labels are facing upwards;
• Ensure all Galvanized Springs(#11) are dry as wet springs are very slippery.
• Ensure the hook of all Galvanized Springs(#11) is facing down and securely pulled into the frame holes.
11
4
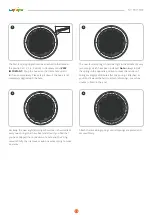
Lay the Trampoline Mat(#1) inside the frame with warning
labels facing up, then attach a spring into one of the triangle
rings on the mat, finally attach the spring with ring to the
frame.
Connect the Galvanized Springs(#11) with the V-ring and the
aligned hole on the main frame.
IMPORTANT:
Please use the Spring Loading Tool(#12) and
ensure the hook of the springs are facing down.
ZERO
Trampoline Mat
Failure to follow instructions may result in spring damages or frame warping/displacement.
WARNING
Springs should be attached as per the steps below.
Summary of Contents for Safump Trampoline
Page 29: ......
Page 30: ...PLAY ENJOY BOND ...


