background image

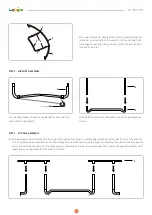
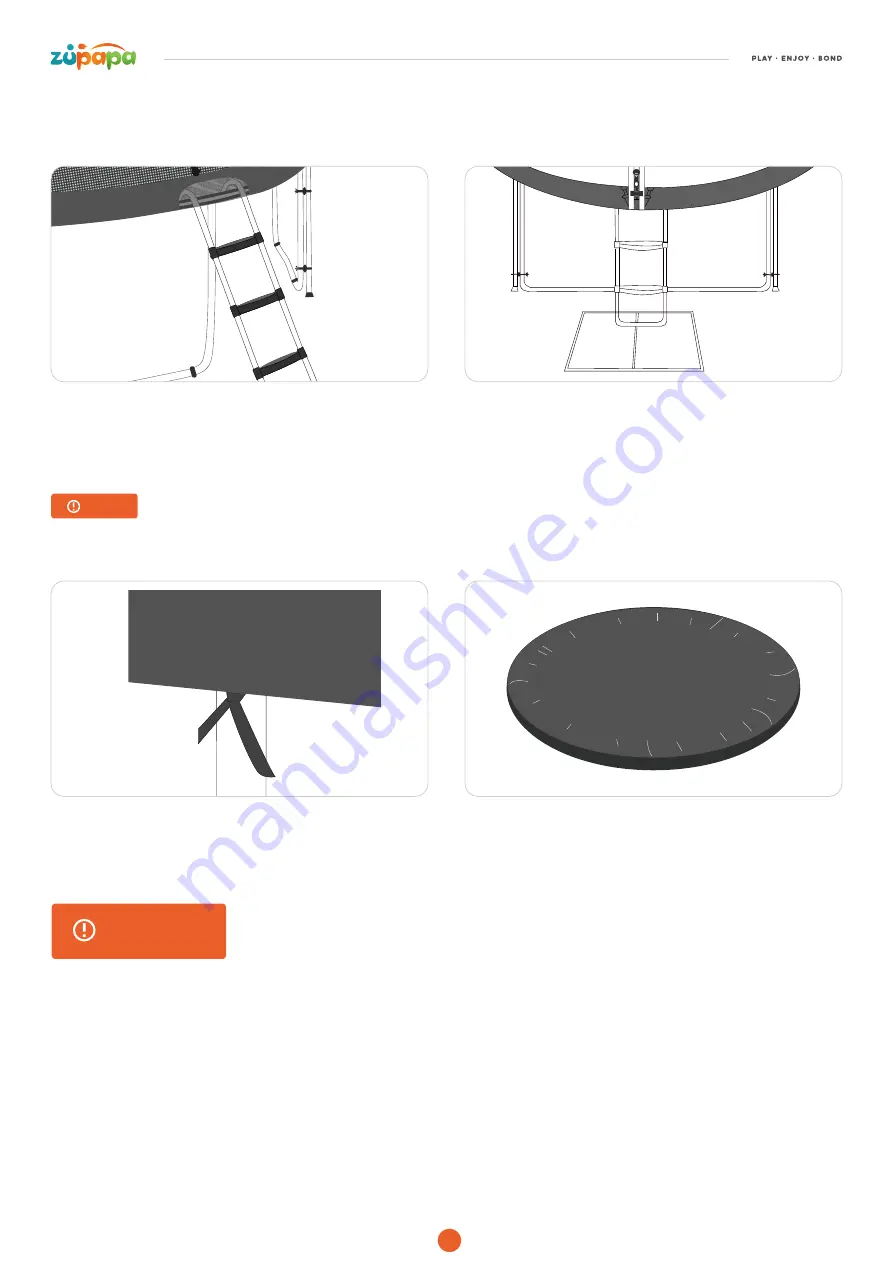
Attach the Ladder to the Frame

Attach the ladder to the frame where is close to the zipper.

Congratulations! Your trampoline is completed! 

18

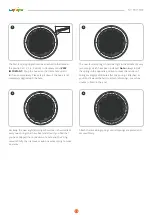
Not a required step. You can skip it and try the trampoline after completing Step 7.

NOTE

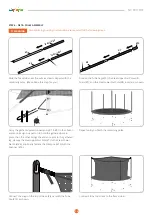
Disassemble the enclosure net and poles firstly, then lay the 
rain cover on the trampoline and tie the straps to the poles.

Please ensure there are no leaves or other objects over the 
preformed hole which is designed for drainage.

STEP 8 - RAIN COVER ASSEMBLY

To prolong your trampoline’s service time, put on the rain cover when it is not in use. 

• Watch the video tutorial at the Zupapa® Website: https://www.zupapa.us/pages/assembly-instructions.
• Email official@zupapa.us if you have any questions about the assembly.

Attention

Summary of Contents for Safump Trampoline

Page 1: ...ne Read understand and follow guidelines in this manual before dis assembling using your trampoline Email official zupapa us Website https www zupapa us Not for commercial use Not recommended for children under 6 years old PLAY ENJOY BOND ...

Page 2: ... Settings if you do not receive a reply as it probably is blocked Our Customer Happiness Executives will always get back to you no later than the timeframe Add the following email address to your CONTACT LIST in case of any blocking Email official zupapa us Visit https www zupapa us for more information About Zupapa 2 Safety Instructions 3 Parts List 6 Placement 8 Assembly 9 Disassembly 19 Care Main...

Page 3: ...stic bars We never slow down our pace to expand the business we are continuously working hard with carefully selected partners to provide more safe and reliable products that can deliver joy and health to more families Brief To be the preferred trustworthy brand in recreational sports and leisure activities Our Vision Zupapa Safump trampolines with the top quality and performance at a price enabli...

Page 4: ...visor or jumper you should read understand and practice safe instructions as below 02 SAFETY INSTRUCTIONS Ensure the jumper s are within the weight limit when playing on the trampoline Inspect the trampoline before each use for bent tubes torn mat loose broken springs and overall stability of the trampoline Small children should be assisted when getting in off the trampoline Do not allow any jumper...

Page 5: ...p onto the frame over the springs and onto the trampoline mat Initially you should get accustomed to the feeling and bounce of the trampoline The focus must be on the fundamental of your body position You should practice each bounce the basic bounces until you can do and control it at ease To break a bounce bend your knees sharply before they contact the trampoline mat This technique should be pra...

Page 6: ...r grasp the frame pad Do not get off by jumping off the trampoline and landing on the ground even if it s a grassland Do not attempt to somersault Do not bounce recklessly on the trampoline because it will increase your chances of getting injured Do not bounce on the trampoline for extended periods because fatigue can increase your chances of injury Keep all objects that could interfere with the jum...

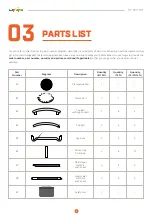
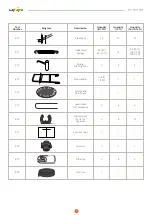
Page 7: ...umber part number quantity and pictures or videos if applicable so that you can get what you need as soon as possible Part Number Diagram Description Quantity 12 ft Quantity 8 10 ft Quantity 14 15 16 ft 1 1 1 1 1 1 1 3 4 6 3 4 6 3 4 6 6 8 12 6 8 6 6 8 6 1 1 1 Trampoline Mat Frame Pad Top Rail with Leg Sockets Top Rail Leg Base Vertical Leg Extension Steel Upper Net Pole with Foam Steel Lower Net P...

Page 8: ... 20 7 12 16 12 72 96 14 ft 108 15 ft 120 16 ft 48 8 ft 60 10 ft 0 8 ft 1 10 ft 2 2 2 1 1 1 1 1 3 4 6 6 6 8 6 8 12 1 1 1 1 1 1 1 1 1 Clamp Set Galvanized Springs Spring Loading Tool Steel Ladder Trampoline Rain Cover Lawn Stake for Trampoline Slip resistant Parts for Leg Base Pad for Shoes Spanner Tube Cap Net Cord ...

Page 9: ... overhead because it keeps the trampoline stable and firm from sliding with traction as well as protects the jumper from severe injuries in case of falling Adjust somewhere a little uneven ONLY applicable for the place where the rise gradient is no more than 3 degrees across the whole space if you have to place the trampoline there The minimum space required overhead the trampoline is 24 feet about...

Page 10: ...video clips if applicable 3 Do not forget to wear gloves and use the Spring Loading Tool 12 provided in the package The owner and the installer should take responsibility for any injuries if they forget to wear and use 4 Ensure all parts are dry before the installation Check assembly instructions of the frame frame pad trampoline mat safety net ladder and rain cover from here There are eight 8 ste...

Page 11: ...Support Assembly from Step 2 to a standing vertical position inserts one of the sockets of the Top Rail with Sockets 3 into the Vertical Leg Extension 6 portion of the Support Assembly the other holds the opposite end and inserts that portion into the other Support Assembly as shown You should have TWO pieces of Support Assembly held together by one Top Rail with the Socket in this step Slide all ...

Page 12: ... all the warning labels are facing upwards Ensure all Galvanized Springs 11 are dry as wet springs are very slippery Ensure the hook of all Galvanized Springs 11 is facing down and securely pulled into the frame holes 11 4 Lay the Trampoline Mat 1 inside the frame with warning labels facing up then attach a spring into one of the triangle rings on the mat finally attach the spring with ring to the ...

Page 13: ...d Note Always install the spring in the opposite position to make the tension of springs averagely distribute after one spring is attached or you ll find it would be hard to attach left springs or even be unable to finish in the end Similarly the next eight 8 springs should be in the middle of every two springs that have been installed If you find that you have skipped the connection of a hole and th...

Page 14: ...ore each use as per the steps below Cover all the metal parts including the steel frame with the Frame Pad Tie the black webbings sewn on the inner arc of the pad to the steel V rings Attach the hook of the elastic strap to the V rings circling around the outside of the top rail frame Important There is space for the pad flap between the trampoline vertical tube and the enclosure tube allowing gaps...

Page 15: ...POLES ASSEMBLY 14 7 foam tube foam tube 8 Carry the gathered poles connected by 7 8 to the chosen entrance Assign one person to hold the gathered pole in place then the other brings the entrance pole to the gathered leg clamps the Steel Upper Net Pole 7 to the Steel Lower Net Pole 8 and finally fastens the Clamp Set 10 with the Spanner 18 Repeat until you finish the remaining poles Connect the snap ...

Page 16: ...E Fix the Leg Base 5 to the ground by inserting the Lawn Stake 15 Note One Lawn Stake 15 for one Leg Base 2 Tie the end of the Net Cord 20 to the trampoline mat ring then pull the CORD through the net edge and the ring as shown Pull the Cord over all the rings then tie both ends of the Cord together 15 ...

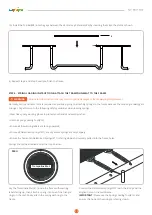
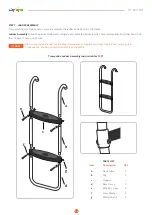
Page 17: ...2 feet 14 feet 15 feet and 16 feet We do not provide a ladder for the 8 feet trampolines as jumpers can easily step into the jumping area Consequently you do not need to assemble and attach it NOTE STEP 7 LADDER ASSEMBLY 16 Trampoline Ladder Assembly Instruction for 10 FT e c a b g d f PARTS LIST Item Description QTY a b c d e f g Hook Tube 2 2 2 1 4 4 4 Leg Stepper M6 x 40 Screw Base Frame 6mm Wa...

Page 18: ...ampoline Ladder Assembly Instruction for 12 14 15 16 FT 17 e c a b g d f M6 Nylon Nut Item Description PARTS LIST QTY a b c d e f g Hook Tube 2 4 3 1 6 6 6 Leg Stepper M6 x 40 Screw Base Frame 6mm Washer ...

Page 19: ...stly then lay the rain cover on the trampoline and tie the straps to the poles Please ensure there are no leaves or other objects over the preformed hole which is designed for drainage STEP 8 RAIN COVER ASSEMBLY To prolong your trampoline s service time put on the rain cover when it is not in use Watch the video tutorial at the Zupapa Website https www zupapa us pages assembly instructions Email o...

Page 20: ...wear socks or be barefoot when using the trampoline Keep your trampoline away from any fire sources such as a grill Do not allow pets or animals to get inside the jumping area Store the trampoline in a dry area with good ventilation when it s not in use Put on the rain cove to prolong your trampoline s life when it s not in use Put on the rain cover to protect the mat from leaves or bird droppings ...

Page 21: ...er disassemble the net poles and the safety net then tie the top frame round outside portion of the trampoline to the ground with ropes and stakes Keep it in mind at least three 3 ties should be used to ensure security and do not just secure the trampoline legs to the ground or the frame sockets would be pulled out WINDY CONDITIONS Although you can use your Zupapa trampoline in winter if you keep ...

Page 22: ... for other accessories can be applied free of charge at ANY TIME Damages caused by weather including but not limited to winds rains snow are excluded from the warranty You can either email Zupapa official zupapa us or the retailer with the inquiry details order number and pictures or videos if applicable if you need to claim for the warranty In case of any blocking we suggest you add Zupapa to your ...

Page 23: ...s learned in Lesson 1 LESSON 3 1 Demonstrate and practice the front drop Important All learners should keep the prone position face down on the ground while the instructor tries to correct the faulty positions that could cause injury 2 Start with a hand and knee bounce and then extend the body into the prone position land on the mat 3 Practice the routine hand and knee bounce front bounce seat bou...

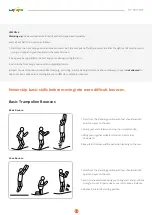
Page 24: ...ve However they are not allowed to skip these basic skills before moving into more difficult complicated bounces Never skip basic skills before moving into more difficult bounces 23 Basic Trampoline Bounces 1 Start from the standing position with feet shoulder width apart and eyes on the mat 2 Swing your arms forward and up in a circular motion 3 Bring feet together while in mid air and point toes dow...

Page 25: ...he prone position face down with your hands and arms extended forward on the mat 3 Push off the mat with your arms returning to the standing position Front Bounce 1 Start with the front bounce position 2 Push off with your left or right hand and arms depending on which way you wish to turn 3 Maintain your head and shoulders in the same direction keep your back parallel to the mat and head up 4 Land ...

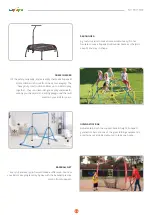
Page 26: ...TDOOR TRAMPOLINE Not any kid can refuse the bouncing fun Zupapa Saffun Safump outdoor trampolines are the ultimate gift idea for your kids making the backyard a safe jumping playground for years Zupapa Product Categories SMALL TRAMPOLINE Are you looking for a perfect place for your preschool and school age boys and girls to free up their energy Try a Zupapa trampoline for small kids with the basket...

Page 27: ...tion enables up to 6 kids to play together they can climb dangle or play underneath making your backyard an exciting playground that will entertain your kids for years GYMNASTICS BAR Adjustable in both the support base height Zupapa gymnastics bars are one of the great folding equipment to entertain your kids Rest assured to take one home BASEBALL NET Every hit and every pitch would make a differen...

Page 28: ...would love to stay outdoors more than before PADDLE BOARD A necessity for water loving ones The most alluring you can surf together with your furry friends of course if they are not afraid of water and are glad to go surfing with you HAMMOCK STAND Nothing is better than reposing on a Zupapa hammock set while the gentle breeze and warm sunlight give a pat on your body You can imagine how delightful ...

Page 29: ......

Page 30: ...PLAY ENJOY BOND ...

Reviews: