Before Assembling
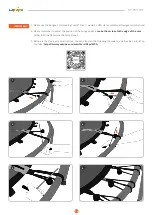
Please read the assembly instructions before starting your work. For the online version, please go to the page:
https://www.zupapa.us/pages/assembly-instructions
. A quick approach is to scan the following QR code.
1. Start your work in the room where you prepared for the trampoline because this structure should not be placed outdoors and is
not allowed to be moved from one place to another after the assembly.
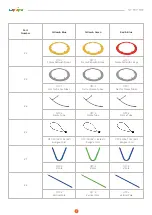
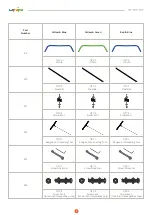
2. Check and confirm you have all labeled parts according to the chapter
Parts List
. If you need any replacement(s), feel free to
reach out to Zupapa® Customer Happiness Executives (
official@zupapa.us
) with the ORDER NUMBER, PART NUMBER,
REQUIRED QUANTITY for each part, and photos or videos (if applicable).
3. Wear gloves and use the Bungee Cord Loading Tool (#12) and the Screw Driver Set (#13) when you assemble the trampoline. The
owner (or installer) should take responsibility for any possible injuries if they forget to wear and use them.
Please understand there is always a risk of injuries when using tools or doing technical work. The owner (or installer) should follow
the guidelines below for the assembly and should take responsibility for any improper operations.
9
04
ASSEMBLY
Do not move the trampoline from one room to another without dissembling the structure after the
assembly.
IMPORTANT
Summary of Contents for Small Trampoline
Page 26: ...PLAY ENJOY BOND ...

