Chapter 29 DHCP
GS1915 Series User’s Guide
231
•
VLAN
–
The Switch is configured on a VLAN by VLAN basis. The Switch can be configured to relay
DHCP requests to different DHCP servers for clients in different VLAN.
29.2 DHCP Configuration
Click
IP Application
>
DHCP
in the navigation panel to display the screen as shown. Click the link next to
DHCPv4
to open screens where you can enable and configure DHCPv4 relay settings and create option
82 profiles. Click the link next to
DHCPv6
to open a screen where you can configure DHCPv6 relay
settings.
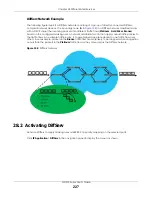
Figure 161
IP Application > DHCP
29.3 DHCPv4 Status
Click
IP Application
>
DHCP
>
DHCPv4
in the navigation panel. The
DHCP Status
screen displays.
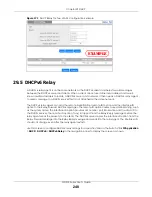
Figure 162
IP Application > DHCP > DHCPv4
The following table describes the labels in this screen.
29.4 DHCPv4 Relay
Configure DHCP relay on the Switch if the DHCP clients and the DHCP server are not in the same
broadcast domain. During the initial IP address leasing, the Switch helps to relay network information
(such as the IP address and subnet mask) between a DHCP client and a DHCP server. Once the DHCP
client obtains an IP address and can connect to the network, network information renewal is done
Table 112 IP Application > DHCP > DHCPv4
LABEL
DESCRIPTION
Relay Status
This section displays configuration settings related to the Switch’s DHCP relay mode.
Relay Mode
This field displays:
None
– if the Switch is not configured as a DHCP relay agent.
Global
– if the Switch is configured as a DHCP relay agent only.
VLAN
– followed by a VLAN ID or multiple VLAN IDs if it is configured as a relay agent for specific
VLANs.


