Chapter 31 Maintenance
GS1915 Series User’s Guide
249
1
In the
Maintenance
screen, click a configuration
button next to
Reboot System
to reboot and load that
configuration file. The confirmation screen displays.
2
Click
OK
again and then wait for the Switch to restart. This takes up to 2 minutes. This does not affect the
Switch’s configuration.
Click
Config 1
and follow steps 1 to 2 to reboot and load configuration one on the Switch.
Click
Config 2
and follow steps 1 to 2 to reboot and load configuration two on the Switch.
Click
Factory Default
and follow steps 1 to 2 to reboot and load Zyxel factory default configuration
settings on the Switch.
Click
Custom Default
and follow steps 1 to 2 to reboot and load a customized default file on the Switch.
This will save the custom default configuration settings to both
Configuration 1
and
Configuration 2
.
Note: If a customized default file was not saved, clicking
Custom Default
loads the factory
default configuration on the Switch.
31.2.4 Factory Default
Follow the steps below to reset the Switch back to the factory defaults.
1
Click the
Factory Default
button.
2
Click
OK
to continue or
Cancel
to abort.
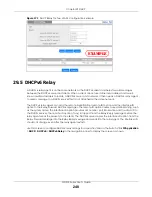
Figure 177
Load Factory Default: Confirmation
If you want to access the Switch Web Configurator again, you may need to change the IP address of
your computer to be in the same subnet as that of the default Switch IP address (192.168.1.1 or DHCP-
assigned IP).
31.2.5 Custom Default
Follow the steps below to reset the Switch back to the
Custom Default
configuration file you created.
This will save the custom default configuration settings to both
Configuration 1
and
Configuration 2
.
1
Click the
Custom Default
button.
2
Click
OK
to continue or
Cancel
to abort.
Note: If you did not save a custom default file in the Web Configurator, then the factory
default file is restored after you press click
Custom Default
(next to
Reboot System
) on
the Switch. You will then have to make all your configurations again on the Switch.


