Chapter 24 Multicast
GS2210 Series User’s Guide
194
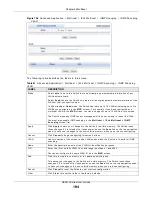
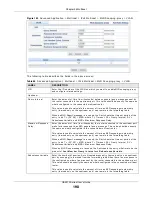
Figure 136
Advanced Applicat ion > Mult icast > I Pv4 Mult icast > I GMP Snooping > I GMP Snooping
VLAN
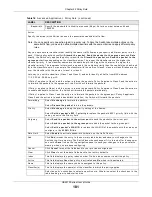
The follow ing t able descr ibes t he labels in t his scr een.
Table 81
Advanced Applicat ion > Mult icast > I Pv4 Mult icast > I GMP Snooping > I GMP Snooping
VLAN
LABEL
DESCRIPTION
Mode Select
a u t o t o have t he Sw it ch lear n m ult icast gr oup m em ber ship infor m at ion of any
VLANs aut om at ically.
Select fix e d t o have t he Sw it ch only lear n m ult icast group m em ber ship infor m at ion of t he
VLAN( s) t hat you specify below.
I n eit her a u t o or f ix e d m ode, t he Sw it ch can lear n up t o 16 VLANs ( including up t o five
VLANs you configur ed in t he M V R scr een) . For ex am ple, if you have configur ed one
m ult icast VLAN in t he M V R scr een, you can only specify up t o 15 VLANs in t his scr een.
The Sw it ch dr ops any I GMP cont r ol m essages w hich do not belong t o t hese 16 VLANs.
You m ust also enable I GMP snooping in t he M u lt ica st > I Pv 4 M u lt ica st > I GM P
Sn oopin g scr een fir st .
Apply
Click Apply t o save your changes t o t he Sw it ch’s r un- t im e m em or y. The Sw it ch loses
t hese changes if it is t ur ned off or loses pow er, so use t he Sa ve link on t he t op navigat ion
panel t o save your changes t o t he non- volat ile m em or y w hen you ar e done configur ing.
Cancel
Click Ca n ce l t o begin configur ing t his scr een afr esh.
VLAN
Use t his sect ion of t he scr een t o add VLANs upon w hich t he Sw it ch is t o per for m I GMP
snooping.
Nam e
Ent er t he descr ipt ive nam e of t he VLAN for ident ificat ion pur poses.
VI D
Ent er t he I D of a st at ic VLAN; t he valid range is bet w een 1 and 4094.
You cannot configur e t he sam e VLAN I D as in t he M V R scr een.
Add
Click t his t o cr eat e a new ent r y or t o updat e an ex ist ing one.
This saves your changes t o t he Sw it ch’s r un- t im e m em or y. The Sw it ch loses t hese
changes if it is t ur ned off or loses pow er, so use t he Sa ve link on t he t op nav igat ion panel
t o save your changes t o t he non- volat ile m em or y w hen you ar e done configur ing.
Cancel
Click Ca n ce l t o r eset t he fields t o your pr evious configurat ion.
Clear
Click Cle a r t o r eset t he fields t o t he fact or y default s.


