Chapter 40 DHCP
GS2210 Series User’s Guide
348
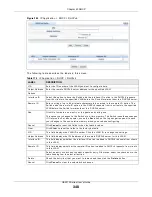
Figure 245
I P Applicat ion > DHCP > DHCPv6
The follow ing t able descr ibes t he labels in t his scr een.
Table 174
I P Applicat ion > DHCP > DHCPv6
LABEL
DESCRIPTION
VI D
Ent er t he I D num ber of t he VLAN you want t o configur e her e.
Helper Addr ess
Ent er t he r em ot e DHCPv6 ser ver addr ess for t he specified VLAN.
Opt ions
I nt er face I D
Select t his opt ion t o have t he Sw it ch add t he int erface- I D opt ion in t he DHCPv 6 request s
fr om t he client s in t he specified VLAN befor e t he Sw it ch for war ds t hem t o a DHCPv 6 ser ver.
Rem ot e I D
Ent er a st r ing of up t o 64 pr int able charact er s t o be car r ied in t he rem ot e- I D opt ion. The
Sw it ch adds t he r em ot e- I D opt ion in t he DHCPv 6 r equest s fr om t he client s in t he specified
VLAN befor e t he Sw it ch for wards t hem t o a DHCPv 6 ser ver.
Add
Click t his t o cr eat e a new ent r y or t o updat e an ex ist ing one.
This saves your changes t o t he Sw it ch’s run- t im e m em ory. The Sw it ch loses t hese changes
if it is t ur ned off or loses pow er, so use t he Sa v e link on t he t op navigat ion panel t o save
your changes t o t he non- volat ile m em or y w hen you ar e done configur ing.
Cancel
Click Ca n ce l t o r eset t he fields t o t heir last saved values.
Clear
Click Cle a r t o r eset t he fields t o t he fact or y default s.
VI D
This field display s t he VLAN I D num ber. Click t he VLAN I D t o change t he set t ings.
Helper Addr ess
This field display s t he I Pv 6 addr ess of t he r em ot e DHCPv6 ser ver for t his VLAN.
I nt er face I D
This field display s w het her t he int er face- I D opt ion is added t o DHCPv 6 r equest s from client s
in t his VLAN.
Rem ot e I D
This field display s w het her t he r em ot e- I D opt ion is added t o DHCPv 6 r equest s fr om client s
in t his VLAN.
Select an ent r y’s check box t o select a specific ent r y. Ot her w ise, select t he check box in t he
t able heading r ow t o select all ent r ies.
Delet e
Check t he ent ry ( ies) t hat you want t o rem ove and t hen click t he D e le t e but t on.
Cancel
Click Ca n ce l t o clear t he select ed check boxes.


