Chapter 8 Basic Setting
XMG1930 Series User’s Guide
117
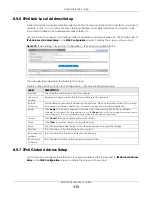
8.9.10 IPv6 Prefix Setup
Use this screen to configure the Switch’s IPv6 prefix list for each interface. Click the link next to
IPv6 Prefix
Setup
in the
IPv6 Configuration
screen to display the screen as shown next.
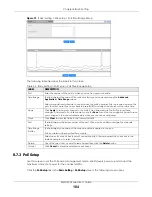
Figure 83
Basic Setting > IPv6 > IPv6 Configuration > IPv6 Prefix Setup
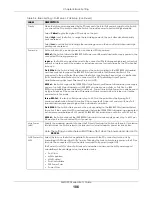
Suppress
Select this option to set the Switch to not send router advertisements and responses to
router solicitations on this interface.
Apply
Click
Apply
to save your changes to the Switch’s run-time memory. The Switch loses these
changes if it is turned off or loses power, so use the
Save
link on the top navigation panel to
save your changes to the non-volatile memory when you are done configuring.
Cancel
Click
Cancel
to begin configuring this screen afresh.
Clear
Click
Clear
to reset the fields to the factory defaults.
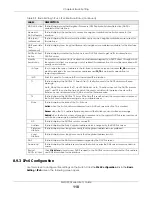
Index
This is the interface index number. Click an index number to change the settings.
Interface
This is the name of the IPv6 interface you created.
Flags
This field displays whether IPv6 hosts use DHCPv6 to obtain IPv6 stateful addresses (
M
) and/
or additional configuration settings (
O
).
Minimum Interval
This field displays the minimum time interval at which the Switch sends router
advertisements for this interface.
Maximum Interval
This field displays the maximum time interval at which the Switch sends router
advertisements for this interface.
Lifetime
This field displays how long the router in router advertisements can be used as a default
router for this interface.
Suppress
This field displays whether the Switch sends router advertisements and responses to router
solicitations on this interface (
No
) or not (
Yes
).
Table 46 Basic Setting > IPv6 > IPv6 Configuration > IPv6 Router Discovery Setup (continued)
LABEL
DESCRIPTION


