Chapter 24 Web Authentication
UAG5100 User’s Guide
240
24.3 Walled Garden Screen
A user must log in before the UAG allows the user’s access to the Internet. However, with a walled
garden, you can define one or more web site addresses that all users can access without logging in.
These can be used for advertisements for example.
Use this screen to configure walled garden web addresses for web sites that all users are allowed to
access without logging in. The web site link(s) then displays in the user login screen.
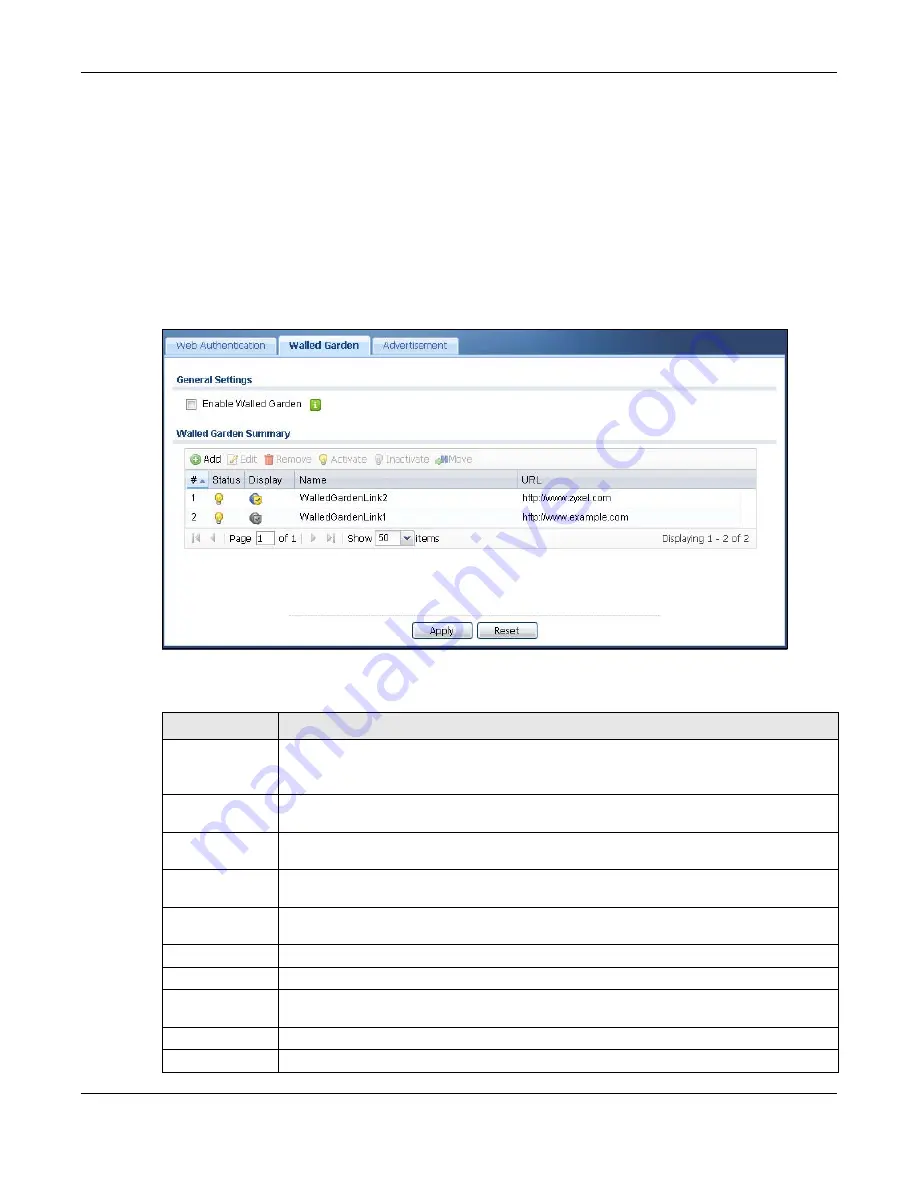
Click Configuration > Web Authentication > Walled Garden to display the screen.
Figure 164
Configuration > Web Authentication > Walled Garden
The following table gives an overview of the objects you can configure.
Table 104
Configuration > Web Authentication > Walled Garden
LABEL
DESCRIPTION
Enable Walled
Garden
Select this to turn on the walled garden feature.
Note: This feature works only when you set web authentication to
Web Portal
.
Walled Garden
Summary
Use this table to manage the list of walled garden links.
Add
Click this to create a new entry. Select an entry and click Add to create a new entry after
the selected entry.
Edit
Double-click an entry or select it and click Edit to open a screen where you can modify the
entry’s settings.
Remove
To remove an entry, select it and click Remove. The UAG confirms you want to remove it
before doing so.
Activate
To turn on an entry, select it and click Activate.
Inactivate
To turn off an entry, select it and click Inactivate.
Move
To move an entry to a different number in the list, click the Move icon. In the field that
appears, specify the number to which you want to move the interface.
#
This field is a sequential value, and it is not associated with any entry.
Status
This icon is lit when the entry is active and dimmed when the entry is inactive.


