Chapter 3 Hardware, Interfaces and Zones
ZyWALL USG Series User’s Guide
77
3
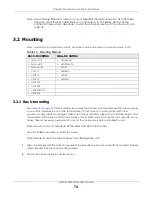
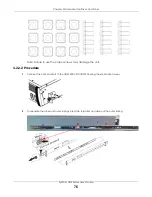
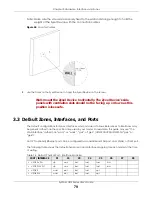
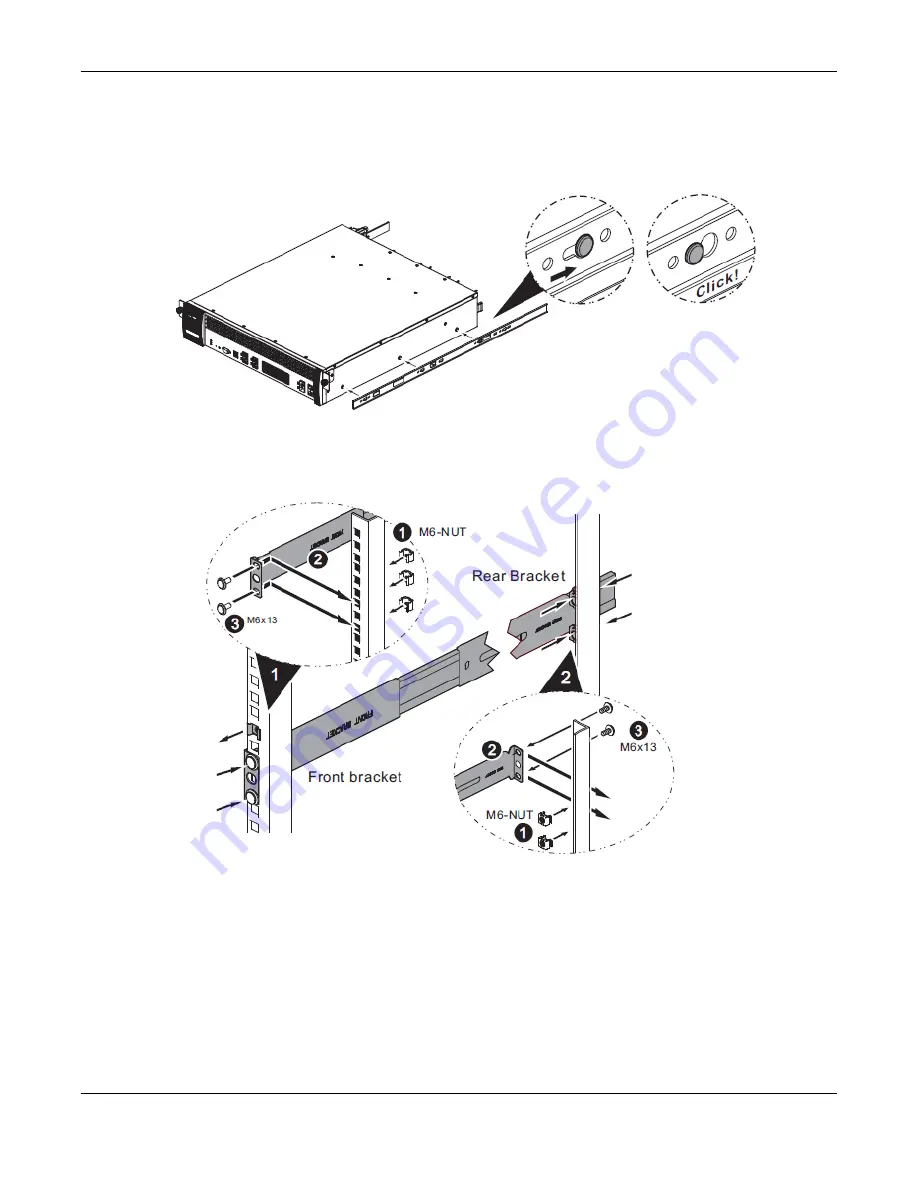
Connect the inner railing to the USG2200-VPN/USG2200 as shown. Align the holes on the inner rail with
the screws on the side of the USG2200-VPN/USG2200 and slide until it clicks in place. Do the same for the
other inner rail on the other side of the USG2200-VPN/USG2200. (Use tab C to remove the inner rail from
the USG2200-VPN/USG2200.)
4
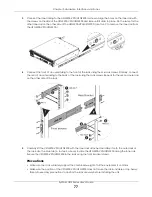
Connect the front of an outer railing to the front of the rack using the M6 rack screws. Similarly, connect
the rear of an outer railing to the back of the rack using the rack screws. Repeat for the second outer rail
on the other side of the rack.
5
Carefully lift the USG2200-VPN/USG2200 with the inner rails attached and slide it onto the outer rails of
the rack. Use the blue tab (A in step 2 above) to slide the USG2200-VPN/USG2200 along the inner rail.
Secure the USG2200-VPN/USG2200 in the rack using the front bracket screws.
Precautions
• Make sure the rack will safely support the combined weight of all the equipment it contains.
• Make sure the position of the USG2200-VPN/USG2200 does not make the rack unstable or top-heavy.
Take all necessary precautions to anchor the rack securely before installing the unit.
Summary of Contents for USG110
Page 27: ...27 PART I User s Guide ...
Page 195: ...195 PART II Technical Reference ...
Page 309: ...Chapter 10 Interfaces ZyWALL USG Series User s Guide 309 ...
Page 313: ...Chapter 10 Interfaces ZyWALL USG Series User s Guide 313 ...
Page 358: ...Chapter 10 Interfaces ZyWALL USG Series User s Guide 358 ...
Page 373: ...Chapter 10 Interfaces ZyWALL USG Series User s Guide 373 ...


