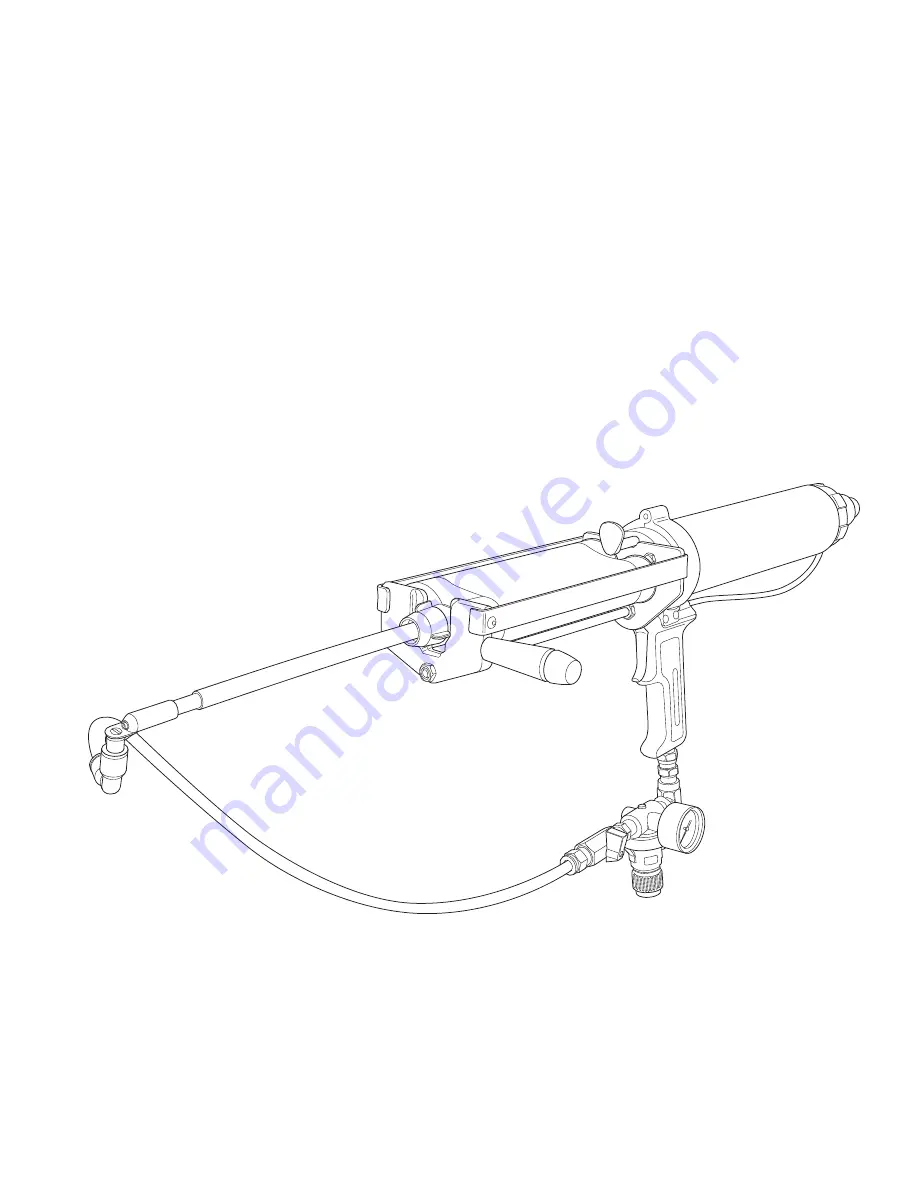
background image

3

Scotchkote

Spray System HSS-450

For Spray Application of 3M

 Scotchkote  

Liquid Epoxy Coating 323

User Instructions

June 2007
80-6111-8421-1

Summary of Contents for Scotchkote HSS-450

Page 1: ...3 Scotchkote Spray System HSS 450 For Spray Application of 3M Scotchkote Liquid Epoxy Coating 323 User Instructions June 2007 80 6111 8421 1 ...

Page 2: ...for use where fast and easy setup no clean up minimal material waste and essentially no equipment maintenance are highly desirable The system must be installed as specified in the 3M Scotchkote Spray System HSS 450 Instructions and is intended for use in a professional industrial environment only It has not been evaluated for other uses or locations Disposal of product related waste Refer to Secti...

Page 3: ... codes and air exhaust for each application Use only 3M approved dual component cartridge materials in the applicator system m CAUTION To reduce the risks associated with air pressure Ensure air line input 145psi and that applicator system regulators are properly adjusted prior to each use Do not alter or modify the applicator system and use only 3M approved service parts Check the applicator syst...

Page 4: ...3 Front Plate 4 Return Pusher Indicator Rod 5 Frame Assembly 6 Handle 7 Piston Housing 8 Fluid Pressure Regulator 9 Piston Air Supply Hose 10 Cartridge 11 Mix Nozzle 12 90 Elbow Connector 13 Nozzle Air Pressure Adjustment Knob 14 Nozzle Air Supply Hose 15 Mini Ball Valve 16 Nozzle Air Pressure Gauge 17 Ejector Plates 18 Air Return Button 4 17 18 8 ...

Page 5: ...the nozzle end of the applicator Toward nozzle end of applicator 1 3 Attach the air supply hose quick disconnect fitting to the T fitting Note Confirm the quick disconnect fitting is the proper size for your air supply hose Other fittings may be substituted if needed Note Wrap the threads on the quick disconnect fitting with Scotch Thread Sealant and Lubricant Tape 48 not included to prevent leaks...

Page 6: ...ith 3M Scotchkote Liquid Epoxy Coating 323 The number of mix elements contained in each mix nozzle is unique to Scotchkote 323 and should not be used with any other product 3M Scotchkote Spray Nozzle Straight Conical Pattern 80 6300 0166 9 3M Scotchkote Spray Nozzle 90 Fan Pattern 80 6300 0165 1 3 0 Attach Mix Nozzle to Cartridge 3 1 Stand cartridge assembly with outlet end up Remove plug Remove p...

Page 7: ...safe direction away from yourself and other personnel This will reduce the chance of material drooling into the mixer bell housing causing premature cure of material in mixer 4 2 Place the large end of the cartridge assembly piston seal end over the two ejector plates of the applicator pushing the cartridge assembly towards the air cylinder snapping the cartridge into place Ensure that the cartrid...

Page 8: ...h to fill the mix nozzle with material release the trigger before actually dispensing material from the nozzle Second point the nozzle into a waste receptacle and dispense approximately a one half nozzle length of potentially unmixed material Note Do not open the ball valve until after the cartridge and nozzle have been purged Note Refer to Section 13 of the 3M Scotchkote Liquid Epoxy Coating 323 ...

Page 9: ... to adjust air pressure to 40 50 psi 2 8 3 4 bar Turn knob to adjust pressure 40 50 psi 2 8 3 4 bar 5 5 Pull trigger to spray Release to stop spraying Pull trigger to spray 5 6 Close the ball valve to stop the air flow to the nozzle Closed ...

Page 10: ... cylinder to retract the ejector plates from the cartridge Push to retract ejector plates Push to retract ejector plates 6 2 Remove the air supply hose from the regulator Remove Air Supply Hose 6 3 Remove the elbow connector on nozzle air hose from the nozzle inlet Note Do not discard the 90 elbow connector It is not necessary to remove the connector from the nozzle air hose Remove 90 elbow connec...

Page 11: ...g the nozzle and resealing the cartridge with the original plug Be sure to re align the plug according to the A and B compounds Note Refer to Section 13 of the 3M Scotchkote Liquid Epoxy Coating 323 Parts A and B MSDSs and applicable regulations or authorities for waste disposal Replace plug 7 0 Cleaning Wipe off excess coating material with a clean rag and a small amount of solvent avoiding getti...

Page 12: ...expressly agreed upon in writing by an authorized officer of 3M Warranty Limited Remedy Limited Liability This product will be free from defects in material and manufacture for a period of one 1 year from the time of purchase 3M MAKES NO OTHER WARRANTIES INCLUDING BUT NOT LIMITED TO ANY IMPLIED WARRANTY OF MERCHANTABILITY OR FITNESS FOR A PARTICULAR PURPOSE If this product is defective within the ...

Reviews: