background image

www.acclaimlighting.com

Canvas

User guide

can

vas

by

Start

can

vas

by

Start

Summary of Contents for Canvas

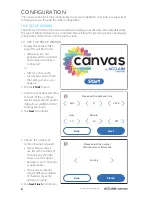
Page 1: ...Canvas User guide canvas by Start canvas by Start...
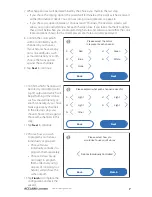
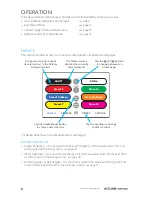
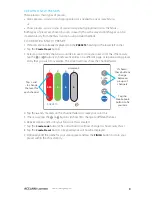
Page 2: ......

Page 3: ...reating new presets 9 Dimmers 11 Timers 12 Mobile device control 14 Settings 16 Passcode 17 Date and time 18 Bluetooth 19 Aria DMX wireless 19 Screen brightness 20 Preset fade 20 Idle Activity Dimmer...

Page 4: ...mote Acclaim Lighting Aria receivers Two analog 0 10V control lines are also made available for legacy fixtures and these can be tied to any of the 1024 control channels The Canvas controller is desig...

Page 5: ...d Gnd G 1 2 3 4 CONTROL OUTPUTS Both DMX universes and both 0 10V analog output connections are made on a single 10 way terminal block The behavior of the 0 10V outputs can be determined within the Se...

Page 6: ...therwise there is no earthing contact on the controller itself Tip A useful wire strip gauge is located next to the connector to show the ideal length for each exposed conductor MOUNTING The Canvas co...

Page 7: ...bladed screwdriver to engage with the raised lip on the underside of the Micro SD card and carefully lever the card outwards from the controller TO REPLACE THE SD MICRO MEMORY CARD 1 Ensure that power...

Page 8: ...previously been configured or After you choose the Factory Reset option from the Settings menu see page 24 2 Tap the START button canvas by Start 3 Set the current date and time For each of the six e...

Page 9: ...ou to optionally define what each channel does If you take a moment to define these it will help when you are programming fixtures and will also ensure that the color representations shown for the sto...

Page 10: ...he Settings menu see page 20 Preset fade times You can determine the speed at which one preset fades into the next This is set within page 3 of the Settings menu see page 20 Dimming values or percenta...

Page 11: ...e or buttons to find vacant entries on a different page or tap an existing preset entry that you wish to overwrite The screen will now show the channel faders 4 Tap the and markers on the channel fade...

Page 12: ...show preset 5 Tap the Create Preset button A new page will be displayed PRESETS Hold 3 sec Fade 30 sec Adjust the scene hold time and fade rate for this preset NEXT 6 This page provides two controls...

Page 13: ...ngle group and will show the same output CREATING PRESETS DIRECTLY FROM THE DIMMERS SECTION You can create static presets directly from the Dimmers section TO CREATE A STATIC PRESET 1 Within the Dimme...

Page 14: ...t and end times The repeat range and The appropriate preset to trigger TO CREATE A NEW TIMER 1 Tap the DIMMERS heading 2 Tap the Create Timer button 3 Select the entry that you would like to use to st...

Page 15: ...eft and right arrows to select the required settings As you change from the Do Not Repeat i e run once only option through to Annually the number of sub settings will increase to help you select the c...

Page 16: ...of the Canvas controller and has line of sight 2 Launch the Canvas app on your mobile device the Devices page will be shown and it will search for any Canvas controllers in the immediate vicinity Aft...

Page 17: ...h devices locate the ACCLAIM Canvas entry and choose the Forget option for that entry This will break the pairing link between the two devices and allow another mobile device to be linked with the Can...

Page 18: ...base of the screen e g PRESETS SETTINGS The six Settings pages provide access to numerous items within the Canvas controller Passcode see page 17 Date and Time see page 18 Bluetooth see page 19 Aria...

Page 19: ...o certain user operations TO SET A PASSCODE 1 Display page 1 of the settings menu 2 Tap the Passcode Set button A keypad will be displayed 3 Enter an appropriate passcode and tap the Ent button Note T...

Page 20: ...age 1 of the settings menu see page 16 2 Tap the Date Time Set button PRESETS DIMMERS TIMERS SETTINGS 1 6 Set Set Date Time 4 6 2018 11 45 57 AM Passcode OFF SETTINGS Set Date and Time Done Hour Minut...

Page 21: ...niverse via the Aria wireless standard supported by many Acclaim Lighting fixtures The usual choice of fifteen Aria radio channels numbered 0 to 14 are available For further details about using wirele...

Page 22: ...ws to determine the intensity of the screen PRESETS DIMMERS TIMERS SETTINGS 3 6 Preset Fade Screen 100 Seconds Brightness OFF 0 PRESET FADE You can choose the speed at which one preset fades into the...

Page 23: ...ivity mode a tap of the screen will restore it to its usual brightness TO SET THE IDLE ACTIVITY DIMMER TIMER 1 Display page 4 of the settings menu see page 16 2 Use the Idle Activity Dimmer left right...

Page 24: ...first contact 3 If necessary tap the or buttons to change to the required contact page each page is aligned to the similarly numbered physical contact input 4 You can set a preset for either or both...

Page 25: ...a Zero To Ten setup page 3 If necessary tap the or buttons to change between the two outputs 1 or 2 the pages are aligned to the physical 0 10V outputs 1 and 2 respectively There are two operation mod...

Page 26: ...setup wizard to help guide you through the configuration process Note All custom mixed presets will be erased and a standard selection put in place RESTART CANVAS The Restart Canvas option on page 6...

Page 27: ...14 1 11 0 10 9 8 5 6 7 5MHz 3MHz 11 2462 Aria radio channels WiFi 2 4 GHz 2 5 GHz 2 4 GHz 2 5 GHz 2 2417 1 2412 WiFi IEEE802 11 channels Channel Mid frequency 3 2422 4 2427 5 2432 6 2437 22MHz 7 2442...

Page 28: ...uality of the RF signal Here are a few examples Standard drywall does not present much of an issue to the 2 4GHz wireless spectrum However things inside or attached to the drywall such as copper pipe...

Page 29: ...storage Using included micro SD card 4GB minimum Internal clock Battery backed RTC user adjusted Power input 100 277VAC 50 60Hz User programmed elements 80 static color or dynamic shows up to 60 step...

Page 30: ...28 www acclaimlighting com DIMENSIONS Total weight 12 38oz 351g 0 39 10mm 6 3 160mm 4 61 117mm 6 02 153mm 1 81 46mm 1 81 46mm 4 29 109mm 2 56 65mm 3 39 3 54 86 90mm 2 36 60mm 0 35 9mm...

Page 31: ...rd party items not manufactures by Acclaim lighting During the period specified above Acclaim Lighting will replace defective parts at its expense and will absorb all expenses for warranty service and...

Page 32: ...www acclaimlighting com...
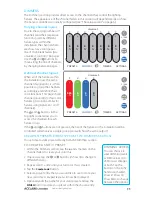
Reviews: