background image


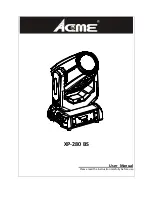
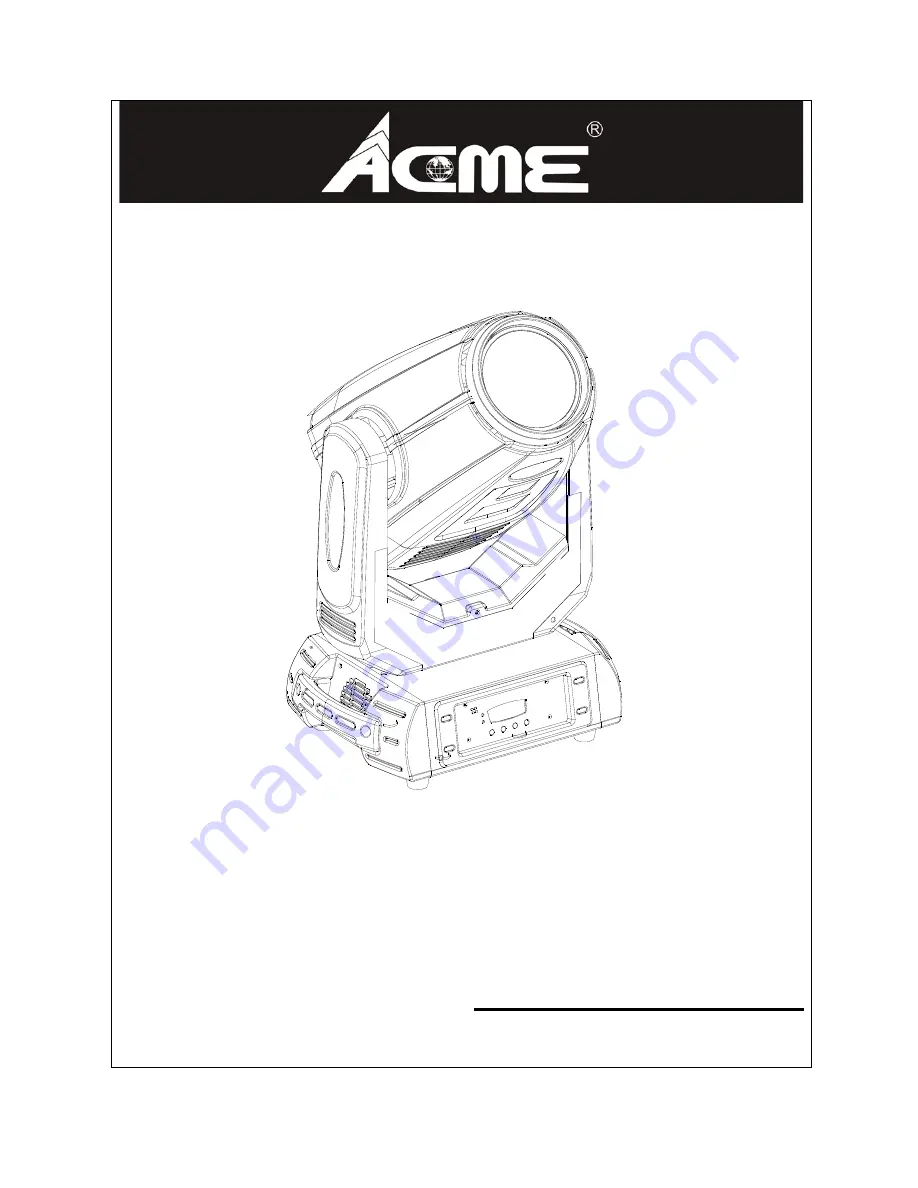
XP-280 BS 


User Manual


Please read the instruction carefully before use


Summary of Contents for XP-280 BS

Page 1: ...XP 280 BS User Manual Please read the instruction carefully before use ...

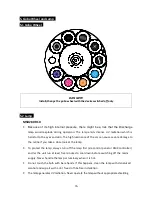
Page 2: ...Lamp 6 5 1 Gobo Wheel 7 5 2 Lamp 7 5 3 Change The Lamp 8 6 How to set the fixture 9 6 1 Main Function 9 6 2 Home Position Adjustment 13 7 Control By Universal DMX Controller 17 7 1 DMX Connections 17 7 2 Channel Mode Setting 18 7 3 DMX Address Setting 19 7 4 DMX Control 19 8 Troubleshooting 27 9 Check and Cleaning 29 A 1A ...

Page 3: ...eated Before operating ensure that the voltage and frequency of power supply matches the power requirements of the unit It s important to ground the yellow green conductor to earth in order to avoid electric shock Maximum ambient temperature TA 40 Don t operate it when the temperature is higher Don t connect the device to any dimmer pack During initial start up some smoke or smell may arise This i...

Page 4: ...ts inside Never try to repair the unit by yourself Repairs carried out by unskilled people can lead to damage or malfunction Please contact the nearest authorized technical assistance center if needed Disconnect the mains power if the fixture is has not been used for a long time Do use the original packing materials before transporting it once again To prevent or reduce the risk of electrical shoc...

Page 5: ... without any harming deformation Also always use a safety cable that can hold 12 times of the weight of the unit when installing the fixture Make absolute sure that the unit is firmly fixed in way that no vibrating or slipping would occur during operation The equipment must be installed beyond the areas where persons may walk by or be seated The rigging has to be operated by or under the guide of ...

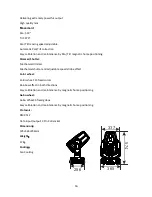
Page 6: ...chanical dimmer Mechanical shutter and adjustable speed strobe effect Color wheel Color wheel 13 fixed colors Rainbow effect in both directions Easy calibration and maintenance by magnetic home positioning Gobo wheel Gobo Wheel 9 fixed gobos Easy calibration and maintenance by magnetic home positioning Protocols DMX 512 Data input output 3 Pin XLR socket Dimension 574 365 256mm Weight 17kg Cooling...

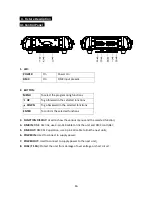
Page 7: ...confirm the selected functions 3 FUNCTION DISPLAY Used to show the various menus and the selected function 4 DMX IN DMX 512 link use 3 pin XLR cable to link the unit and DMX controller 5 DMX OUT DMX 512 operation use 3 pin XLR cable to link the next units 6 POWER IN Used to connect to supply power 7 POWER OUT Used to connect to supply power to the next unit 8 FUSE T 10A Protect the unit from damag...

Page 8: ...arc can cause severe damage to the retina if you take a close look at the lamp To protect the lamp always turn off the lamp first via control panel or DMX controller and let the unit run at least five minutes to cool down before switching off the mains supply Never handle the lamp or luminary when it is hot Do not touch the bulb with bare hands If this happens clean the lamp with denatured alcohol...

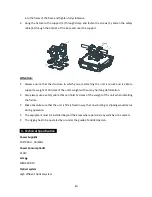
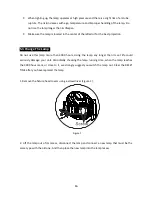
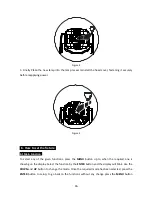
Page 9: ...mp more than 3000 hours Using the lamp any longer than its set life could seriously damage your unit Periodically checking the lamp running time when the lamp reaches the 3000 hour mark or close to it we strongly suggest you switch the lamp out Clear the RESET TIME after you have replaced the lamp 1 Remove the fixture head covers using a screwdriver Figure 1 Figure 1 2 Lift the lamp out of its rec...

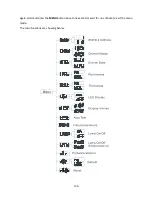
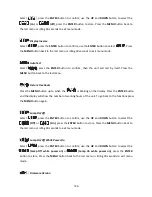
Page 10: ...ction To select any of the given functions press the MENU button up to when the required one is showing on the display Select the function by the ENTER button and the display will blink Use the DOWN and UP button to change the mode Once the required mode has been selected press the ENTER button to setup to go back to the functions without any change press the MENU button A 9A ...

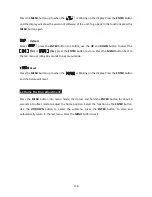
Page 11: ...again Hold and press the MENU button about one second or wait for one minute to exit the menu mode The main functions are showing below A 10A ...

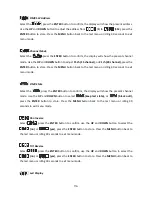
Page 12: ...to exit menu mode DMX State Select the press the ENTER button to confirm the display will show the present channel mode Use the UP and DOWN button to select keep last state or black outl press the ENTER button to store Press the MENU button back to the last menu or idling 30 seconds to exit menu mode Pan Inverse Select press the ENTER button to confirm use the UP and DOWN button to select the no o...

Page 13: ... Press the MENU button up to when the is blinking on the display Press the ENTER button and the display will show the number of working hours of the unit To go back to the functions press the MENU button again Lamp On Off Select press the ENTER button to confirm use the UP and DOWN button to select the Off or On press the ENTER button to store Press the MENU button back to the last menu or idling ...

Page 14: ...U button back to the last menu or idling 30 seconds to exit menu mode Reset Press the MENU button up to when the is blinking on the display Press the ENTER button and the fixture will reset 6 2 Home Position Adjustment Press the MENU button into menu mode then press and hold the ENTER button for about 3 seconds into offset mode to adjust the home position Select the function by the ENTER button Us...

Page 15: ...Offset A 14A ...

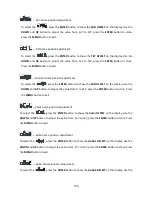
Page 16: ...he PAN OFFSET on the display Use the DOWN and UP button to adjust the value from 0 to 255 press the ENTER button to store Press the MENU button to exit Color home position adjustment To select the press the ENTER button to show the Color OFFSET on the display Use the DOWN and UP button to adjust the value from 127 to 127 press the ENTER button to store Press the MENU button to exit Gobo home posit...

Page 17: ...to store Press the MENU button to exit R Prism 1 home position adjustment To select the press the ENTER button to show the R Prism 1 OFFSET on the display Use the DOWN and UP button to adjust the value from 127 to 127 press the ENTER button to store Press the MENU button to exit Prism 2 home position adjustment To select the press the ENTER button to show the Prism 2 OFFSET on the display Use the ...

Page 18: ...press the ENTER button to show the ZOOM OFFSET on the display Use the DOWN and UP button to adjust the value from 0 to 255 press the ENTER button to store Press the MENU button to exit Focus home position adjustment To select the press the ENTER button to show the Focus OFFSET on the display Use the DOWN and UP button to adjust the value from 0 to 255 press the ENTER button to store Press the MENU...

Page 19: ...ach lighting unit needs to have a DMX address to receive the data by the controller The address number is between 0 511 usually 0 1 are equal to 1 5 The end of the DMX 512 system should be terminated to reduce signal errors 6 3 pin XLR connectors are more popular than 5 pins XLR 3 pin XLR Pin 1 GND Pin 2 Negative signal Pin 3 Positive signal 5 pin XLR Pin 1 GND Pin 2 Negative signal Pin 3 Positive...

Page 20: ...ns without any change press the MENU button again If you use please refer to the following diagram to address your DMX512 channel for the first 4 units 15 CHANNEL MODE 21 CHANNEL MODE 7 4 DMX Control 15 Channels Mode 1 Channel Value Function 1 000 255 PAN 0 540 2 000 255 TILT 0 270 3 000 255 PAN TILT SPEED Fast Slow 4 000 069 070 079 080 089 090 099 100 109 110 119 120 129 130 139 140 149 150 159 ...

Page 21: ...028 029 030 031 032 033 034 036 037 038 039 040 041 042 043 045 046 047 048 049 050 051 052 054 055 056 057 058 059 060 061 063 064 127 128 189 190 193 194 255 COLOR White Color1 Color2 Color3 Color4 Color5 Color6 Color7 Color8 Color9 Color10 Color11 Color12 Color13 Color14 Color15 Color16 Color17 Color18 Color19 Color20 Color21 Color22 Color23 Color24 Color25 Color26 Color27 Index Rotation Fast S...

Page 22: ...haking Gobo6 Shaking Gobo7 Shaking Gobo8 Shaking Gobo9 Shaking Gobo10 Shaking Gobo11 Shaking Gobo12 Shaking Gobo13 Shaking Gobo14 Shaking Rotation Fast Slow Stop Rotation Slow Fast 7 000 006 007 012 013 019 020 025 026 032 033 038 039 044 045 051 052 057 058 064 065 071 072 078 079 085 086 092 093 099 100 106 107 113 114 120 121 127 GOBO 2 Open Gobo1 Gobo2 Gobo3 Gobo4 Gobo5 Gobo6 Gobo7 Gobo8 Gobo9...

Page 23: ...Effect 10 000 127 128 190 191 192 193 255 PRISM ROTATION Index Rotation Rotation Fast Slow Stop Rotation Slow Fast 11 000 255 ZOOM 0 100 12 000 255 FOCUS 0 100 13 000 255 FROST 0 100 14 000 007 008 015 016 131 132 167 168 203 204 239 240 247 248 255 STROBE Off Open Shutter Slow Fast Fast Close Slow Open Fast Open Slow Close Shutter Slow Fast Strobe Random Open 15 000 255 DIMMER 0 100 21 Channels M...

Page 24: ...kout while color change disable Blackout while gobo change enable Blackout while gobo change disable Lamp on Pan tilt reset Color reset Gobo reset Shutter reset Null Prims Focus Zoom Frost reset Reset all Blackout while pan tilt gobo color change enable Blackout while pan tilt gobo color change disable Lamp off Null 7 000 007 008 015 016 023 024 031 032 039 040 047 048 055 056 063 064 071 072 079 ...

Page 25: ... 000 255 PAN TILT MACRO SPEED Fast Slow 9 000 002 003 004 005 006 007 009 010 011 012 013 014 015 016 018 019 020 021 022 023 024 025 027 028 029 030 031 032 033 034 036 037 038 039 040 041 042 043 045 046 047 048 049 050 051 052 054 055 056 057 058 059 060 COLOR White Color1 Color2 Color3 Color4 Color5 Color6 Color7 Color8 Color9 Color10 Color11 Color12 Color13 Color14 Color15 Color16 Color17 Col...

Page 26: ...7 118 122 123 127 128 189 190 193 194 255 GOBO 1 Gobo1 Gobo2 Gobo3 Gobo4 Gobo5 Gobo6 Gobo7 Gobo8 Gobo9 Gobo10 Gobo11 Gobo12 Gobo13 Gobo14 Gobo1 Shaking Gobo2 Shaking Gobo3 Shaking Gobo4 Shaking Gobo5 Shaking Gobo6 Shaking Gobo7 Shaking Gobo8 Shaking Gobo9 Shaking Gobo10 Shaking Gobo11 Shaking Gobo12 Shaking Gobo13 Shaking Gobo14 Shaking Rotation Fast Slow Stop Rotation Slow Fast 11 000 006 007 012...

Page 27: ...5 GOBO 2 ROTATION Index Rotation Rotation Fast Slow Stop Rotation Slow Fast 13 000 007 008 063 064 255 PRISM No Effect Prism1 Effect Prism2 Effect 14 000 127 128 190 191 192 193 255 PRISM ROTATION Index Rotation Rotation Fast Slow Stop Rotation Slow Fast 15 000 255 ZOOM 0 100 16 000 255 ZOOM FINE 0 100 17 000 255 FOCUS 0 100 18 000 255 FOCUS FINE 0 100 19 000 255 FROST 0 100 20 000 007 008 015 016...

Page 28: ...linked properly 2 If the DMX LED is on and no response to the channel check the address settings and DMX polarity 3 If you have intermittent DMX signal problems check the pins on connectors or on PCB of the unit or the previous one 4 Try to use another DMX controller 5 Check to see if the DMX cables run near or run alongside high voltage cables that may cause damage or interference to DMX interfac...

Page 29: ...t wires over the belt 5 Change a new belt D put the belt around the axis gear and motor gear 6 Plug all the connect wires back upon the belt 7 Tighten all the screws F If The tilt belt is broken 1 Turn off the mains power 2 Loosen all the screws A that fix the bridge B 3 Change a new belt C Please adjust the tension of the belt properly Note do not fix the belt too tight as it is can easily ruptur...

Page 30: ...hey ve aged and turned easy to break Cleaning The cleaning of internal and external optical lenses and or mirrors must be carried out periodically to optimize light output Cleaning frequency depends on the environment in which the fixture operates damp smoky or particularly dirty surrounding can cause greater accumulation of dirt on the unit s optics Clean with soft cloth and use normal glass to c...

Page 31: ...th the provision of the Electromagnetic Compatibility EMC Directive 89 336 EEC EN55103 1 2009 EN55103 2 2009 EN62471 2008 EN61000 3 2 2006 A1 2009 A2 2009 EN61000 3 3 2008 Harmonized Standard EN 60598 1 2015 EN 60598 2 17 1989 A2 1991 EN 62471 2008 EN 62493 2010 Safety of household and similar electrical appliances Part 1 General requirements A 30A ...

Page 32: ...Innovation Quality Performance ...

Reviews: