background image

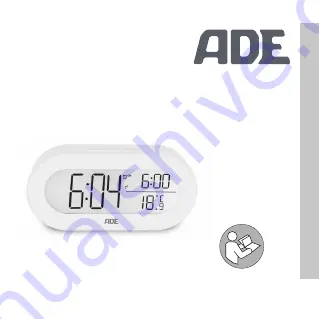
Digitaler Wecker mit 

Temperaturanzeige

Digital alarm clock with temperature display | 

Despertador digital con indicador de temperatura | 

Réveil numérique avec affichage de la température | 

Sveglia digitale con visualizzazione della temperatura | 

Budzik cyfrowy ze wskazaniem temperatury


D

E


EN


ES


FR


IT


PL

Bedienungsanleitung


CK 2134

Operating Manual | Manual de instrucciones |  

Mode d’emploi | Istruzioni per l’uso | Instrukcja obsługi 

Summary of Contents for CK 2134

Page 1: ...ndicador de temperatura Réveil numérique avec affichage de la température Sveglia digitale con visualizzazione della temperatura Budzik cyfrowy ze wskazaniem temperatury DE EN ES FR IT PL Bedienungsanleitung CK 2134 Operating Manual Manual de instrucciones Mode d emploi Istruzioni per l uso Instrukcja obsługi ...

Page 2: ... intelligente Funktionen mit einem außergewöhnlichen Design vereint Mit diesem Wecker haben Sie die Uhrzeit stets präzise im Blick Die langjährige Erfahrung der Marke ADE stellt eine technisch hohen Standard und bewährte Qualität sicher Wir wünschen Ihnen jederzeit ein entspanntes Timing Ihr ADE Team IM_Web_CK2134_202108_V1 ...

Page 3: ... und die Pflege des Artikels Bewahren Sie diese Bedienungsanleitung auf falls Sie später etwas nachlesen möchten Wenn Sie den Artikel an jemand anderen weitergeben geben Sie auch diese Anleitung mit Die Nichtbeachtung dieser Bedienungsanleitung kann zu Verletzungen oder Schäden am Artikel führen ...

Page 4: ...vor schweren Verletzungen Dieses Symbol in Verbindung mit dem Wort WARNUNG warnt vor Verletzungen mittleren und leichten Grades Dieses Symbol in Verbindung mit dem Wort HINWEIS warnt vor Sachschäden Dieses Symbol kennzeichnet zusätzliche Informationen und allgemeine Hinweise ...

Page 5: ...ch 9 Auf einen Blick 10 Lieferumfang 14 Inbetriebnahme 14 Uhrzeit einstellen 15 Uhrzeitformat wählen 16 Display beleuchten 16 Maßeinheit der Temperatur wechseln 17 Wecken 17 Reinigen 20 Störung und Abhilfe 20 Technische Daten 21 Konformitätserklärung 22 Garantie 22 Entsorgen 23 ...

Page 6: ...tigt oder bezüglich des sicheren Gebrauchs des Artikels unterwiesen wurden und die daraus resultierenden Gefahren verstehen Kinder dürfen nicht mit dem Artikel spielen Reinigung und Benutzerwartung dürfen nicht von Kindern vorgenommen werden es sei denn sie sind 8 Jahre oder älter und werden beaufsichtigt Batterien können bei Verschlucken lebensgefährlich sein Artikel und Batterien für Kleinkinder...

Page 7: ...and Verbrennung und oder Explosion Explosionsgefahr bei unsachgemäßem Auswechseln der Batterien Batterien nur durch denselben oder gleichwertigen Batterietyp ersetzen Technischen Daten beachten Batterien dürfen nicht geladen mit anderen Mitteln reaktiviert auseinander genommen ins Feuer geworfen oder kurzgeschlossen werden Ansonsten erhöhte Explosions und Auslaufgefahr außerdem können Gase entweic...

Page 8: ...vor starken Stößen Erschütterungen und Feuchtigkeit schützen Batterien aus dem Artikel nehmen wenn diese verbraucht sind oder Wecker länger nicht benutzt werden soll Vermeidet Schäden die durch Auslaufen entstehen können Bein Einsetzen und Wechseln der Batterien auf die richtige Polarität achten Batterien keinen extremen Bedingungen aussetzen indem diese z B auf Heizkörpern oder unter direkter Son...

Page 9: ...chen Typen oder gebrauchte und neue Batterien miteinander verwenden Keine Änderungen an dem Artikel vornehmen Reparaturen nur von einer Fachwerkstatt durchführen lassen Unsachgemäß durchgeführte Reparaturen können erhebliche Gefährdungen für den Benutzer verursachen Bestimmungsgemäßer Gebrauch Dieser Wecker ist für den Privatgebrauch in trockenen Innenräumen konzipiert ...

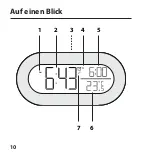
Page 10: ...10 Auf einen Blick 1 PM 2 3 4 5 7 6 ...

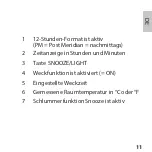
Page 11: ...ist aktiv PM Post Meridian nachmittags 2 Zeitanzeige in Stunden und Minuten 3 Taste SNOOZE LIGHT 4 Weckfunktion ist aktiviert ON 5 Eingestellte Weckzeit 6 Gemessene Raumtemperatur in C oder F 7 Schlummerfunktion Snooze ist aktiv ...

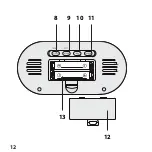
Page 12: ...12 8 9 10 11 12 13 ...

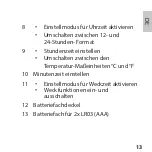
Page 13: ...en 12 und 24 Stunden Format 9 Stundenzeit einstellen Umschalten zwischen den Temperatur Maßeinheiten C und F 10 Minutenzeit einstellen 11 Einstellmodus für Weckzeit aktivieren Weckfunktionen ein und ausschalten 12 Batteriefachdeckel 13 Batteriefach für 2x LR03 AAA ...

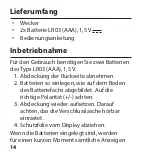
Page 14: ... 1 5 V 1 Abdeckung der Rückseite abnehmen 2 Batterien so einlegen wie auf dem Boden des Batteriefachs abgebildet Auf die richtige Polarität achten 3 Abdeckung wieder aufsetzen Darauf achten das die Verschlusslasche hörbar einrastet 4 Schutzfolie vom Display abziehen Wenn die Batterien eingelegt sind werden für einen kurzen Moment sämtliche Anzeigen ...

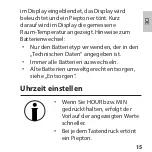
Page 15: ...eigt Hinweise zum Batterienwechsel Nur den Batterietyp verwenden der in den Technischen Daten angegeben ist Immer alle Batterien auswechseln Alte Batterien umweltgerecht entsorgen siehe Entsorgen Uhrzeit einstellen Wenn Sie HOUR bzw MIN gedrückt halten erfolgt der Vorlauf der angezeigten Werte schneller Bei jedem Tastendruck ertönt ein Piepton ...

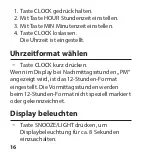
Page 16: ...t eingestellt Uhrzeitformat wählen Taste CLOCK kurz drücken Wenn im Display bei Nachmittagsstunden PM angezeigt wird ist das 12 Stunden Format eingestellt Die Vormittagsstunden werden beim 12 Stunden Format nicht speziell markiert oder gekennzeichnet Display beleuchten Taste SNOOZE LIGHT drücken um Displaybeleuchtung für ca 8 Sekunden einzuschalten ...

Page 17: ...angezeigt zu bekommen Wecken Weckzeit einstellen 1 Taste ALARM gedrückt halten 2 Mit Taste HOUR Weckstunde einstellen 3 Mit Taste MIN Weckminute einstellen 4 Taste ALARM loslassen Die Weckzeit ist eingestellt 5 Taste ALARM nochmals kurz drücken Im Display wird neben dem Weckersymbol ON angezeigt Die Weckfunktion ist aktiv ...

Page 18: ... den Alarm zu unterbrechen Nach 24 Stunden wird der Alarm erneut ausgelöst Autostopp Funktion Wenn Sie keine Taste drücken schaltet sich der Alarm nach 1 Minute automatisch aus Nach 24 Stunden wird der Alarm erneut ausgelöst Weckwiederholung Snooze Funktion 1x die Taste SNOOZE LIGHT drücken wenn das Wecksignal ertönt Das Wecksignal verstummt und im Display blinkt ...

Page 19: ... wiederholt werden Weckfunktion aus und wieder einschalten Taste ALARM kurz drücken ggf mehrfach bis im Display neben dem Weckersymbol OFF angezeigt wird Die Weckfunktion ist deaktiviert Durch erneutes kurzes Drücken von ALARM wird im Display neben wieder ON angezeigt und die Weckfunktion ist wieder aktiviert ...

Page 20: ...er bei Bedarf mit einem weichen trockenen Tuch entstauben oder mit einem leicht angefeuchteten Tuch abwischen Störung und Abhilfe Keine Funktion Batterien leer oder falsch herum eingelegt Temperaturangabe erscheint zu hoch Prüfen ob der Wecker direkter Sonnenstrahlung ausgesetzt ist Wecker hat nicht geweckt Weckfunktion aktiviert Anzeige ON ...

Page 21: ... Messbereich ca 0 C 50 C ca 32 F 122 F Abmessungen 141 x 30 x 69 mm Inverkehrbringer keine Service Adresse Waagen Schmitt GmbH Neuer Höltigbaum 15 22143 Hamburg Germany Unsere Produkte werden ständig weiter entwickelt und verbessert Aus diesem Grund sind Design und technische Änderungen jederzeit möglich ...

Page 22: ...ht Die Erklärung verliert ihre Gültigkeit falls an dem Artikel eine nicht mit uns abgestimmte Änderung vorgenommen wurde Hamburg August 2021 Waagen Schmitt GmbH Garantie Die Firma Waagen Schmitt GmbH garantiert für 2 Jahre ab Kaufdatum die kostenfreie Behebung von Mängeln aufgrund von Material oder Fabrikationsfehlern durch Reparatur oder Austausch ...

Page 23: ...Reklamationsgrundes an Ihren Händler zurück Entsorgen Verpackung entsorgen Entsorgen Sie die Verpackung sortenrein Geben Sie Pappe und Karton zum Altpapier Folien in die Wertstoff Sammlung Artikel entsorgen Entsorgen Sie den Artikel entsprechend der Vorschriften die in Ihrem Land gelten ...

Page 24: ...gung zuzuführen Dabei werden im Gerät enthaltene Wertstoffe der Wiederverwertung zugeführt und die Belastung der Umwelt vermieden Geben Sie das Altgerät an einer Sammelstelle für Elektroschrott oder einem Wertstoffhof ab Wenden Sie sich für nähere Auskünfte an Ihr örtliches Entsorgungsunternehmen oder Ihre kommunale Verwaltung ...

Page 25: ...ehören nicht in den Hausmüll Alle Batterien und Akkus müssen bei einer Sammelstelle der Gemeinde des Stadtteils oder im Handel abgegeben werden Dadurch können Batterien und Akkus einer umweltschonenden Entsorgung zugeführt werden ...

Page 26: ...duct which combines intelligent functions with an exceptional design With this alarm clock you always have a precise time in view The wealth of experience of the ADE brand ensures a high technical standard and proven quality We wish you easy timing at any time Your ADE Team ...

Page 27: ...s how to operate and maintain your product safely Keep this operating manual in a safe place for future reference If you pass this product on to someone else pass on this operating manual as well Failure to observe this operating manual may result in injuries or damage to your product ...

Page 28: ...th the word DANGER warns of serious injuries This symbol combined with the word WARNING warns of moderate and mild injuries This symbol combined with the word NOTE warns of material damage This symbol indicates additional information and general notes ...

Page 29: ...use 33 Overview 34 Scope of delivery 38 Start up 38 Setting the time 39 Selecting the time format 40 Illuminating the display 40 Change temperature unit 41 Alarm 41 Cleaning 44 Fault and remedy 44 Technical data 45 Declaration of conformity 46 Warranty 46 Disposal 47 ...

Page 30: ...ed in the safe use of the product and understand the risks that may arise Children must not play with the product Cleaning and user maintenance must not be carried out by children unless they are 8 years of age or older and are being supervised Batteries when swallowed can be life threatening Keep the product and batteries out of reach of small children If batteries have been swallowed seek medica...

Page 31: ... a risk of explosion if the batteries are replaced improperly Replace the batteries only with the same or an equivalent battery type Observe the Technical Data Batteries must not be recharged reactivated by other means dismantled thrown into fire or short circuited Otherwise there is an increased risk of explosion and leakage furthermore gases may escape ...

Page 32: ...g shocks vibrations and moisture Remove the batteries from the item when they are exhausted or if you will not use the alarm clock for an extended period of time This prevents damage that may be caused by leakage When inserting and changing batteries pay attention to the correct polarity Do not expose the batteries to extreme conditions for example by storing them on radiators or under direct sunl...

Page 33: ...ype Do not use different types or used and new batteries together Do not make any changes to the product Only allow repairs to be carried out by a specialist workshop Repairs carried out improperly can considerably endanger the user Intended use This alarm clock is designed for private use in dry indoor environments ...

Page 34: ...34 Overview 1 PM 2 3 4 5 7 6 ...

Page 35: ...rmat is enabled PM Post Meridian afternoon hours 2 Time display in hours and minutes 3 SNOOZE LIGHT button 4 Alarm function is enabled ON 5 Set alarm time 6 Room temperature display in C or F 7 Snooze function is enabled ...

Page 36: ...36 8 9 10 11 12 13 ...

Page 37: ...gle between 12 and 24 hour displays 9 Hour setting Toggle between temperature units C and F 10 Minute setting 11 Enable alarm setting mode Turn alarm functions on and off 12 Battery compartment cover 13 Battery compartment for 2x LR03 AAA ...

Page 38: ...u will need two LR03 AAA 1 5V batteries 1 Remove the back cover 2 Insert the batteries as shown on the bottom of the battery compartment Pay attention to the correct polarity 3 Replace the cover Make sure the locking tab clicks audibly into place 4 Peel off the protective film on the display ...

Page 39: ... displayed shortly afterwards Notes on changing the battery Only use the battery type specified in the Technical Data Always replace all batteries Dispose of old batteries in an environmentally friendly manner see Disposal Setting the time If HOUR or MIN are pressed and held the values displayed will change faster A beep sounds each time the button is pressed ...

Page 40: ...CK button The time has been set Selecting the time format Briefly press the CLOCK button The 12 hour format is set if PM is displayed for the afternoon hours The 12 hour format has no special indications for the morning hours Illuminating the display Pressing the SNOOZE LIGHT button enables display illumination for approx 8 seconds ...

Page 41: ...t F Alarm Setting the alarm time 1 Press and hold the ALARM button 2 Use the HOUR button to set the alarm hour 3 Use the MIN button to set the alarm minutes 4 Release the ALARM button The alarm time has been set 5 Briefly press the ALARM button once again ON is displayed next to the alarm clock icon The alarm function is enabled ...

Page 42: ...alarm After 24 hours the alarm will be triggered again Auto stop function If you do not press a button the alarm switches off automatically after 1 minute After 24 hours the alarm will be triggered again Repeat alarm snooze function Press the SNOOZE LIGHT button 1x when the alarm sounds The alarm signal will be muted and will appear flashing on the display ...

Page 43: ...procedure can be repeated multiple times Switching the alarm function off and on again Briefly press the ALARM button until OFF is displayed next to the alarm clock icon The alarm function is disabled Briefly pressing ALARM displays ON next to again and enables the alarm function ...

Page 44: ...ry use a soft dry cloth or a slightly moistened one to wipe the alarm clock Fault and remedy No function Are the batteries empty or inserted the wrong way around Temperature indication appears too high Check whether the alarm clock is exposed to direct sunlight The alarm clock did not wake me up Is the alarm function enabled ON display ...

Page 45: ...mA Measuring range approx 0 C 50 C approx 32 F 122 F Dimensions 141 x 30 x 69 mm Distributor no service address Waagen Schmitt GmbH Neuer Höltigbaum 15 22143 Hamburg Germany Our products are constantly developed and improved For this reason design and technical modifications are possible at any time ...

Page 46: ... and 2011 65 EU This declaration loses its validity if any modification is made to the item that has not been agreed with us in advance Hamburg August 2021 Waagen Schmitt GmbH Warranty Waagen Schmitt GmbH warrants for 2 years from the purchase date the cost free rectification of defects in material and workmanship through repair or exchange ...

Page 47: ...g the reason for claim to your dealer Disposal Disposing of the packaging Dispose of the packaging according to type Dispose of cardboard with waste paper and of films with recyclable materials Disposing of the product Dispose of the product in accordance with the regulations that apply in your country ...

Page 48: ...in an appropriate way In this way valuable materials contained in the device will be recycled and the burden on the environment avoided Bring the old device to a collection point for electronic waste or to a recycling depot For more information contact your local waste disposal firm or your local administrative body ...

Page 49: ... disposed of along with household waste All batteries and rechargeable batteries must be brought to a local or district collection point or to the retailer Such batteries and rechargeable batteries can thus be disposed of in an environmentally friendly way ...

Page 50: ... que aúna unas funciones inteligentes con un diseño extraordinario Con este despertador siempre tendrá a la vista la hora exacta La larga experiencia de la marca ADE le asegura unos elevados estándares técnicos y es garantía de calidad Le deseamos una planificación de tiempo relajada El equipo de ADE ...

Page 51: ... y el cuidado del artículo Conserve este manual de instrucciones por si necesita volver a consultarlo Si le entrega el artículo a otra persona acompáñelo también de estas instrucciones Si no se tienen en cuenta las recomendaciones de este manual de instrucciones pueden producirse lesiones o daños en el artículo ...

Page 52: ...ELIGRO advierte de heridas graves Este símbolo unido a la palabra ADVERTENCIA advierte de heridas de grado medio o leve Este símbolo unido a la palabra INDICACIÓN advierte de daños materiales Este símbolo significa información adicional e indicaciones generales ...

Page 53: ... Volumen de entrega 62 Puesta en marcha 62 Ajustar la hora 63 Seleccionar formato de hora 64 Iluminar la pantalla 64 Cambiar las unidades de temperatura 65 Despertador 65 Limpieza 68 Problemas y soluciones 68 Datos técnicos 69 Declaración de conformidad 70 Garantía 71 Eliminación 72 ...

Page 54: ...ro del artículo y comprendan los peligros resultantes Los niños no deben jugar con el artículo La limpieza y el mantenimiento por parte del usuario no deben ser realizados por niños salvo que sean mayores de 8 años y estén supervisados Las pilas pueden suponer un peligro de muerte si se ingieren Mantenga el artículo y las pilas fuera del alcance de los niños Si se ingiere una pila debe acudirse in...

Page 55: ...plosión Peligro de explosión debido a una sustitución incorrecta de las pilas Cambie las pilas únicamente por otras iguales o del mismo tipo Tenga en cuenta los Datos técnicos Las pilas no deben cargarse reactivarse con otros medios desmontarse arrojarse al fuego o cortocircuitarse En caso contrario existe un riesgo mayor de explosión y fuga y además pueden producirse gases ...

Page 56: ...po PRECAUCIÓN por daños materiales Proteja el despertador de golpes fuertes sacudidas y de la humedad Saque las pilas del artículo cuando estén gastadas o cuando no vaya a utilizarse el despertador durante mucho tiempo De este modo evitará los daños que pudieran producirse por el derrame del líquido de las pilas Cuando coloque y cambie las pilas preste atención a la polaridad correcta ...

Page 57: ...ocarlas Emplee únicamente pilas del mismo tipo y no utilice juntas pilas de tipos diferentes o pilas usadas junto con otras nuevas No lleve a cabo ninguna modificación en el artículo Realice las reparaciones únicamente en un taller especializado Las reparaciones realizadas de forma inadecuada pueden suponer un riesgo elevado para el usuario Uso adecuado Este despertador está concebido para el uso ...

Page 58: ...58 De un vistazo 1 PM 2 3 4 5 7 6 ...

Page 59: ...do PM Post Meridian tardes 2 Visualización de la hora en horas y minutos 3 Botón SNOOZE LIGHT 4 La función de alarma está activada ON 5 Hora de alarma seleccionada 6 Temperatura ambiente medida en C o F 7 La función de repetición está activada ...

Page 60: ...60 8 9 10 11 12 13 ...

Page 61: ...9 Establecer la hora Cambio entre las unidades de medida de temperatura C y F 10 Establecer minutos 11 Activar el modo de configuración para la hora de la alarma Activar y desactivar las funciones de alarma 12 Tapa del compartimento de las pilas 13 Compartimento para pilas 2x LR03 AAA ...

Page 62: ...tapa de la parte posterior 2 Coloque las pilas del modo que se indica en la base del compartimento de las pilas Preste atención a la polaridad correcta 3 Vuelva a poner la tapa Asegúrese de que la pestaña de bloqueo haga clic en su lugar de forma audible 4 Retire la película protectora de la pantalla Cuando están colocadas las pilas se muestran durante un momento todos los indicadores en ...

Page 63: ... la sustitución de las pilas Utilice únicamente el tipo de pilas especificado en los Datos técnicos Cambie siempre todas las pilas Elimine las pilas gastadas conforme a la normativa medioambiental consulte Eliminación Ajustar la hora Si mantiene pulsado HOUR o MIN los valores mostrados avanzarán más rápido Cada vez que se pulsa un botón suena un pitido ...

Page 64: ...ionar formato de hora Pulse brevemente el botón CLOCK Si la pantalla muestra PM para las horas de la tarde se ha configurado el formato de 12 horas Las horas de la mañana no están marcadas ni etiquetadas de ningún modo especial en el formato de 12 horas Iluminar la pantalla Pulse el botón SNOOZE LIGHT para encender la iluminación de la pantalla durante unos 8 segundos ...

Page 65: ...ora de alarma 1 Mantenga pulsado el botón ALARM 2 Configure la hora del despertador con el botón HOUR 3 Configure los minutos del despertador con el botón MIN 4 Suelte el botón ALARM La hora del despertador está ajustada 5 Vuelva a pulsar brevemente el botón ALARM La pantalla muestra ON junto al símbolo del despertador La función de alarma está activada ...

Page 66: ...ir la alarma Pasadas 24 horas la alarma sonará nuevamente Función Autostop Si no presiona ningún botón la alarma se detendrá automáticamente después de 1 minuto Pasadas 24 horas la alarma sonará nuevamente Repetición de la alarma función Snooze Cuando oiga la señal de alarma pulse una vez el botón SNOOZE LIGHT La señal de alarma se silencia y en la pantalla parpadea ...

Page 67: ...esactivar y volver a activar la función despertador Pulse brevemente el botón ALARM varias veces si es necesario hasta que aparezca en la pantalla OFF junto al símbolo del despertador La función de alarma está desactivada Pulsando brevemente ALARM de nuevo en la pantalla vuelve a aparecer ON junto a y se reactiva la función de alarma ...

Page 68: ...otar Cuando sea necesario quite el polvo al despertador con un paño suave y seco o límpielo con un paño ligeramente humedecido Problemas y soluciones Sin función Se han gastado las pilas o están mal colocadas La indicación de temperatura aparenta ser excesivamente alta Compruebe si el despertador está colocado directamente expuesto a la luz del sol ...

Page 69: ... Datos técnicos Modelo Despertador digital CK 2134 Pilas 2 x LR03 AAA 1 5 V Intensidad de corriente 5 3 mA Rango de pesaje aprox 0 50 C aprox 32 122 F Dimensiones 141 x 30 x 69 mm Distribuidor no hay dirección de servicio técnico Waagen Schmitt GmbH Neuer Höltigbaum 15 22143 Hamburgo Alemania ...

Page 70: ...modificaciones técnicas Declaración de conformidad Waagen Schmitt GmbH declara por la presente que el reloj despertador digital CK 2134 cumple con las directivas 2014 30 UE y 2011 65 UE Esta declaración perderá su validez si se ha realizado una modificación en el artículo que no haya sido previamente autorizada por nuestra parte Hamburgo agosto de 2021 Waagen Schmitt GmbH ...

Page 71: ...ha de compra la subsanación gratuita de los defectos debidos a fallos de material o fabricación mediante reparación o cambio del equipo En caso de solicitar la aplicación de la garantía lleve el artículo a su distribuidor con el justificante de compra explicando el motivo de la reclamación ...

Page 72: ...n al contenedor de cartón y las láminas al de plásticos Eliminación del artículo Elimine el artículo conforme a la normativa correspondiente aplicable en su país Los aparatos no deben eliminarse con la basura doméstica normal El artículo debe ser eliminado de forma adecuada al final de su vida útil ...

Page 73: ...s reciclables Para más información diríjase a su empresa de recogida de residuos o administración local Las pilas y baterías no son residuos domésticos Todas las pilas y baterías deben depositarse en los puntos de recogida del ayuntamiento del distrito o en los comercios De este modo puede realizarse la eliminación de pilas y baterías de una forma respetuosa con el medio ambiente ...

Page 74: ...la marque ADE qui allie des fonctions intelligentes à un design exceptionnel Ce réveil vous permettra d être toujours à l heure Les années d expérience de la marque ADE garantissent une haute technicité et une qualité éprouvée Nous vous souhaitons d agréables moments en toute ponctualité L équipe ADE ...

Page 75: ...conforme ainsi que les procédures d entretien de l article Conservez ce manuel pour toute référence ultérieure Si vous cédez l article à une tierce personne transmettez lui également ce mode d emploi Le non respect de ce mode d emploi peut entraîner des blessures ou endommager l article ...

Page 76: ...lessures graves Ce symbole associé au mot ATTENTION prévient de blessures moyennes et légères Ce symbole associé au mot AVERTISSEMENT prévient de dommages matériels Ce symbole désigne des informations supplémentaires ainsi que des indications d ordre général ...

Page 77: ...ge 86 Mise en marche 86 Régler l heure 87 Sélection du format de l heure 88 Activer le rétroéclairage de l écran 88 Changer l unité de mesure de la température 89 Réveil 89 Nettoyage 92 Dysfonctionnement et solutions 92 Caractéristiques techniques 93 Déclaration de conformité 94 Garantie 94 Mise au rebut 95 ...

Page 78: ...e l utilisation conforme de l article et comprennent les risques qui en découlent Les enfants ne doivent pas jouer avec cet article Le nettoyage et l entretien ne doivent pas être réalisés par des enfants à moins qu ils aient 8 ans révolus et soient sous surveillance Les piles peuvent être dangereuses pour la santé en cas d ingestion Placez l appareil et ses piles hors de portée des petits enfants...

Page 79: ...n cas de remplacement non conforme des piles Remplacez les piles uniquement par des piles du même type ou similaires Respectez les Caractéristiques techniques des piles Les piles ne doivent pas être chargées réactivées avec d autres moyens démontées jetées au feu ou court circuitées Autrement le risque d explosion ou de fuite augmente par ailleurs des gaz peuvent s échapper ...

Page 80: ...ez l appareil à l abri des chocs violents des secousses et de l humidité Retirez les piles de l appareil si elles sont usées ou si vous n utilisez plus l appareil Cela prévient les dommages dus à une fuite de pile Respectez la polarité lors du changement des piles Évitez de soumettre les piles à des conditions extrêmes par ex en les posant sur un objet chaud ou à la lumière directe du soleil Risqu...

Page 81: ... types différents ou des piles usées et des piles neuves Ne modifiez pas les composants de l appareil Les réparations doivent être uniquement effectuées par un atelier spécialisé Toute réparation incorrecte peut entraîner de graves dangers pour l utilisateur Utilisation conforme Ce réveil est conçu pour un usage privé dans des espaces intérieurs secs ...

Page 82: ...82 Aperçu 1 PM 2 3 4 5 7 6 ...

Page 83: ...ost Meridian après midi 2 affichage des heures et des minutes 3 Touche SNOOZE LIGHT 4 La fonction de réveil est activée ON 5 Heure de réveil réglée 6 Température ambiante mesurée en C ou en F 7 La fonction Snooze répétition d alarme est activée ...

Page 84: ...84 8 9 10 11 12 13 ...

Page 85: ... et 24 heures 9 Réglage de l heure Basculer entre les unités de mesure de la température C et F 10 Réglage des minutes 11 Passer en mode réglages du réveil Activer et désactiver les fonctions de réveil 12 Couvercle du compartiment à pile 13 Compartiment pour 2 piles LR03 AAA ...

Page 86: ...irez le couvercle arrière 2 Placez les piles tel qu indiqué par le dessin sur le fond du compartiment à piles Respectez la polarité 3 Remettez le couvercle Assurez vous que la patte de fermeture se bloque de façon audible 4 Retirez le film de protection de l écran Dès que les piles sont insérées toutes les informations s affichent en même temps sur ...

Page 87: ...e pile indiqué dans les Caractéristiques techniques Remplacer toujours toutes les piles en même temps Mettre les anciennes piles au rebut en respectant les prescriptions environnementales voir Mise au rebut Régler l heure Une pression prolongée sur HOUR ou sur MIN fait défiler les valeurs affichées plus rapidement Un bip sonore retentit chaque fois que vous appuyez sur la touche ...

Page 88: ...rs réglée Sélection du format de l heure Appuyez brièvement sur CLOCK Si PM apparaît à l écran pendant les heures de l après midi alors le format 12 heures est activé Les heures de la matinée ne sont pas signalées de façon particulière dans le format 12 heures Activer le rétroéclairage de l écran Appuyez sur SNOOZE LIGHT pour allumer le rétro éclairage de l écran pendant env 8 secondes ...

Page 89: ...re en degré Celsius C ou en degré Fahrenheit F Réveil régler l heure de réveil 1 Appuyez sur le bouton ALARM et maintenez le enfoncé 2 Réglez l heure de réveil à l aide du bouton HOUR 3 Réglez les minutes de réveil à l aide du bouton MIN 4 Relâchez le bouton ALARM L heure d activation du réveil est réglée ...

Page 90: ...veillé par un signal d alarme Désactiver l alarme pendant 24 heures Appuyer sur n importe quel bouton sauf SNOOZE LIGHT pour interrompre l alarme La sonnerie se déclenchera de nouveau au bout de 24 heures Fonction d arrêt automatique Si vous n appuyez sur aucune touche la sonnerie s éteint automatiquement au bout de 1 minute Après 24 heures la sonnerie est de nouveau déclenchée ...

Page 91: ...éclenche Ce processus peut être répété plusieurs fois Désactivation et réactivation de la fonction réveil Appuyez brièvement sur ALARM plusieurs fois au besoin jusqu à ce que OFF apparaisse à l écran à côté du symbole de réveil La fonction de réveil est désactivée Lorsque vous appuyez à nouveau de manière brève sur ALARM ON apparaît à nouveau à l écran à côté du symbole et la fonction de réveil es...

Page 92: ...écessaire le réveil avec un chiffon doux et sec ou essuyez le avec un chiffon légèrement imbibé d eau Dysfonctionnement et solutions L appareil ne fonctionne pas Piles déchargées ou insérées à l envers La température indiquée est trop élevée Assurez vous que le réveil n est pas directement exposé à la lumière du soleil Le réveil n a pas sonné Fonction de réveil activée ON affiché ...

Page 93: ...50 C env 32 F 122 F Dimensions 141 x 30 x 69 mm Distributeur n effectuant pas les réparations Waagen Schmitt GmbH Neuer Höltigbaum 15 22143 Hambourg Allemagne Nos produits font l objet de perfectionnements et d améliorations permanentes Pour cette raison des modifications de design et des modifications techniques peuvent survenir à tout moment ...

Page 94: ...ration perd sa validité si l article subit des modifications sans notre assentiment Hambourg août 2021 Waagen Schmitt GmbH Garantie La société Waagen Schmitt GmbH garantit la prise en charge gratuite par des réparations ou par un échange de tout dysfonctionnement résultant d un défaut matériel ou de fabrication pendant 2 ans à compter de la date d achat ...

Page 95: ...tion à votre revendeur Mise au rebut Élimination de l emballage Éliminer l emballage selon son type Jetez le papier et le carton avec les papiers de récupération les plastiques dans les collecteurs de matières recyclables Mise au rebut de l article Veuillez éliminer l article selon les prescriptions en vigueur dans votre pays en matière de traitement des déchets ...

Page 96: ...une élimination contrôlée Ainsi les matières utiles contenues dans l appareil pourront être recyclées avec un moindre impact sur l environnement Déposez l appareil usagé dans un point de collecte pour les déchets électroniques ou dans un centre de recyclage Pour plus d informations adressez vous à votre service de collecte local ou à votre municipalité ...

Page 97: ...e éliminées avec les déchets ménagers Toutes les piles et batteries doivent être déposées dans un point de collecte de votre localité ou rapportées à leur point d achat Les piles et batteries seront ainsi traitées dans le respect de l environnement ...

Page 98: ...E che unisce funzioni intelligenti e un design fuori dal comune Con questa sveglia si ha costantemente sotto controllo l ora esatta La lunga esperienza della ADE garantisce standard tecnici elevati e qualità consolidata Auguriamo un tempismo rilassato in qualsiasi momento Il Suo team ADE ...

Page 99: ...so descrivono l utilizzo sicuro e la cura del prodotto Conservarle per eventuali consultazioni future In caso di cessione del prodotto a terzi consegnare anche le presenti istruzioni per l uso La mancata osservanza delle istruzioni per l uso può causare lesioni alle persone o danni al prodotto ...

Page 100: ...contro il rischio di gravi lesioni Questo simbolo accompagnato dalla parola AVVERTENZA indica il rischio di lesioni di lieve o media entità Questo simbolo accompagnato dalla parola ATTENZIONE indica il rischio di danni alle cose Questo simbolo indica ulteriori informazioni o indicazioni generali ...

Page 101: ... della fornitura 110 Messa in funzione 110 Impostazione dell ora 111 Selezionare il formato dell ora 112 Illuminazione del display 112 Selettore unità di misura della temperatura 113 Sveglia 113 Pulizia 116 Risoluzione dei problemi 116 Dati tecnici 117 Dichiarazione di conformità 118 Garanzia 118 Smaltimento 119 ...

Page 102: ...ponsabile o se hanno ricevuto e compreso le istruzioni e i pericoli che potrebbero manifestarsi durante l uso del dispositivo I bambini non devono giocare con questo articolo I bambini possono eseguire le operazioni di pulizia e manutenzione solo se di età superiore agli 8 anni e sotto la supervisione di una persona adulta L ingestione delle batterie può costituire un pericolo mortale Tenere artic...

Page 103: ...ncendio ustioni e o esplosione La sostituzione non corretta delle batterie può costituire un pericolo di esplosione Sostituire le batterie solo con batterie dello stesso tipo o equivalenti Si veda Dati tecnici Le batterie non devono essere ricaricate riattivate con altri mezzi smontate buttate nel fuoco o messe in cortocircuito Altrimenti sussiste un forte rischio di esplosione o perdita e potrebb...

Page 104: ...il medico ATTENZIONE a danni materiali Proteggere la sveglia da forti urti vibrazioni e umidità Estrarre le batterie dall articolo se sono scariche o se la sveglia non viene utilizzata per un lungo periodo In tal modo si eviteranno danni causati da eventuali perdite di liquido dalle batterie Durante l inserimento e la sostituzione delle batterie prestare attenzione alla corretta polarità ...

Page 105: ...inserirle Utilizzare solo batterie dello stesso tipo non utilizzare insieme tipi differenti di batterie o batterie nuove e usate Non apportare alcuna modifica all articolo Rivolgersi esclusivamente ad un tecnico specializzato per la riparazione del prodotto Riparazioni non eseguite correttamente possono essere causa di seri pericoli per l utente Destinazione d uso Questa sveglia è stata progettata...

Page 106: ...106 Descrizione 1 PM 2 3 4 5 7 6 ...

Page 107: ...2 ore attivo PM Post Meridian pomeriggio 2 Visualizzazione dell ora in ore e minuti 3 Tasto SNOOZE LIGHT 4 Sveglia attiva ON 5 Orario della sveglia impostato 6 Temperatura ambiente misurata in C o F 7 Funzione Snooze attiva ...

Page 108: ...108 8 9 10 11 12 13 ...

Page 109: ...e 24 ore 9 Impostazione delle ore Commutazione tra unità di misura C e F per la temperatura 10 Impostazione dei minuti 11 Attivazione della modalità di impostazione della sveglia Attivazione e disattivazione delle sveglie 12 Coperchio del vano batterie 13 Vano batterie per 2 batterie LR03 AAA ...

Page 110: ...muovere il coperchio posteriore 2 Inserire le batterie come indicato sul fondo del vano batterie Prestare attenzione alla corretta polarità 3 Riposizionare il coperchio Accertarsi che i fermi del coperchio si chiudano facendo uno scatto udibile 4 Rimuovere la pellicola protettiva dal display Quando le batterie sono inserite tutte le indicazioni sul display vengono visualizzate ...

Page 111: ...stituzione delle batterie Utilizzare solo il tipo di batterie indicato nei Dati tecnici Sostituire sempre tutte le batterie Provvedere allo smaltimento corretto delle batterie vedi Smaltimento Impostazione dell ora Se si tengono premuti i pulsanti HOUR o MIN le cifre visualizzate scorreranno più rapidamente A ogni pressione del pulsante viene emesso un bip ...

Page 112: ...ata Selezionare il formato dell ora Premere brevemente il pulsante CLOCK Se sul display viene indicato PM per le ore pomeridiane allora il formato impostato è quello di 12 ore Le ore del mattino nel formato di 12 ore non vengono segnalate o indicate in maniera particolare Illuminazione del display Premere il tasto SNOOZE LIGHT per accendere l illuminazione del display per circa 8 secondi ...

Page 113: ...isura Celsius o Fahrenheit Sveglia Impostazione della sveglia 1 Tenere premuto il pulsante ALARM 2 Impostare l ora per la sveglia con il pulsante HOUR 3 Impostare i minuti per la sveglia con il pulsante MIN 4 Rilasciare il pulsante ALARM L impostazione della sveglia è così completata 5 Premere di nuovo brevemente il pulsante ALARM ...

Page 114: ...asto tranne SNOOZE LIGHT per interrompere la sveglia Suonerà nuovamente dopo 24 ore Funzione di interruzione automatica La sveglia si interromperà automaticamente dopo 1 minuto quando non viene premuto nessun pulsante Suonerà nuovamente dopo 24 ore Ripetizione della sveglia funzione Snooze Premere 1 volta il tasto SNOOZE LIGHT quando il segnale della sveglia suona Il segnale della sveglia cessa e ...

Page 115: ...vazione e riattivazione della funzione sveglia Premere brevemente il pulsante ALARM eventualmente più volte fin quando sul display non compare il simbolo della sveglia OFF La sveglia è disattivata Premendo di nuovo brevemente il pulsante ALARM sul display accanto a sarà visualizzato di nuovo ON e la sveglia sarà nuovamente attiva ...

Page 116: ...un panno morbido e asciutto o pulirla con un panno leggermente inumidito Risoluzione dei problemi Il dispositivo non funziona Le batterie sono scariche o sono state installate in modo errato La temperatura sembra troppo alta Controllare se la sveglia è esposta ai raggi diretti del sole La sveglia non ha suonato La sveglia è attiva visualizzazione ON ...

Page 117: ...tata circa 0 C 50 C circa 32 F 122 F Dimensioni 141 x 30 x 69 mm Distributore nessun servizio di assistenza Waagen Schmitt GmbH Neuer Höltigbaum 15 22143 Hamburg Germania I nostri prodotti vengono costantemente sviluppati e migliorati Pertanto modifiche tecniche e nel design sono possibili in qualsiasi momento ...

Page 118: ...hiarazione perde ogni sua validità qualora al prodotto vengano apportate modifiche senza la nostra autorizzazione Amburgo agosto 2021 Waagen Schmitt GmbH Garanzia La ditta Waagen Schmitt GmbH garantisce la riparazione o la sostituzione gratuita dell unità per un periodo di 2 anni a partire dalla data di acquisto nel caso di difetti di materiale o fabbricazione del prodotto ...

Page 119: ...el reclamo Smaltimento Smaltimento dell imballaggio Provvedere allo smaltimento dell imballaggio in base al tipo Conferire il cartone nella raccolta della carta e la pellicola in quella del materiale riciclabile Smaltimento del prodotto Smaltire il prodotto secondo le norme vigenti nel proprio paese ...

Page 120: ...opriato In tal modo si rende possibile il riutilizzo del materiale riciclabile contenuto nell apparecchio limitando l impatto sull ambiente Smaltire l apparecchio usato presso un centro di raccolta per rifiuti elettrici o un centro di riciclaggio Per ulteriori informazioni rivolgersi alla ditta di smaltimento locale o alla propria amministrazione comunale ...

Page 121: ...re smaltiti con i rifiuti domestici Le batterie e gli accumulatori devono essere consegnati presso un centro di raccolta comunale o di quartiere oppure presso il proprio rivenditore al fine di garantire il loro smaltimento in modo rispettoso dell ambiente ...

Page 122: ...i ADE łączy w sobie inteligentne funkcje z wyjątkową stylistyką Budzik umożliwia precyzyjne kontrolowanie czasu Wieloletnie doświadczenie marki ADE gwarantuje wysoki standard techniczny oraz sprawdzoną jakość Życzymy zawsze poczucia czasu bez pośpiechu Zespół ADE ...

Page 123: ...iecznej obsługi i pielęgnacji artykułu Instrukcję obsługi należy przechowywać w celu jej późniejszego wykorzystania Jeżeli produkt będzie przekazywany innej osobie należy przekazać również tę instrukcję Nieprzestrzeganie instrukcji obsługi może spowodować obrażenia ciała lub uszkodzenie produktu ...

Page 124: ...a przed poważnymi obrażeniami ciała Ten symbol w połączeniu ze słowem OSTRZEŻENIE ostrzega przed obrażeniami ciała średniego i lekkiego stopnia Ten symbol w połączeniu ze słowem WSKAZÓWKA ostrzega przed stratami materialnymi Ten symbol oznacza dodatkowe informacje i ogólne wskazówki ...

Page 125: ...W skrócie 130 Zakres dostawy 134 Uruchomienie 134 Ustawienie godziny 135 Wybór formatu godziny 136 Oświetlenie wyświetlacza 136 Zmiana jednostki miary temperatury 137 Budzenie 137 Czyszczenie 140 Usterki i ich usuwanie 140 Dane techniczne 141 Deklaracja zgodności 142 Gwarancja 142 Utylizacja 143 ...

Page 126: ... przeszły przeszkolenie z zakresu bezpiecznego użytkowania produktu i rozumieją wynikające z tego niebezpieczeństwa Dzieci nie mogą bawić się produktem Dzieci nie mogą czyścić ani serwisować urządzenia chyba że mają co najmniej 8 lat i są nadzorowane Połknięcie baterii stanowi zagrożenie dla życia Produkt i baterie należy przechowywać w miejscach niedostępnych dla dzieci W razie połknięcia baterii...

Page 127: ...u Niebezpieczeństwo wybuchu w przypadku niewłaściwej wymiany baterii Baterie należy wymieniać tylko na ten sam lub podobny rodzaj Przestrzegać parametrów z Dane techniczne Baterii nie wolno ładować reaktywować w inny sposób rozkładać na części wrzucać w ogień lub powodować ich zwarcia W innym przypadku grozi niebezpieczeństwo wybuchu lub wycieku kwasu z baterii bądź ulotnienia się gazów ...

Page 128: ...NIE straty materialne Chronić budzik przed gwałtownymi uderzeniami wstrząsami i wilgocią Wyjąć baterie po zużyciu lub w przypadku gdy budzik nie będzie używany przez dłuższy czas Unikać szkód które mogą powstać w skutek wycieku Wkładając baterie lub wymieniając je na nowe należy uważać na właściwe położenie biegunów Nie przechowywać baterii w skrajnych warunkach np na grzejnikach lub w miejscach n...

Page 129: ...e wkładać różnych typów baterii lub zużytych baterii oraz nie korzystać ze zużytych i nowych baterii jednocześnie Nie dokonywać zmian w produkcie Naprawy należy przeprowadzać w wykwalifikowanym serwisie Nieprawidłowo wykonane naprawy mogą spowodować poważne zagrożenia dla użytkownika Użycie zgodne z przeznaczeniem Budzik jest przeznaczony do użytku prywatnego w suchych pomieszczeniach wewnętrznych...

Page 130: ...130 W skrócie 1 PM 2 3 4 5 7 6 ...

Page 131: ...PM Post Meridian po południu 2 Wyświetlanie czasu w godzinach i minutach 3 Przycisk SNOOZE LIGHT 4 Funkcja budzenia jest aktywna ON 5 Ustawiony czas budzenia 6 Zmierzona temperatura pomieszczenia w C lub F 7 Funkcja drzemki Snooze jest aktywna ...

Page 132: ...132 8 9 10 11 12 13 ...

Page 133: ... formatem 12 i 24 godzinnym 9 Ustawianie godziny Przełączanie między jednostkami temperatury C i F 10 Ustawianie minut 11 Aktywacja trybu ustawiania czasu budzenia Włączanie i wyłączanie funkcji budzenia 12 Pokrywa komory na baterie 13 Komora na baterie 2x LR03 AAA ...

Page 134: ...ć tylną pokrywę 2 Baterie ułożyć w taki sposób jak jest to przedstawione na spodzie komory na baterie Należy uważać na właściwe położenie biegunów 3 Ponownie założyć pokrywę Upewnić się że zatrzask blokujący zatrzasnął się słyszalnie 4 Zdjąć folię ochronną z wyświetlacza Powłożeniubateriinawyświetlaczupojawiąsięna chwilęwszystkiewskaźniki zapalisiępodświetlenie ...

Page 135: ... korzystać tylko z typu baterii podanego w punkcie Dane techniczne Wymieniać zawsze wszystkie baterie Stare baterie należy utylizować zgodnie z zasadami ochrony środowiska patrz Utylizacja Ustawienie godziny W przypadku naciśnięcia i przytrzymania przycisku HOUR lub MIN wyświetlane wartości zmieniają się szybciej Po każdym naciśnięciu przycisku emitowany jest sygnał dźwiękowy ...

Page 136: ... już ustawiony Wybór formatu godziny Nacisnąć krótko przycisk CLOCK Jeśli na wyświetlaczu pojawi się PM dla godzin popołudniowych ustawiony jest format 12 godzinny Godziny przedpołudniowe nie są wyraźnie zaznaczone ani oznakowane w formacie 12 godzinnym Oświetlenie wyświetlacza Nacisnąć przycisk SNOOZE LIGHT aby włączyć podświetlenie wyświetlacza na ok 8 sekund ...

Page 137: ...Ustawianie czasu budzenia 1 Nacisnąć i przytrzymać przycisk ALARM 2 Za pomocą przycisku HOUR ustawić godzinę budzenia 3 Za pomocą przycisku MIN ustawić minuty budzenia 4 Zwolnić przycisk ALARM Czas budzenia jest już ustawiony 5 Ponownie nacisnąć krótko przycisk ALARM Obok symbolu budzika na wyświetlaczu pojawi się napis ON Funkcja budzenia jest aktywna ...

Page 138: ...enia alarmu Alarm rozlegnie się ponownie po 24 godzinach Funkcja automatycznego wyłączania Alarm wyłączy się automatycznie po 1 minutach jeśli nie zostanie naciśnięty żaden przycisk Alarm rozlegnie się ponownie po 24 godzinach Powtarzanie budzenia funkcja Snooze Nacisnąć raz przycisk SNOOZE LIGHT po wybrzmieniu sygnału budzenia Sygnał budzenia ustaje a na wyświetlaczu miga ...

Page 139: ...owne włączanie funkcji budzenia Nacisnąć krótko przycisk ALARM w razie potrzeby kilkakrotnie aż na wyświetlaczu obok symbolu budzika pojawi się napis OFF Funkcja budzenia jest wyłączona Po ponownym krótkim naciśnięciu przycisku ALARM na wyświetlaczu ponownie pojawi się obok napis ON i funkcja budzenia zostanie ponownie włączona ...

Page 140: ...ci W razie potrzeby budzik oczyścić z kurzu miękką suchą szmatką lub przetrzeć lekko wilgotną szmatką Usterki i ich usuwanie Urządzenie nie działa Baterie wyczerpane lub włożone nieprawidłowo Dane temperatury wydają się za wysokie Sprawdzić czy czujnik zewnętrzny nie jest narażony na bezpośrednie działanie promieni słonecznych ...

Page 141: ...4 Bateria 2x LR03 AAA 1 5 V Prąd znamionowy 5 3 mA Zakres pomiarowy ok 0 50 C ok 32 122 F Wymiary 141 x 30 x 69 mm Dystrybutor nie adres serwisu Waagen Schmitt GmbH Neuer Höltigbaum 15 22143 Hamburg Niemcy Nasze produkty są stale udoskonalane i ulepszane Z tego powodu zawsze możliwe są zmiany w wyglądzie i zmiany techniczne ...

Page 142: ... i 2011 65 UE Deklaracja traci ważność jeżeli w przedmiocie dokonano zmian które nie zostały z nami uzgodnione Hamburg sierpień 2021 r Waagen Schmitt GmbH Gwarancja Firma Waagen Schmitt GmbH udziela 2 letniej gwarancji od daty zakupu na bezpłatne usuwanie usterek spowodowanych błędami materiałowymi lub produkcyjnymi poprzez naprawę lub wymianę ...

Page 143: ...podając również powód reklamacji Utylizacja Utylizacja opakowania Opakowanie należy utylizować zgodnie z jego rodzajem Tektura i karton powinny trafić do pojemnika na papier folia do pojemnika na surowce wtórne Utylizacja produktu Produkt należy utylizować zgodnie z przepisami obowiązującymi w danym kraju ...

Page 144: ...wiedniej utylizacji Surowce wtórne znajdujące się w urządzeniu zostaną przekazane do recyklingu co zmniejszy zanieczyszczenie środowiska Zużyte urządzenie należy oddać do punktu zbiórki odpadów elektrycznych lub do punktu zbiórki surowców wtórnych Więcej informacji można uzyskać od lokalnego zakładu utylizacji lub administracji gminy ...

Page 145: ...ulatorów nie wolno wyrzucać razem z odpadami domowymi Wszystkie baterie i akumulatory należy oddawać do punktu zbiórki w gminie dzielnicy lub sklepie W ten sposób baterie i akumulatory mogą trafić do ekologicznej utylizacji ...

Page 146: ......

Reviews: