background image

- 1 -

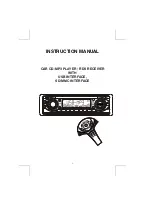
INSTRUCTION MANUAL

CAR CD/MP3 PLAYER / RDS RECEIVER

WITH

USB INTERFACE,

SD/MMC INTERFACE 

H

C

R

A

E

S


3

P

M

VOL

D

U IO

A


A

C N

S

MENU

INT

RPT

RDM

DN

UP

MODE

A

S

DISP

B

D

AN

CS MP 530 IR

USB/MP3 PLAYER

B

AF 

TA 

PTY

Summary of Contents for CS MP 530 IR

Page 1: ...L CAR CD MP3 PLAYER RDS RECEIVER WITH USB INTERFACE SD MMC INTERFACE H C R A E S 3 P M A C N S VOL D U IO A A C N S MENU SM 115MPR 1 INT RPT RDM 2 3 4 5 DN 6 UP MODE A S DISP B D AN CS MP 530 IR USB MP3 PLAYER B AF TA PTY ...

Page 2: ...rs Do not stick paper or tape on the disc P 2 Before playing clean the discs with an optional cleaning cloth Wipe each disc from the centre out P 4 Do not use solvents such as benzine thinner commercially available cleaners or antistatic spray intended for analog discs Do not expose the discs to direct sunlight or heat sources such as hot air ducts or leave them in a car parked in direct sunlight ...

Page 3: ...ght or from hot air from heater or where it would be subject to dust dirt or excessive vibration Be sure to remove the front panel before installing the unit DIN FRONT REAR MOUNT This unit can be property installed either from Front conventional DIN Front mount or Rear DIN Rear mount installation utilizing threaded screw holes at the sides of the unit chassis For details refer to the following ill...

Page 4: ...into the groove in the front of frame and pull out to remove the frame When re attaching the frame point the side with a groove down wards and attach it c Insert the levers supplied with the unit into the grooves at both sides of the unit as shown in figure until they click Pulling the levers makes it possible to remove the unit from the dashboard Trim Plate Installation Removing the unit a b c PA...

Page 5: ...t The rear connector that connects the main unit and the D C P is an extremely important part Be careful not to damage it by pressing on it with fingernails pens screwdrivers etc Note If the D C P is dirty wipe off the dirt with soft dry cloth only And use a cotton swab soaked in isopropyl alcohol to clean the socket on the back of the D C P Socket 1 Turn the Power off 2 Press the Panel Release Bu...

Page 6: ...COLOR FUNCTION LABEL A4 A5 A7 A8 B1 B2 B3 B4 B5 B6 B7 B8 YELLOW BLUE RED BLACK VIOLET VIOLET BLACK GREY GREY BLACK WHITE WHITE BLACK GREEN GREEN BLACK BATTERY POWER ANTENNA IGNITION ACC GROUND RIGHT REAR SPEAKER RIGHT REAR SPEAKER RIGHT FRONT SPEAKER RIGHT FRONT SPEAKER LEFT FRONT SPEAKER LEFT FRONT SPEAKER LEFT REAR SPEAKER LEFT REAR SPEAKER ISO CONNECTOR See Figure 2 FUSE 20 PIN AUDIO POWER HARN...

Page 7: ...constant power supply battery 2 The A 7 pin red of the vehicle s iso connector is connected to the constant power supply battery and the A 4 pin yellow is linked to the ignition then please change the connections of the red yellow wire by using the small connector on these two wires as illustrated below 3 The A 4 pin Yellow of the vehicle s iso is not connected to anything Whicle the A 7 pin is co...

Page 8: ...Y 9 AMS BUTTON MP3 SEARCH BUTTON 10 PRESET MEMORY STATION BUTTONS 11 USB COVER FLIP OPEN TO ACCESS TO USB SOCKET 12 PTY BUTTON 13 TUNING SEEK UP DOWN TRACK UP DOWN BUTTONS 14 PANEL OPEN BUTTON 15 BAND BUTTON 16 SCAN BUTTON 17 MODE BUTTON 18 REMOTE SENSOR 8 H C R A E S 3 P M A C N S VOL D U IO A A C N S MENU SM 115MPR 1 INT RPT RDM 2 3 4 5 DN 6 UP MODE A S DISP B D AN CS MP 530 IR USB MP3 PLAYER B ...

Page 9: ...CD DISPLAY 9 9 ALBUM Album title indication 10 Preset radio station indication 1 to 6 1 STEREO Radio stereo indication 2 TP RDS Traffic programme indication 3 AF RDS Alternative frequency indication 4 TA RDS Traffic announcement indication 5 PTY RDS Programme type indication 6 MP3 MP3 disc playing indication 7 ARTIST Artist name indication 8 MUSIC Music song title indication ...

Page 10: ...ds TA SEEK The radio retunes to a different station which contains TP information TA ALARM The radio does not retune but beeps will come out MASK PI MASK ALL PI is referred to Different PI with same AF During AF search PI stations and non RDS stations with strong signal will be masked in the latter case the non RDS stations may cause interference resulting the real AF to be masked due to the misju...

Page 11: ... MODE BUTTON Press this button to select different mode sequence as follow BEEP MODE BEEP ON OFF BEEP OFF disable audible beep tone when any function is accessed BEEP ON enable audible beep tone MODE PRIORITY A Tuner mode Radio B CDP MP3 only if a CD or MP3 disc is inserted C USB only if a USB drive is inserted D SD MMC Only if a SD or MMC card is inserted Whenever a USB or SD MMC is being inserte...

Page 12: ... when temperatures increase to a normal range 10 STATION PRESET BUTTONS M1 M6 You can store recall six preset radio stations by pressing M1 M6 buttons TO STORE A STATION 1 select a band if needed 2 select a station by tuning up down button 3 hold a preset button which you want store the station for at least 2 seconds The preset number will appear on the display accompanied by a beeps sound TO RECA...

Page 13: ...d when AF switching or PI SEEK is implemented Some broadcasting stations may change their program from normal broadcasting to regional broadcasting for a certain period When regional mode is off the region identification in the PI code is ignored the radio may switch to a local variant of the current program When region mode is on the radio will only switch to a program carrying the exact same PI ...

Page 14: ...e this button is located behind the front panel fold down the panel before accessing this button Under normal play mode press the Track Up Button for less than 1 second to skip the playback to the next track or press the Track Down Button for less than 0 5 seconds to return to the beginning of the current track press this button one more time to skip to the previous track When any of these buttons...

Page 15: ...are in any mode 6 Please refer to section 7 CD operation section 11 MP3 operation on how to use possible function for USB files playback All the USB files playback function is same as normal CD or MP3 disc playback 7 Always close the USB plastic cover after unplugged the USB drive device in order to keep the USB socket in good condition P 3 1 2 P 1 P 2 PLAY PRIORITY Does not matter the unit is in ...

Page 16: ... force used will cause permanent serious damage to the unit the USB drive device P 6 4 Please never try to plug in any USB drive device with excessive weight or excessive size into the unit Please always use USB drive device with reasonable weight size which will not overload the unit which will not make performing normal operation on the front panel impossible Excessive weight or size USB drive d...

Page 17: ...n to choose SD MMC mode only if SD or MMC is inserted in the unit or any other modes when they are in any mode 8 Please refer to section 7 CD operation section 11 MP3 operation on how to use possible function for SD MMC files playback All the SD MMC files playback function is same as normal CD or MP3 disc playback PLAY PRIORITY Does not matter the unit is in what mode TUNER CD USB etc once a SD or...

Page 18: ...ess the Enter Button long to start playing the first track under selected folder or press the Enter Button short less than 1 seconds to display the tracks or folders under this folder Repeat this procedure to navigate through the folders up to 8 levels deep During folder search not only folders are shown but also the tracks but they can be easily identified because they have their own icon display...

Page 19: ...ame press Enter button more than 1 second to start the search If no such song NOT FND will be shown 4 Searching by character ID3 TAG Press BAND button repeatedly to Display ID3 TAG information If the MP3 file is available with ID3 TAG pressing the BAND button repeatedly will show information in the following sequence FILE NAME FOLDER NAME SONG TITLE ARTIST ALBUM TITLE If any of the ID3 TAG informa...

Page 20: ...the unit CD mechanism 4 Press this button to pause disc playback Press this button again to resume disc Playback 5 BAND Press this button to change the radio band 6 DISP 7 AUDIO A 8 9 10 11 Press this button to increase the volume Press this button to decrease the volume Short press this button to change the display mode Short press this button to enter into the Audio menu long press this button t...

Page 21: ... without notice System Usable disc Sampling frequency No of quantization bits Frequency Number of channels S N Ratio Compact disc audio system Compact disc 44 1KHz 1bit 5 20 000Hz 2 stereo 70dB Frequency Range Intermediate Frequency Usable Sensitivity Stereo Separation S N Ratio 87 5 108 Mhz 10 7 MHz Better than 15dB at S N 30 dB 25 dB at 1KHz 50 dB RADIO SECTION FM 21 ...

Page 22: ...ing connection The operation keys do not work No sound The built in microcomputer is not operating properly due to noise Press the RESET button Front panel is not properly fixed into its place Sound skips The installation angle is more than 30 degrees Adjust the installation angle to less 30 degrees The disc is extremely dirt or defective disc Clean the compact disc Then try to play a new one The ...

Reviews: