background image

User manual
Manuel d’utilisation
Benutzerhandbuch
Manuale d’uso
Használati utasítás
Instrukcja obsługi

Manual de usuario disponible en:

Gebruikershandleiding beschikbaar op:

Manual do usuário disponível em:

Руководство пользователя доступно по адресу:

Uživatelská příručka k dispozici na adrese:

www.gtcompany.fr/en/customer-support/

Dash Cam

KM600

Summary of Contents for Realimove KM600

Page 1: ...lati utasítás Instrukcja obsługi Manual de usuario disponible en Gebruikershandleiding beschikbaar op Manual do usuário disponível em Руководство пользователя доступно по адресу Uživatelská příručka k dispozici na adrese www gtcompany fr en customer support Dash Cam KM600 ...

Page 2: ...Microphone Records sound 7 RESET button Press and hold this button using a paper clip or pin to reset your camera 8 Up button Press to scroll up while in a settings menu 9 OK button Press to start stop recording or snap a photo press to confirm menu selection or changes 10 Down button Press to scroll down while in a settings menu 11 Power button Short Press to turn on Press and hold to power off W...

Page 3: ...new or a formatted card Formatting permanently deletes all data on the memory card so be sure to copy the data you want to keep to another storage device before formatting To remove a Micro SD card from the memory card slot push the edge of the card until it pops out Mounting the Dashcam to a Windshield Attach the dashcam to your vehicle s windshield with the included suction cup mount 1 Slide the...

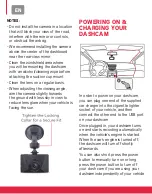
Page 4: ...ound with less sky in view to reduce lens glare when your vehicle is facing the sun Powering On Charging Your Dashcam In order to power on your dashcam you can plug one end of the supplied car charger into the cigarette lighter socket of your vehicle and then connect the other end to the USB port on your dashcam Once plugged in your dashcam turns on and starts recording automatically when the vehi...

Page 5: ...cess the mode of your choice Once you ve reached the mode of your choosing you can press the Power button to open the setting menu of that specific mode For a quick description of each of the modes see below Video Capture Mode This icon appears on your dashcam s display screen when you are in video capture mode Use this mode to capture videos Photo Capture Mode This icon appears on your dashcam s ...

Page 6: ...f your dashcam does not automatically start recording when your vehicle s engine is started or if you are operating your dashcam independently of your automobile you can press the OK button to start recording video The icon on the display screen will have a flashing red dot appear next to it to indicate that video recording is in process To stop recording press the OK button again The red dot will...

Page 7: ...ess the Up and Down buttons to scroll through the various settings options Press the OK button to confirm any settings options that you have selected and press the Power button again to exit the menu Playback Mode If your dashcam is powered on and not recording video then you can view the photos or videos that you have already taken by entering playback mode To enter playback mode press the Mode b...

Page 8: ...m features Loop recording Stores video recordings of 1 2 or 5 minutes in the SD card When the SD card is full the latest video overwrites the earliest video Motion detection With the motion detection function on the dashcam automatically starts recording when it detects something move in front of it If there is no movement for a while the dash cam stops recording automatically G Sensor When the gr...

Page 9: ... 2 0 inch LCD Video Format AVI Video resolution 1080P 1920 x 1080 720P 1280 x 720 or VGA 640 x 480 Image Format JPG Photo resolution 12M 8M 5M 3M 2M 1M VGA G SENSOR Yes Micro SD card up to 32GB Lens f 3 0mm F2 0 Microphone Yes ...

Page 10: ...sur ce bouton et maintenez le enfoncé à l aide d un trombone ou d une épingle pour réinitialiser l appareil 8 Bouton haut Appuyez pour faire défiler vers le haut dans un menu de paramètres 9 Bouton OK Appuyez pour démarrer arrêter l enregistrement ou prendre une photo appuyez pour confirmer la sélection ou les modifications 10 Bouton bas Appuyez pour faire défiler vers le bas dans un menu de param...

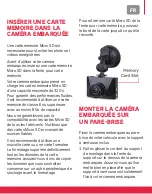
Page 11: ... cartes Micro SD provenant de sources fiables Il est recommandé d utiliser une nouvelle carte ou une carte formatée Le formatage supprime définitivement toutes les données de la carte mémoire assurez vous donc de copier les données que vous souhaitez conserver sur un autre périphérique de stockage avant le formatage Pour retirer une carte Micro SD de la fente pour carte mémoire poussez le bord de ...

Page 12: ... du tableau de bord près du rétroviseur Nettoyez la zone du pare brise où vous installez la caméra embarquée avec une lingette alcoolisée nettoyante avant de fixer le support à ventouse Nettoyez la lentille régulièrement Lors du réglage de l angle de vue dirigez légèrement la caméra vers le sol pour réduire l éblouissement de l objectif lorsque votre véhicule est face au soleil ALLUMER ET CHARGER ...

Page 13: ...ge s éteint lorsque la batterie est complètement chargée La charge prend généralement environ 90 minutes selon le niveau de décharge de la batterie L icône d état de la batterie vous indiquera le niveau de batterie EXPLORER LES DIFFERENTS MODES DE LA CAMÉRA EMBARQUÉE Votre caméra embarquée dispose de trois modes distincts Pour basculer entre les différents modes appuyez sur le bouton Mode à plusie...

Page 14: ...egistrement de contenu vidéo Une fois que votre caméra embarquée est en mode de capture vidéo et qu une carte Micro SD est insérée dans la fente pour carte mémoire vous pouvez commencer à enregistrer du contenu vidéo Lorsque votre caméra embarquée est connectée au chargeur de voiture inclus et que le moteur de votre véhicule est démarré votre caméra embarquée commence à enregistrer du contenu vidé...

Page 15: ...éo vous pouvez prendre des photos en entrant en mode de capture photo Pour entrer en mode de capture photo appuyez sur le bouton Mode à plusieurs reprises jusqu à ce que l icône apparaisse dans le coin supérieur gauche de l écran Appuyez sur le bouton OK pour prendre une photo Accéder au menu des paramètres du mode de capture photo Pour ajuster la façon dont votre caméra embarquée prend des photos...

Page 16: ...les paramètres que vous avez sélectionnées puis appuyez à nouveau sur le bouton d alimentation pour quitter le menu Paramètres du mode de lecture Paramètre Description Verrouiller Vous permet de verrouiller ou de déverrouiller la photo vidéo affichée ou de verrouiller ou déverrouiller tous les fichiers Les fichiers verrouillés ne peuvent être supprimés que s ils sont déverrouillés Supprimer Vous p...

Page 17: ...ollision est détectée la caméra embarquée protège automatiquement la dernière vidéo pour éviter qu elle ne soit écrasée par l enregistrement en boucle Mode Parking Surveillance Parking En mode parking l appareil s allume automatiquement et démarre l enregistrement lorsqu une collision ou un impact est détecté Protection de fichier Les fichiers protégés ne peuvent pas être supprimés de l appareil p...

Page 18: ...N Drücken und halten Sie diese Taste mit einer Büroklammer oder einer Stecknadel um die Kamera zurückzusetzen 8 Aufwärtstaste Drücken um in einem Einstellungsmenü nach oben zu blättern 9 OK Taste Drücken um die Aufnahme zu starten stoppen oder ein Foto zu machen Drücken um die Menüauswahl oder Änderungen zu bestätigen 10 Abwärtstaste Drücken um in einem Einstellungsmenü nach unten zu blättern 11 E...

Page 19: ...von zuverlässigen Anbietern Es wird empfohlen eine neue oder eine formatierte Karte zu verwenden Beim Formatieren werden alle Daten auf der Speicherkarte dauerhaft gelöscht Kopieren Sie daher die Daten die Sie behalten möchten vor dem Formatieren auf ein anderes Speichermedium Um eine Mikro SD Karte aus dem Speicherkartensteckplatz zu entfernen drücken Sie auf den Rand der Karte bis sie herausspri...

Page 20: ...maturenbretts in der Nähe des Rückspiegels anzubringen Reinigen Sie den Bereich der Windschutzscheibe an dem Sie die Dashcam befestigen werden mit einem Alkohol Reinigungstuch bevor Sie die Saugnapfhalterung anbringen Reinigen Sie die Linse regelmäßig Richten Sie die Kamera beim Einstellen des Betrachtungswinkels leicht in Richtung Boden aus so dass weniger Himmel zu sehen ist um eine Blendung der...

Page 21: ...haltet sich aus wenn der Akku vollständig aufgeladen ist Der Ladevorgang dauert in der Regel ca 90 Minuten je nachdem wie leer der Akku ist Das Akkustatussymbol zeigt Ihnen an wie nah der Akku an der vollständigen Ladung ist ERKUNDEN DER VERSCHIEDENEN MODI IHRER DASHCAM Ihre Dashcam verfügt über drei separate Modi Um zwischen den Modi zu wechseln drücken Sie wiederholt die Modus Taste bis Sie den ...

Page 22: ...n Sobald sich Ihre Dashcam im Video Aufnahmemodus befindet und eine Mikro SD Karte in den Speicherkartensteckplatz eingesetzt ist können Sie mit der Aufnahme beginnen Wenn Ihre Dashcam an das mitgelieferte Kfz Ladegerät angeschlossen ist und der Motor Ihres Fahrzeugs gestartet wird beginnt Ihre Dashcam mit der Videoaufzeichnung Neben dem Videokamera Symbol auf dem Display erscheint ein blinkender ...

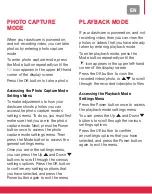
Page 23: ...as Menü zu verlassen FOTO AUFNAHMEMODUS Wenn Ihre Dashcam eingeschaltet ist und keine Videos aufnimmt können Sie Fotos aufnehmen indem Sie den Foto Aufnahmemodus aufrufen Um den Foto Aufnahmemodus aufzurufen drücken Sie wiederholt die Modustaste bis das Kamerasymbol in der oberen linken Ecke des Displays erscheint Drücken Sie die OK Taste um ein Foto aufzunehmen Zugriff auf das Einstellungsmenü de...

Page 24: ...odus aufzurufen Sie können die Aufwärts und Abwärts Tasten drücken um durch die verschiedenen Einstellungsoptionen zu blättern Drücken Sie die OK Taste um die ausgewählten Einstellungsoptionen zu bestätigen und drücken Sie erneut die Einschalttaste um das Menü zu verlassen Einstellungen des wiedergabemodus Sperren Beschreibung Sperren Ermöglicht das Sperren oder Entsperren des aktuell angezeigten ...

Page 25: ...geschaltet ist und eine Kollision erkannt wird schützt die Dashcam automatisch das letzte Video um zu verhindern dass es von der Loop Aufnahme überschrieben wird Einparkmodus Im Einparkmodus schaltet sich das Gerät automatisch ein und beginnt mit der Aufzeichnung wenn eine Kollision oder ein Aufprall erkannt wird Dateischutz Geschützte Dateien können nicht auf der Kamera gelöscht werden Sie können...

Page 26: ... tű segítségével és tartsa lenyomva a kamera visszaállításához 8 Fel gomb Ezzel a gombbal görgethet felfelé a beállítások menüben 9 OK gomb Nyomja meg a felvétel megkezdéséhez leállításához vagy egy fénykép elkészítéséhez továbbá egy menüpont kiválasztásának vagy módosításainak megerősítéséhez 10 Le gomb Ezzel a gombbal görgethet lefelé a beállítások menüben 11 Bekapcsológomb Röviden megnyomva bek...

Page 27: ...formázott kártyát használjon A formázás véglegesen törli a memóriakártyán lévő összes adatot ezért formázás előtt mindenképpen másolja át a tárolni kívánt adatokat egy másik tárolóeszközre A micro SD kártya memóriakártya nyílásból történő kivételéhez nyomja be a kártya szélét amely ennek hatására kiugrik a nyílásból A FEDÉLZETI KAMERA FELSZERELÉSE A SZÉLVÉDŐRE Rögzítse a kamerát a jármű szélvédőjé...

Page 28: ...merát kissé a talaj felé hogy csökkentse a lencse tükröződését amikor a járműve a nappal szemben halad A KAMERA BEKAPCSOLÁSA ÉS FELTÖLTÉSE A fedélzeti kamera bekapcsolásához csatlakoztassa a mellékelt autós töltő egyik végét a jármű szivargyújtó aljzatához a másikat pedig a fedélzeti kamera USB portjához A csatlakozás után a fedélzeti kamera bekapcsol és automatikusan elindítja a felvételt amikor ...

Page 29: ... többször a mode üzemmód gombot addig amíg el nem éri a kívánt üzemmódot A kívánt üzemmód elérésekor nyomja meg a bekapcsológombot az adott üzemmód beállítási menüjének megnyitásához Alább elolvashatja az egyes üzemmódok rövid leírását Videórögzítés Ez az ikon jelenik meg a kijelzőn amikor a készülék videórögzítés üzemmódban van Ebben az üzemmódban rögzíthet videófelvételeket Fényképezés Ez az iko...

Page 30: ...vételt a jármű motorjának beindulásával egy időben vagy Ön a kamerát az autótól függetlenül kívánja használni akkor a videó rögzítésének megkezdéséhez nyomja meg az OK gombot Ekkor a kijelzőn látható videókamera ikon mellett villogó piros pont jelenik meg amely jelzi hogy a videó rögzítése folyamatban van A felvétel leállításához nyomja meg újra az OK gombot Ekkor a piros pont eltűnik jelezve hogy...

Page 31: ... le gombokkal lépkedhet a különböző beállítási lehetőségek között A kiválasztott beállítás megerősítéséhez nyomja meg az OK gombot A menüből való kilépéshez nyomja meg újra a bekapcsológombot LEJÁTSZÁS Amikor a készülék be van kapcsolva és nem rögzít videót a lejátszás üzemmódban megtekintheti az elkészített fényképeket vagy videókat A lejátszás üzemmódba lépéshez nyomja meg többször a mode gombot...

Page 32: ...ban A FEDÉLZETI KAMERA FUNKCIÓI Folytonos felvétel Az SD kártyán 1 2 vagy 5 perces videofelvételeket tárolhat Amikor az SD kártya megtelt a legújabb videó felülírja a legkorábbi videót Mozgásérzékelés Ha a mozgásérzékelési funkció be van kapcsolva a fedélzeti kamera automatikusan megkezdi a felvételt amikor mozgást érzékel maga előtt Ha egy ideig nincs mozgás a fedélzeti kamera automatikusan leáll...

Page 33: ...ch LCD Videóformá tum AVI Videófelbon tás 1080P 1920 x 1080 720P 1280 x 720 or VGA 640 x 480 Képformátum JPG Fényképfel bontás 12M 8M 5M 3M 2M 1M VGA G ÉRZÉKELŐ Igen Micro SD kártya Legfeljebb 32 GB Lencse f 3 0mm F2 0 Mikrofon Igen ...

Page 34: ...ESET Wciśnięcie i przytrzymanie tego przycisku przy pomocy spinacza biurowego lub szpilki resetuje kamerę 8 Przycisk Góra Naciśnięcie powoduje przewinięcie w górę w menu ustawień 9 Przycisk OK Naciśnięcie rozpoczyna zatrzymuje nagrywanie lub robi zdjęcie naciśnięcie potwierdza wybór menu lub zmianę 10 Przycisk Dół Naciśnięcie powoduje przewinięcie w dół w menu ustawień 11 Przycisk zasilania Krótki...

Page 35: ...anej Formatowanie powoduje trwałe skasowanie z karty pamięci wszystkich danych dlatego przed sformatowaniem skopiuj dane które chcesz zachować na inne urządzenie pamięci masowej Aby wyjąć kartę Micro SD z gniazda karty pamięci naciśnij krawędź karty aż karta wyjdzie z gniazda MONTAŻ WIDEOREJESTRATORA NA PRZEDNIEJ SZYBIE Zamocuj wideorejestrator na przedniej szybie pojazdu za pomocą dołączonego uch...

Page 36: ...ejszyć powierzchnię nieba w kadrze i tym samym zredukować odblaski światła w obiektywie gdy pojazd będzie skierowany pod słońce WŁĄCZANIE ZASILANIA I ŁADOWANIE WIDEOREJESTRATORA Aby włączyć zasilanie wideorejestratora można podłączyć jeden koniec przewodu dołączonej ładowarki samochodowej do gniazda zapalniczki w pojeździe a następnie podłączyć drugi koniec przewodu do portu USB w wideorejestrator...

Page 37: ... pomiędzy trybami należy wielokrotnie naciskać przycisk Tryb aż uzyska się dostęp do wybranego trybu Po odnalezieniu wybranego trybu można nacisnąć przycisk zasilania aby otworzyć menu ustawień dla tego konkretnego trybu Krótki opis każdego z trybów znajduje się poniżej Tryb rejestrowania wideo Ikonka ta pojawia się na wyświetlaczu wideorejestratora gdy wybrany jest tryb rejestrowania wideo Tryb t...

Page 38: ...na ekranie pojawi się migająca czerwona kropka oznaczająca że trwa nagrywanie wideo Nagranie wideo zatrzyma się automatycznie zaraz po wyłączeniu silnika pojazdu Jeśli wideorejestrator nie rozpocznie automatycznego nagrywania po uruchomieniu silnika lub jeśli będziesz używać wideorejestratora poza samochodem możesz nacisnąć przycisk OK aby rozpocząć nagrywanie wideo Obok ikonki kamery wideo na ekr...

Page 39: ...celu najpierw upewnij się że urządzenie znajduje się w trybie robienia zdjęć Naciśnij jednokrotnie przycisk zasilania aby wejść w menu ustawień trybu robienia zdjęć Następnie naciśnij przycisk Tryb aby wejść w menu ustawień ogólnych Po wejściu w menu ustawień możesz naciskać przyciski Góra i Dół aby przewijać poszczególne opcje ustawień Naciśnij przycisk OK aby potwierdzić wybrane przez siebie opc...

Page 40: ...łu wideo lub usunięcie wszystkich plików MENU USTAWIEŃ OGÓLNYCH Gdy wideorejestrator jest włączony i nie nagrywa wideo możesz wejść w menu ustawień ogólnych z poziomu dowolnego trybu W tym celu naciśnij jednokrotnie przycisk zasilania Następnie naciśnij przycisk Tryb aby wejść w menu ustawień ogólnych Po wejściu w menu ustawień ogólnych w lewym górnym rogu ekranu pojawi się ikonka narzędzi FUNKCJE...

Page 41: ...atycznie włączy się i rozpocznie rejestrowanie po wykryciu kolizji lub uderzenia Zabezpieczenie plików Zabezpieczonych plików nie można skasować w kamerze ale można je skasować ręcznie na komputerze lub poprzez sformatowanie karty PARAMETRY Ekran 2 0 cale LCD Format wideo AVI Rozdzielczość wideo 1080P 1920 x 1080 720P 1280 x 720 or VGA 640 x 480 Format obrazu JPG Rozdzielczość zdjęć 12M 8M 5M 3M 2...

Page 42: ...etta o uno spillo per ripristinare la videocamera alle impostazioni di fabbrica 8 Pulsante Su Premere per scorrere verso l alto mentre ci si trova in un menu impostazioni 9 Pulsante OK Premere per avviare interrompere la registrazione o per scattare una foto premere per confermare la selezione del menu o le modifiche 10 Pulsante Giù Premere per scorrere verso il basso mentre ci si trova in un menu...

Page 43: ...ermanente tutti i dati presenti sulla scheda di memoria quindi assicurarsi di copiare i dati che si desidera conservare su un altro dispositivo di memorizzazione prima di formattare Per rimuovere una scheda Micro SD dall alloggiamento della scheda di memoria spingere il bordo della scheda finché non fuoriesce INSTALLAZIONE DELLA DASHCAM SU UN PARABREZZA Fissare la dashcam al parabrezza del proprio...

Page 44: ...o in modo che inquadri una minore porzione di cielo così da ridurre l abbagliamento dell obiettivo quando il veicolo è rivolto verso il sole ACCENSIONE E RICARICA DELLA DASHCAM Per alimentare la dashcam è possibile collegare un estremità del caricatore per auto in dotazione alla presa dell accendisigari del veicolo e quindi collegare l altra estremità alla porta USB della dashcam Una volta collega...

Page 45: ...o a quando non si accede alla modalità desiderata Una volta raggiunta la modalità desiderata premere il pulsante di accensione per aprire il menu delle impostazioni di quella specifica modalità Qui sotto si trova una rapida descrizione di ciascuna delle modalità Modalità di acquisizione video Questa icona appare sul display della dashcam quando ci si trova in modalità di acquisizione video Utilizz...

Page 46: ...inizierà a registrare video L icona della videocamera sullo schermo presenterà un punto rosso lampeggiante accanto per indicare che la registrazione del video è in corso La registrazione video si interromperà automaticamente poco dopo lo spegnimento del motore del veicolo Se la dashcam non inizia automaticamente la registrazione all avvio del motore del veicolo o se si sta utilizzando la dashcam i...

Page 47: ...lità finché l icona della fotocamera non viene visualizzata nell angolo superiore sinistro dello schermo Premere il pulsante OK per scattare una foto Accesso al menu delle impostazioni della modalità di acquisizione foto Per apportare modifiche al modo in cui la dashcam scatta le foto è possibile accedere al menu delle impostazioni della modalità di acquisizione foto Per fare ciò bisogna prima ass...

Page 48: ...zione Premere il pulsante OK per confermare le opzioni di impostazione selezionate e premere nuovamente il pulsante di accensione per uscire dal menu Impostazioni della modalità di riproduzione Imposta zione Descrizione Blocca Consente di bloccare o sbloccare la foto video attualmente visualizzato o di bloccare o sbloccare tutti i file I file bloccati non possono essere eliminati a meno che non ve...

Page 49: ...vata una collisione la dashcam protegge automaticamente l ultimo video per evitare che venga sovrascritto dalla registrazione in loop Modalità parcheggio In modalità parcheggio il dispositivo si accenderà automaticamente e inizierà a registrare ove venga rilevata una collisione o un impatto Protezione dei file I file protetti non possono essere cancellati sulla videocamera ma possono essere elimin...

Page 50: ...iated harmonised European standards Disposal of waste equipment by users in the European Union this symbol means that according to local laws and regulations it is prohibited to dispose of this product with household waste Instead it is your responsibility to protect the environment and human health by handing over your used device to a designated collection point for the recycling of waste electr...

Page 51: ...port and warranty information contact the distributor or manufacturer Product manufactured for and distributed by GT COMPANY 5 rue de la Galmy 77700 Chessy France 33 0 1 61 10 09 25 www gtcompany fr After sales service service après vente Kundendienst servicio postventa servizio post vendita serviço pós venda dienst na verkoop serwis posprzedażowy értékesítés utáni szolgáltatás poprodejní servis п...

Page 52: ......

Reviews: